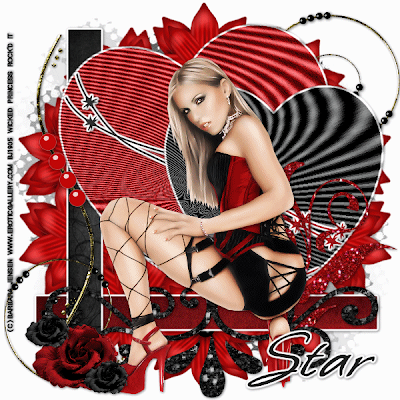

Red Hawt PTU (Animated)
This tutorial was written on August 3, 2009 by Shani aka Wicked Princess. The concept of the tag is mine and mine alone. Any resemblance to any other tag/tut is pure coincidence. This was written for those with working knowledge of PSP.
Supplies Needed:
++Paint Shop Pro ( I used 10 but any version should work)
++Animation Shop 3
++Scrap kit by Stargazer Musings called Love or Lust can be purchased HERE
++Template 19 by Bev at Horseplays Pastures can be found HERE
++Tube of choice or the one I used. I used the artwork of Barbara Jensen and you can purchase it
HERE
++Plug ins:
-Eye Candy 4000 Gradient Glow
-Muera Meister Copies
-Xero, Radiance
-Tramages, Moving Screen
++Font and mask of choice
**NOTES:
-Add Drop shadow of choice as you go
-You can merger layers as you want to make things easier for yourself.
Open the template in PSP, using your shortcut keys on your keyboard (SHIFT+D) duplicate the template as a new image. Close the original.
Open several papers of choice, resizing as needed. For example, when I look at the blue bar where it tells me what I’ve opened (say like paper 2) it tells me what percentage I’m viewing it at. For me it’s usually 16%, so I resize to 16% bringing it to 100%. ( I hope that made sense!) Once you’ve done this, minimize for later use.
Next go to the bottom template layer and go to selections, select all, then float, selections defloat. Don’t forget to go to selections, none then delete the template layer. Add a fat gradient glow in white. Repeat this process for the rest of the template
Add a new raster layer and flood fill with your choice of paper. Add your mask layer and merge group. I chose to duplicate the mask layer then flipped and mirrored it.
Open a flower of your choice, copy and paste as a new layer in the center of the canvas. Use your plug in Muera Meister Copies on the encircle option. Use 65 for shift x and y and set to your choice of number of flowers. Move this layer to above the mask layers.
Next open the doodle of your choice, copy and paste it as a new layer and move to the upper right hand portion of the canvas. Move this to the bottom above the flower layer. Duplicate it then go to image, mirror then image flip.
Open the glitter flower doodle of your choice, resize it. Copy and paste as a new layer and move it towards the bottom of the template.
Next open the glitter scroll doodle of choice. Resize then copy and paste as a new layer and center in the bottom of the tag.
Add your tube, use your plug in xero, radiance on whatever setting you like. I just used a random one.
Open a pearl doodle you like and copy and paste as a new layer, moving to the left of the tag.
Add three roses you like, resized towards the bottom left hand corner of the tag.
Add your text, copyrights, license info and tagger markings. Save as a psp image if you wish to go on to do the animation. If not save as a jpeg or png.
ANIMATION
Open Animation shop and minimize it, we’ll go to in just a minute.
Back in PSP duplicate each of your hearts twice so that you have three hearts each.
Go to the bottom red heart layer and use your Tramages, Moving Screen plug in. I used the default setting and click ok. Add this plug in to the next one up, and change the frequency a bit higher. Do the same thing for the third heart layer.
Next go to the bottom black heart layer and do the same series of things with the plug in.
Now close off the top two heart layers on both the black and red. Go to edit, copy merged. Maximize Animation Shop and right click. Click on paste as new animation.
Back in PSP, close off the bottom hearts, and open the middle ones. Edict, copy merged, and back over to animation shop. Go to edit, paste after current frame.
Repeat this step for the final hearts.
Click on the little film strip at the top and animate it. If your satisfied, save it as a gif and your done!
Thank you for trying my tutorial!

No comments:
Post a Comment