Wednesday, March 31, 2010
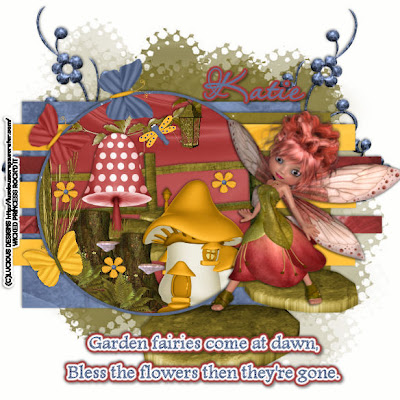
Fairy Blessings PTU
This tutorial was written on March 31, 2010 Shani aka Wicked Princess. The concept of the tag is mine and mine alone. Any resemblance to any other tag/tut is pure coincidence. This was written for those with working knowledge of PSP.
Supplies Needed:
++Paint Shop Pro ( I used 10 but any version should work)
++Scrap kit by called Wings of Spring by Crazed’s Creations can be found HERE
++ Template 153 by Designs by Ali can be found HERE
++Tube of choice or the one I used. I used the work of Luscious scraps, as it was included in the kit. Her URL is the TOU for the kit.
++Font and mask of choice
**NOTES:
-Add Drop shadow of choice as you go
-You can merger layers as you want to make things easier for yourself.
Open the template in PSP, using your shortcut keys on your keyboard (SHIFT+D) duplicate the template as a new image. Close the original.
Open several papers of choice, resizing as needed. For example, when I look at the blue bar where it tells me what I’ve opened (say like paper 2) it tells me what percentage I’m viewing it at. For me it’s usually 16%, so I resize to 16% bringing it to 100%. ( I hope that made sense!) Once you’ve done this, minimize for later use.
Next go to the bottom template layer and go to selections, select all, then float, selections defloat. Don’t forget to go to selections, none then delete the template layer. Repeat this process for the rest of the template.
Now add a new layer, move it to the bottom of the layers palette. Flood fill with your choice of paper and add the mask of your choosing. Merge the group.
Open the flower doodle you like, resize it then copy and paste as a new layer. Move it to just above the mask layer. Duplicate it and go to image, mirror.
Then open the leaf branch, resize it then copy and paste as a new layer towards the top of the circle layer. But make sure it’s below the frame. Erase the parts you don’t want seen outside of the frame.
Now open the lantern, resize it then copy and paste as a new layer. Again, were working under the circle frame. Erase the parts you don’t want seen outside the frame.
Next open the fence, resize it then copy and paste as a new layer. Move it towards the bottom of the circle frame. Erase the parts you don’t want seen outside of the frame.
Open the tree mushroom with the dots, resize it then copy and paste as a new layer. Move to the left and center of the frame, above the fence. Center it as you like.
Now open the tree trunk, resize it then copy and paste as a new layer. Move it to the bottom left of the circle frame. Duplicate it and move to just below the first one. Erase the parts you don’t want seen outside the frame. Add the grass behind the tree trunks. Erase the parts you don’t want seen outside the frame.
Then open the mushroom house you like, resize then copy and paste as a new layer. Move to the bottom right of the circle frame. Erase the parts that you don’t want seen outside of the frame.
Open the cobble stone path. Resize it then copy and paste as a new layer. Move it to the bottom of the layer pallet, below the circle background layer. You want to make it look like its coming out from behind the scene we just made.
Then open your tube of choice, in my case I used the tube from the kit. Resize it then copy and paste as a new layer, to the right of the circle frame. Adjust it on the stone to make it look like its sitting on it.
Next open three of the butterflies you like. Resize then copy and paste as a new layer on the left side of the circle frame, arranging them so they look like they are going up the friend.
Add a dragonfly where you like it and a flower several times through the scene.
Finally add your text, copyrights, license number if needed and tagger markings
Save and your done!
Thanks for trying my tutorial!
Tuesday, March 30, 2010
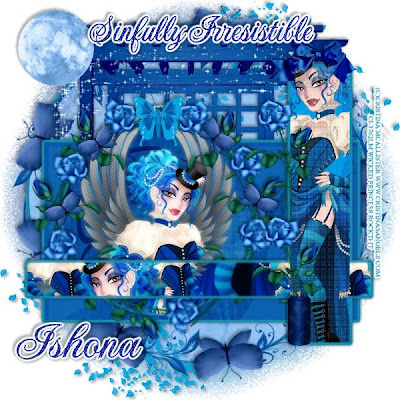
Sinfully Irresistable PTU
This tutorial was written on March 27, 2010 Shani aka Wicked Princess. The concept of the tag is mine and mine alone. Any resemblance to any other tag/tut is pure coincidence. This was written for those with working knowledge of PSP.
Supplies Needed:
++Paint Shop Pro ( I used 10 but any version should work)
++Scrap kit by called Venus by Athena Designs can be purchased HERE
++Valentine Template 184 by Missy can be found HERE
++Tube of choice or the one I used. I used the work of Cristina Mcallister and you can purchase her work from HERE
++Font and mask of choice
++Plug ins-
-Eye candy 4000 Gradient Glow
-Penta.com Jeans
-Penta.com dots and cross
-Muera Meister copies
**NOTES:
-Add Drop shadow of choice as you go
-You can merger layers as you want to make things easier for yourself.
Open the template in PSP, using your shortcut keys on your keyboard (SHIFT+D) duplicate the template as a new image. Close the original.
Open several papers of choice, resizing as needed. For example, when I look at the blue bar where it tells me what I’ve opened (say like paper 2) it tells me what percentage I’m viewing it at. For me it’s usually 16%, so I resize to 16% bringing it to 100%. ( I hope that made sense!) Once you’ve done this, minimize for later use.
Next go to the bottom template layer and go to selections, select all, then float, selections defloat. Don’t forget to go to selections, none then delete the template layer. Repeat this process for the rest of the template.
Now add a new layer, move it to the bottom of the layers palette. Flood fill with your choice of paper and add the mask of your choosing. Merge the group.
Then using your preset shapes, set on circle we’re going to draw out a fairly large circle. First pick the paper you like, and make sure its set in the foreground and background on your color palette. Now draw out the circle, make it large, you can downsize if you need to. Convert to a raster layer, and move to just above your mask layer. Go to edit, cut and then edit paste as new layer. The reason for this is to center it into the canvas. Delete the extra layer.
Open the splatter that looks like blue petals. Resize then copy and paste as a new layer. Move it to the upper right side of the canvas. Duplicate it and go to image, mirror and then image, flip.
Next open the blue leaf circle frame. Resize as needed, copy and paste as a new layer above the circle layer. Move and adjust it so that it looks like the frame is framing the circle. You may need to resize the circle a little.
Now open the butterfly of your choosing, resize it then copy and paste as a new layer. Using your plug in, muera meister copies, set it on the encircle option and I believe I set X and Y to 65. Choose the number of butterflies. Click ok and now adjust the butterfly circle over the circle frame. Adjust as needed.
Then open the garden arch/trellis thingy lol. Resize it then copy and paste as a new layer. You want to make sure that it’s mostly towards the top of the canvas. Keep in mind, we’re still building from the mask up. These are all below the template layer.
Open the constellation glitter. Resize then copy and paste over the trellis at the top of the template layer and adjust as you need to.
Next open the moon of your choosing, resize then copy and paste in the upper left corner of the canvas.
Now open your tube of choice, crop it, then copy and paste as a new layer. Move it above the circle template layer. Center the tube in the circle. On the circle layer, go to selections, select all then selections float, then selections, defloat. Then go to selections, invert. On your tube layer, hit the delete key. Go to selections none. On the tube layer, duplicate it. Go to adjust, blur, guassian blur. Set it at 3 and hit ok. On the blur layer, we’re going to change the blend mode. Go to your layer’s palette and change the blend to overlay. Merge down. Using your plug in penta, jeans set it at the setting you personally like. Hit ok.
Still working around the circle layer here. Open the rose you like, resize it then copy and paste as a new layer. Move it an angle somewhere around the circle. This way it looks like its framing the circle. Duplicate it several times, and move it around the circle more. Leave the top of the circle open. Add a butterfly to the center of it. Add butterflies in between the roses.
Open your tube again, this time at full length. Resize it if you need to. Copy and paste as a new layer, over the rectangle on the right. On the rectangle go to selections, select all then selections defloat. Now go to selections, invert. On your tube layer, hit delete. Go to selections, none. Add your plug in, penta, dot and cross. Set it to the setting you like.
Again open your tube. Resize it if you need to then copy and paste as a new layer. This time over the rectangle layer at the bottom. Your going to place it so the part showing in the rectangle that you want shown. Duplicate it several times, moving it up or down, again showing what part you want shown. Do this across the rectangle. Merge down until the tube layers are all together. Back on the rectangle layer, go to selections, select all then selections, float then selections defloat. Now go to selections, invert. On the tube layer, hit the delete key. Go to selections none. Now duplicate this layer. Go to adjust, blur, guassian blur and set it to 3. Then change the blend mode to overlay, just as we did before.
Now open another rose, resize then copy and paste as a new layer to the left of the right hand rectangle. Move one to the bottom of it, duplicate it then move to the top. Add a bow to the top of the rectangle and a candle to the bottom left.
Go to each template layer and add the gradient glow of your choosing.
Finally add your text, copyrights, license info and tagger markings. Save and your done! Thanks for trying my tutorial.
Monday, March 29, 2010
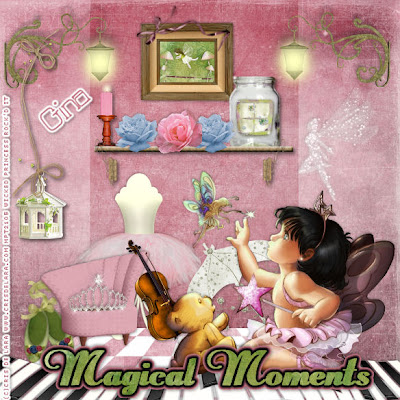
Magic Moments PTU
This tutorial was written on March 29, 2010 Shani aka Wicked Princess. The concept of the tag is mine and mine alone. Any resemblance to any other tag/tut is pure coincidence. This was written for those with working knowledge of PSP.
Supplies Needed:
++Paint Shop Pro ( I used 10 but any version should work)
++Scrap kit by called Magic of Dance by Kikeka kits can be found:
++Tube of choice or the one I used. I used the work of Cris De Lara and the artist work can be purchased from www.mypsptubes.com
++Font of choice
++Plug ins:
-Xero, Radiance
**NOTES:
-Add Drop shadow of choice as you go
-You can merger layers as you want to make things easier for yourself.
+*+ This is a FULL size kit!
Open several papers of choice, resizing as needed. For example, when I look at the blue bar where it tells me what I’ve opened (say like paper 2) it tells me what percentage I’m viewing it at. For me it’s usually 16%, so I resize to 16% bringing it to 100%. ( I hope that made sense!) Once you’ve done this, minimize for later use.
Before we get started with the actual tag, we’re going to make the extra’s that make the tag more special.
First open the mason jar frame, and resize it down to where you like. Using your magic wand tool, click inside the frames. Go to selections, modify expand by 3. Add a new raster layer and flood fill with your choice of paper. Move this layer below the jar. Go to selections none. Then open the butterflies, resize then copy and paste as a new layer and adjust as needed. Erase any parts outside of the jar. Merge the layers and minimize for later use.
Now open the golden frame, resize it. Using your magic wand tool, click inside the frame. Go to selections, modify and expand by 5. Add a new layer and flood fill with your choice of paper. Go to selections, none. Move this layer to the bottom. Now open several elements you like to use, and resize them. Make a “scene” in the picture frame. Merge the layers, and minimize for later use.
Now on to the tag! Open the paper that has the room layout. It has the checkered bottom. Resize this paper to the size your comfortable with.
Then open the piano keys. Resize then copy and paste as a new layer to the bottom of the paper. Noticed, I moved mine so it looked like a wavy road.
Open the glitter fairy silhouette and resize. Copy and paste as a new layer to the right side of the “wall”. Move it to where you like it on the wall.
Next open the shelf, resize it then copy and paste as a new layer. Move it to the center wall, move it about a quarter of the way down. Open the candle, roses and maximize the mason jar. Copy and paste as new layer on either end of the shelf. Move it below the shelf layer. This way it looks like it’s actually sitting on the shelf. Erase the parts below the shelf you don’t want to see. Open two roses, resize then copy and paste them as new layers in between the two other elements.
Then maximize your picture, then copy and paste as a new layer to above the shelf layer. Center it as you like it. Move this layer below the mason jar, so it looks like its behind the jar.
Now open the ballet slipper. Resize it then copy and paste as a new layer to the bottom left of the tag. Duplicate it and angle it so it looks like they are paired together.
Open the gazebo on the string. Resize it then copy and paste as a new layer to the left, making it look like it’s hanging on the lamp.
Then open the ballerina skirt mannequin thing. Resize it then copy and paste as a new layer. Move it to the upper left of the paper. More so in the “corner”. Add the pink chair in front of it, and a tiara on top of the chair seat.
Next open the cello, resize it then copy and paste as a new layer. Move it at an angle so it looks like its resting on the arm of the chair. Add the umbrella at an angle to the right of it.
Now open your tube of choice, resize it and add the plug in Xero, Radiance. Set it to the setting you like. I used a very subtle one. Copy and paste it so its at the bottom right. Make it look like it’s sitting on the piano keys.
Finally add your text, copyrights, license info and tagger markings. Save and your done! Thank you for trying my tutorial.
Saturday, March 27, 2010
Sweet Dreams Are Made of these PTU
This tutorial was written on March 27, 2010 Shani aka Wicked Princess. The concept of the tag is mine and mine alone. Any resemblance to any other tag/tut is pure coincidence. This was written for those with working knowledge of PSP.
Supplies Needed:
++Paint Shop Pro ( I used 10 but any version should work)
++Scrap kit by called I Dream of La La can be purchased from HERE
++Template 110 by Scraps of enchantment can be found HERE
++Tube of choice or the one I used. I used the work of Christina McAllister and you can purchase his work from HERE
++Font and mask of choice
++Plug ins:
-Xero, Radiance
**NOTES:
-Add Drop shadow of choice as you go
-You can merger layers as you want to make things easier for yourself.
Open the template in PSP, using your shortcut keys on your keyboard (SHIFT+D) duplicate the template as a new image. Close the original.
Open several papers of choice, resizing as needed. For example, when I look at the blue bar where it tells me what I’ve opened (say like paper 2) it tells me what percentage I’m viewing it at. For me it’s usually 16%, so I resize to 16% bringing it to 100%. ( I hope that made sense!) Once you’ve done this, minimize for later use.
Next go to the bottom template layer and go to selections, select all, then float, selections defloat. Don’t forget to go to selections, none then delete the template layer. Repeat this process for the rest of the template. I removed the word art layer and the heart layers.
Add a new raster layer, flood fill with your choice of paper. Add your mask of choice and merge the group.
Now open the glitter rain, resize it then copy and paste as a new layer. Move it to just above the top circle layer. On the circle layer go to selections, select all, selections float then selections, defloat. On the glitter rain layer, hit the delete key. Go to selections, none.
Then open the piano keys, resize as needed then copy and paste as a new layer above the rain layer. On the circle layer go to selections, select all, selections float then selections, defloat. On the piano layer, hit the delete key. Go to selections, none.
Open the chandelier. Resize it then copy and paste as a new layer. Move it to the top center of the circles. Make sure this is on the top layer. Add the flower of your choosing, on either side of it. Duplicate them several times, and arrange so it looks like they are arcking over the circle.
Then open the rose bud vines, resize then copy and paste to the left of the top circle layer. Also move it towards the top. Duplicate it and go to image, mirror.
Next open the black and white road splat thingy lol, Resize it then copy and paste as a new layer. Move it below the frame layer on the rounded square. Adjust it so it looks good. Using your magic wand tool, click inside the frame and go to selections, modify, expand by 5. On your road layer, hit the delete key. Go to selections, none.
Then open the clock, resize it, copy and paste as a new layer. Place somewhere on background layer below the frame. We’ll move it around in a minute.
Open the drapery, resize then copy and paste as a new layer. Move to the right side of the frame. Adjust where you like it and duplicate it. Go to image, mirror. Erase the parts you don’t want seen outside of the frame. Add the valance to the upper top of the frame, again erasing the parts you don’t want seen outside of the frame.
Now open the cello, resize then copy and paste into the center of the frame. Add a chair and the piano where you like them on either side. Move the clock where you like it now. Add the rose and candles on top of the piano.
Open your tube of choice, resize it then copy and paste to the left of the tag. Adjust as needed.
Add your text, copyrights, license info and tagger markings. Save and your done!
Thanks for trying my tutorial.
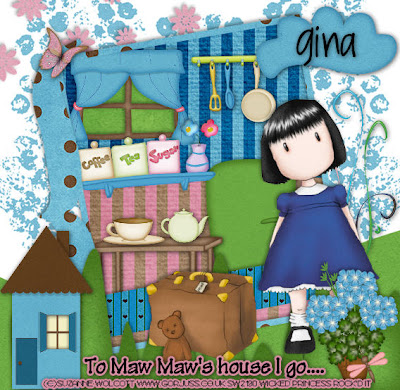
To Maw Maw's House I go... PTU
This tutorial was written on March 27, 2010 Shani aka Wicked Princess. The concept of the tag is mine and mine alone. Any resemblance to any other tag/tut is pure coincidence. This was written for those with working knowledge of PSP.
Supplies Needed:
++Paint Shop Pro ( I used 10 but any version should work)
++Scrap kit by called MawMaw’s House by Kikeka kits. You can purchase the kit HERE
++Valentine Template 2 by Designs by Ali can be found HERE
++Tube of choice or the one I used. I used the work of Suzanne Wolcott and you can purchase her work HERE
++Font of choice
**NOTES:
-Add Drop shadow of choice as you go
-You can merger layers as you want to make things easier for yourself.
Open the template in PSP, using your shortcut keys on your keyboard (SHIFT+D) duplicate the template as a new image. Close the original.
Open several papers of choice, resizing as needed. For example, when I look at the blue bar where it tells me what I’ve opened (say like paper 2) it tells me what percentage I’m viewing it at. For me it’s usually 16%, so I resize to 16% bringing it to 100%. ( I hope that made sense!) Once you’ve done this, minimize for later use.
Next go to the bottom template layer and go to selections, select all, then float, selections defloat. Don’t forget to go to selections, none then delete the template layer. Repeat this process for the rest of the template. I removed the word art layer and the heart layer.
First open the bubbled back ground. Resize then copy and paste as a new layer. Move it to the bottom of the template layers. Duplicate it and go to image, mirror. Adjust as needed.
Now open your landscape (hill) element. Resize it then copy and paste as a new layer. Make sure it’s just above the bubble background.
Open the doodle (it looks like long weeds) resize it then copy and paste as a new layer to the right of the template.
Then open the flower spray, resize then copy and paste as a new layer. Move it to the right so it looks like it’s spraying from the top down to the opposite corner.
Now using your pre set shapes on the rectangle shape, draw out a rectangle just above your rectangle background template layer. If you can’t quite get it the same size as the rectangle, that’s ok. Erase the parts that are hanging outside the frame.
Next open your pots and utensil hanging thing. Resize then copy and paste as a new layer to the upper right of the template background.
Then add the refrigerator to the bottom right of the template. Make sure its below the skinny rectangle layer on the bottom.
Open the window, resize it then copy and paste as a new layer to the upper left of the template. Erase the part that shows outside the frame. Draw out another rectangle with the paper of your choice using your preset shapes tool and move it below the window.
Now open the shelf, resize it then copy and paste below the window so it looks like its just at the top of that second back ground layer you made. It kind of looks like a divide in the wallpaper right?
Then open the table, resize then copy and paste as a new layer. Move it below the shelf. Add the teapot and the cup, so that its sitting on the table.
Next open the grass, resize it then copy and paste as a new layer at the bottom of the canvas.
Open the house, resize then copy and paste as a new layer to the left of canvas.
Now open the tube of choice and paste it where you like it.
Then open the flower pot of your choice, resize it then copy and paste as a new layer to the bottom right of the tag. Add the dragon fly to the bottom center of the pot.
Next open the cloud you like, resize then copy and paste as a new layer to the upper right of the tag. Add a butterfly to the opposite side.
Finally add your text, copyrights, license info and tagger markings
Save and your done! Thank you for trying my tutorial.
Friday, March 26, 2010
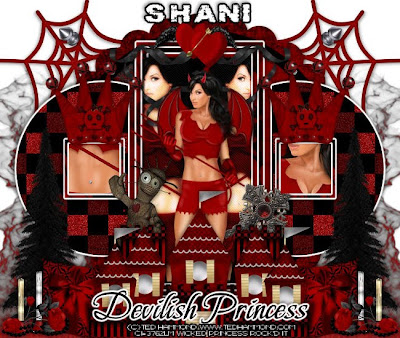
Devilish Princess PTU
This tutorial was written on March 26, 2010 Shani aka Wicked Princess. The concept of the tag is mine and mine alone. Any resemblance to any other tag/tut is pure coincidence. This was written for those with working knowledge of PSP.
Supplies Needed:
++Paint Shop Pro ( I used 10 but any version should work)
++Scrap kit by called Wicked Princess – The Kit can be purchased from HERE
++Template 104 by Yvette can be found HERE
++Tube of choice or the one I used. I used the work of Ted Hammond and you can purchase his work from HERE Note that the tube I used specifically was a part of a promotion. I’m not sure if it’s on sale by itself now.
++Font of choice
++Plug ins:
-Xero, Radiance
-Eye Candy 4000 Gradient Glow
-Penta.com, Jeans.
**NOTES:
-Add Drop shadow of choice as you go
-You can merger layers as you want to make things easier for yourself.
Open the template in PSP, using your shortcut keys on your keyboard (SHIFT+D) duplicate the template as a new image. Close the original.
Open several papers of choice, resizing as needed. For example, when I look at the blue bar where it tells me what I’ve opened (say like paper 2) it tells me what percentage I’m viewing it at. For me it’s usually 16%, so I resize to 16% bringing it to 100%. ( I hope that made sense!) Once you’ve done this, minimize for later use.
Next go to the bottom template layer and go to selections, select all, then float, selections defloat. Don’t forget to go to selections, none then delete the template layer. Add a gradient glow of your choosing. Repeat this process for the rest of the template. I removed the word art layer and the heart layers.
Then open the smoke element. Resize it as needed then copy and paste as a new layer. Move it to the bottom left of the tag. Duplicate it and go to image, mirror.. Adjust as needed.
Now open the spiderweb you like, resize then copy and paste as a new layer in the upper left corner of the canvas. Duplicate it and go to image, mirror.
Next open the metal studs, resize then copy and paste as a new layer into the center of the canvas. Move it below the template layers.
Open the circle frame, resize then copy and paste as a new layer. Using your magic wand tool, click inside the frame. Go to selections, modify, expand by 5. Add a new raster layer and flood fill with you choice of paper. Go to selections, none and move this paper below the frame layer.
Then open the tree, resize then copy and paste as a new layer to the left of the canvas. Make sure its just above the half circle layers. Duplicate it and go to image, mirror.
Now open your tube of choice. Resize then copy and paste as a new layer. Move it to the left, over the small square layer. On the square layer, go to selections, select all, selections, float and then selections defloat. Then go to selections, invert. Go to the tube layer, and hit delete. Go to selections, none. Do the same thing to the opposite square.
Then copy and paste your tube again, this time place it slightly to the left in the rectangle layer. Using your plug in Xero, radience, set to your chosen setting. Then use the plug in penta, jeans. Again set to the setting you like. Duplicate it, then go to image mirror. On the rectangle layer go to selections, select all, selections, float and then selections defloat. Then go to selections, invert. Go to the tube layer, and hit delete. Go to selections, none. Adjust these as you need too.
Copy and paste your tube once more, into the center of the rectangle. Resize as needed again.
Open the castle, resize it then copy and paste as a new layer to the bottom center of the canvas. Center it as needed. Make sure this is the top layer.
Then open the pillow, resize it then copy and paste as a new layer. Move it below the castle, and to the left of it. Duplicate it and go to image, mirror.
Next open the double candle’s. Resize then copy and paste as a new layer to the left of the pillow. Duplicate it and go to image, mirror.
Now open the curly ribbon. Resize it then copy and paste as a new layer. Move it to the top right of the rectangle layer. Duplicate it and go to, image, mirror. Add the double heart with wings to the top center.
Open the cross, resize it then copy and paste as a new layer. Move it below the castle layer, but towards the top of it. So it looks like its peeking up. Add the voo doo doll to the other side of it.
Then open the crown, resize then copy and paste as a new layer. Move it to the top of the rectangle on the left. Duplicate it and go to image, mirror.
Finally add your text, copyrights and tagger markings. Save and your done! Thanks for trying my tutorial.
Saturday, March 20, 2010
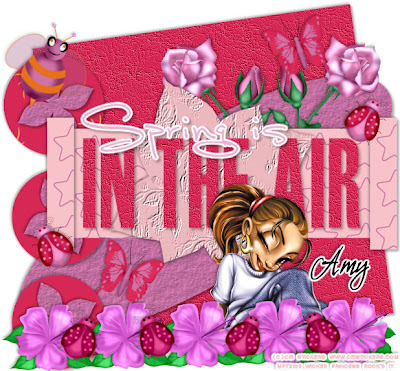
Spring Sprung PTU
This tutorial was written on March 20, 2010 Shani aka Wicked Princess. The concept of the tag is mine and mine alone. Any resemblance to any other tag/tut is pure coincidence. This was written for those with working knowledge of PSP.
Supplies Needed:
++Paint Shop Pro ( I used 10 but any version should work)
++Scrap kit by called Amanda can be purchased at HERE
++Template Spring has sprung by Daira can be found HERE
++Tube of choice or the one I used. I used the work CEI Stickers and it can be purchased from HERE
++Font of choice
**NOTES:
-Add Drop shadow of choice as you go
-You can merger layers as you want to make things easier for yourself.
Open the template in PSP, using your shortcut keys on your keyboard (SHIFT+D) duplicate the template as a new image. Close the original.
Open several papers of choice, resizing as needed. For example, when I look at the blue bar where it tells me what I’ve opened (say like paper 2) it tells me what percentage I’m viewing it at. For me it’s usually 16%, so I resize to 16% bringing it to 100%. ( I hope that made sense!) Once you’ve done this, minimize for later use.
Next go to the bottom template layer and go to selections, select all, then float, selections defloat. Don’t forget to go to selections, none then delete the template layer. Repeat this process for the rest of the template.
Now open the long stem roses. Resize it then copy and paste as a new layer above the oval layer. Move it to the right and duplicate it going to image, mirror. Move it so it criss cross’ the other rose.
Then open the butterfly, resize it then copy and paste as a new layer to the bottom lower of the tag. Duplicate it and move it up towards the top. Angle them how you like.
Open up your tube of choice, resize it then copy and paste as a new layer to the bottom right of the tag. Adjust as needed.
Now open the hibiscus flower, resize it then copy and paste as a new layer to the bottom part of the tag. Resize then duplicate several times, move them in a line at the bottom of the template. Adjust as needed.
Open the lady bug, resize then duplicate several times. Move them in between the flowers. Also move two around the canvas where you like them. Add the bee to the top left of the tag.
Add your text, copyrights and tagger markings.
Save and your done!
Thank you for trying my tutorial.
Tuesday, March 16, 2010
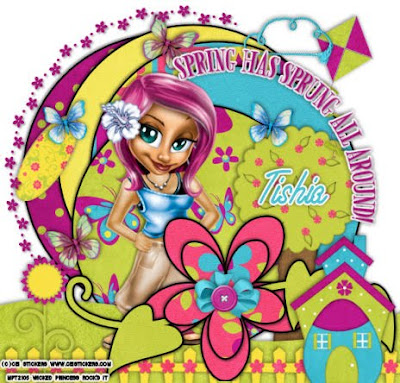
Spring Sprung PTU
This tutorial was written on March , 2010 Shani aka Wicked Princess. The concept of the tag is mine and mine alone. Any resemblance to any other tag/tut is pure coincidence. This was written for those with working knowledge of PSP.
Supplies Needed:
++Paint Shop Pro ( I used 10 but any version should work)
++Scrap kit by called Spring Thing by Tishia can be purchased HERE
++Template Spring has sprung by Daira can be found HERE
++Tube of choice or the one I used. I used the work CEI Stickers and it can be purchased from HERE
++Plug ins:
-Eye Candy 4000 Gradient Glow
++Font of choice
**NOTES:
-Add Drop shadow of choice as you go
-You can merger layers as you want to make things easier for yourself.
Open the template in PSP, using your shortcut keys on your keyboard (SHIFT+D) duplicate the template as a new image. Close the original.
Open several papers of choice, resizing as needed. For example, when I look at the blue bar where it tells me what I’ve opened (say like paper 2) it tells me what percentage I’m viewing it at. For me it’s usually 16%, so I resize to 16% bringing it to 100%. ( I hope that made sense!) Once you’ve done this, minimize for later use.
Next go to the bottom template layer and go to selections, select all, then float, selections defloat. Don’t forget to go to selections, none then delete the template layer. Add a gradient glow of your choice. Repeat this process for the rest of the template. **Note I adjusted the word art layer a bit to move it out of the way.
Open the hill, resize it then copy and paste as a new layer. Move it to the bottom of the canvas and adjust as needed. Make sure its below the template flower and leaves layers.
Then open the picket fence, resize it then copy and paste as a new layer. Move it to the bottom of the canvas. Adjust as needed.
Next open your tube of choice, resize it then copy and paste as a new layer. Move below the flower template layer and then off to the left a bit.
Now open the house, resize it then copy and paste as a new layer. Move it to the bottom right of the canvas. Add a kite in the upper right hand corner of the canvas. Also add a cloud.
Open the bow and button of your choice. Resize then copy and paste as new layers. Move into the center of the template flower.
Then open the tree, and a flower. Resize them then copy and paste the tree to the right side, and move below the hill layer. Adjust it off to the right a little. Move the flower to the left side of the tag.
Next open the butterflies of your choosing. Resize them then copy and paste as new layers through the tag as you like them. Add a tag where you like it too.
Save and your done! Thanks for trying my tutorial.
Monday, March 8, 2010
New Tagging Forum!
The Scrappin Bratz team has a new forum up! Great for taggers and non taggers. If you love to offer tags or recieve them, this is the place to be! As I write this the forum is being set up and games ready to go soon! Fun for everyone :) Make sure you check it out HERE
Wednesday, March 3, 2010
Hello Gorgeous PTU
This tutorial was written on March 3, 2010 Shani aka Wicked Princess. The concept of the tag is mine and mine alone. Any resemblance to any other tag/tut is pure coincidence. This was written for those with working knowledge of PSP.
Supplies Needed:
++Paint Shop Pro ( I used 10 but any version should work)
++Scrap kit by called Que Sera Sera by Mystical Illusionz can be purchased HERE
++Template by Ali, Valentine 6 can be found HERE
++Tube of choice or the one I used. I used the work Keith Garvey can be purchased from HERE
++Plug ins:
-Eye Candy 4000 Gradient Glow
++Font and Mask of choice
**NOTES:
-Add Drop shadow of choice as you go
-You can merger layers as you want to make things easier for yourself.
Open the template in PSP, using your shortcut keys on your keyboard (SHIFT+D) duplicate the template as a new image. Close the original.
Open several papers of choice, resizing as needed. For example, when I look at the blue bar where it tells me what I’ve opened (say like paper 2) it tells me what percentage I’m viewing it at. For me it’s usually 16%, so I resize to 16% bringing it to 100%. ( I hope that made sense!) Once you’ve done this, minimize for later use.
Next go to the bottom template layer and go to selections, select all, then float, selections defloat. Don’t forget to go to selections, none then delete the template layer. Add a gradient glow of your choice. Repeat this process for the rest of the template.
Add a new raster layer and flood fill with your choice of paper. Add your choice of mask and merge group. Move this layer below your template layers.
Open one of the round frames you like, resize if needed then copy and paste as a new layer. Move below the frame layers. Duplicate it and go to image, flip. Using the magic wand tool, click inside the top frame. Go to selections, modify and expand by 4. Add a new raster layer and flood fill with your choice of paper. Remember to go to selections, none. Duplicate it and go to image, flip.
Then open the lace ups you like. Resize then copy and paste as a new layer. Move below the hearts layers, but above the frame.
Next open your tube of choice, resize then copy and paste as a new layer. Move it above which ever large heart you like. ON that heart layer, go to selections, select all then, selections float then selections, defloat. Now go to selections, invert. On the tube layer, hit the delete key. Go to selections, none. Do this again for the other heart.
On the top tube/heart layer, duplicate the tube. Go to blur, guassin blur and set it at 3.00. Change the blend mode to overlay on this layer and merge down. Repeat the process for the second tube layer.
Open the flower of choice, resize it then copy and paste as a new layer. Move it to the upper right hand side, moving it so it sits between the two top hearts. Duplicate it and go to image, mirror and move to the middle on the left. Duplicate it again and move it to the bottom right of the tag.
Next open the tag of your choosing, resize it then copy and paste as a new layer, moving it to the upper right. Add a bow of choice to the top of it.
Then open the string bow you like, resize it then copy and paste as a new layer. Move it to the left, duplicate it and go to image, mirror. Move it down where you like it on the right side.
Add your tube of choice, adjusting and moving where you like. Duplicate it and go to adjust, blur, guassin blur set at 3.00 Change the blend mode to overlay and merge down.
Now add your text, copyrights, license info and tagger markings. Save and your done!
Thanks for trying my tutorial.
Subscribe to:
Posts (Atom)