Wednesday, July 15, 2009

This is what sexy looks like-FTU


This tutorial was written on July 15, 2009 by Shani aka Wicked Princess. The concept of the tag is mine and mine alone. Any resemblance to any other tag/tut is pure coincidence. This was written for those with working knowledge of PSP.
Supplies Needed:

++Paint Shop Pro ( I used 10 but any version should work)

++Scrap kit called Diamond Diva Add on (FTU) can be found at Envied and Admired Scraps blog HERE

++Template 13 also by Nee can be found HERE

++Tube of choice or the one I used. I used the artwork of Alice Terraneo which can be purchased HERE


++Plug ins:

-Eye candy 4000-Gradient Glow

++Font and mask of choice

Let’s get Started!

**NOTES:
-Add Drop shadow of choice as you go
-You can merger layers as you want to make things easier for yourself.

Open the template in PSP, using your shortcut keys on your keyboard (SHIFT+D) duplicate the template as a new image. Close the original.

Open several papers of choice, resizing as needed. For example, when I look at the blue bar where it tells me what I’ve opened (say like paper 2) it tells me what percentage I’m viewing it at. For me it’s usually 16%, so I resize to 16% bringing it to 100%. ( I hope that made sense!) Once you’ve done this, minimize for later use.


Next go to the bottom template layer and go to selections, select all, then float, selections defloat. Don’t forget to go to selections, none then delete the template layer. Repeat this process for the rest of the template.


Add a new raster layer, flood fill with your choice of paper. Add your mask and merge group. Move this to the very bottom of your layers palette. Repeat this with a different paper. Choose one of the mask layers to mirror.

Open the hearts and stars doodle, resize as needed. Copy and paste as a new layer. Move it over to the circle layer and adjust where you like it. Make sure this layer is just above the circle layer.

Next add your tube of choice, move this layer below the rectangle layer so it looks like its popping out of it. I moved it to the right slightly.

Open the butterfly glitter doodle and then resize. Copy and paste as a new layer above the tube layer. Move it to the right of the tube and adjust as needed.

Next open the star curtain of your choosing. Copy and paste as a new layer below the word art layers. Move it and adjust it so it looks like its falling out from under the word art.

Add your text, copyrights, license info and tagger markings.

Save and your done!

Thank you for trying my tutorial.

Rockstar World-PTU


This tutorial was written on July 15, 2009 by Shani aka Wicked Princess. The concept of the tag is mine and mine alone. Any resemblance to any other tag/tut is pure coincidence. This was written for those with working knowledge of PSP.
Supplies Needed:

++Paint Shop Pro ( I used 10 but any version should work)

++Scrap kit called Rock my world by Nee @ Envied and Admired Scraps can be purchased HERE OR HERE OR HERE

++Template 10 also by Nee can be found HERE

++Tube of choice or the one I used. I used the artwork of Keith Garvey which can be purchased HERE

++Plug ins:

-Eye candy 4000-Gradient Glow
-Xero Radiance

++Effects:
-Blur
-Textures, Mosaic Glass

+Font of choice

Let’s get Started!

**NOTES:
-Add Drop shadow of choice as you go
-You can merger layers as you want to make things easier for yourself.

Open the template in PSP, using your shortcut keys on your keyboard (SHIFT+D) duplicate the template as a new image. Close the original.

Open several papers of choice, resizing as needed. For example, when I look at the blue bar where it tells me what I’ve opened (say like paper 2) it tells me what percentage I’m viewing it at. For me it’s usually 16%, so I resize to 16% bringing it to 100%. ( I hope that made sense!) Once you’ve done this, minimize for later use.


Next go to the bottom template layer and go to selections, select all, then float, selections defloat. Don’t forget to go to selections, none then delete the template layer. Repeat this process for the rest of the template.

Go to your rectangle layer, the bottom one with the horizontal ones. Merge just these, you will need to close off all the other layers. Duplicate it, and go to your effects, texture, mosaic glass. I used the default setting. Then go to adjust, blur. Repeat this process for the large rectangles.

Open your glitter doodle of choice, resize then copy and paste as a new layer. Move it to the bottom left corner of the tag and move below the octagon layer. Duplicate it then go to image mirror, then image flip.

Next open the wire of your choice, copy and paste as a new layer. Move it to above the octagon layer.

Activate you octagon layer, go to selections, select all then float and defloat. Then go to selections, invert. Go to your wire layer and hit delete on your keyboard. Back to the octagon layer and go to selections, none.

Open the disco ball, resize. Copy and paste as a new layer towards the top of the tag, center it the best you can.

Next open the guitar of your choice, add a gradient glow. Resize then copy and paste as a new layer. Angle it so the guitar is upside down and angled. Move it to the upper right hand of the tag. Duplicate it and go to image mirror.

Add the drum set, with a gradient glow added. Place in the bottom lower part of the tag. Add the microphone and stand to the opposite side also with a gradient glow.

Open the musical note strand of your choice. Add a gradient glow to it and resize. Copy and paste as a new layer towards the top over the disco ball.

Next open your tube of choice and add your plug in , Xero Radiance. I used a random setting. Copy and paste as a new layer into the center of the tag. Make adjustments as needed.

Finally add your text, copyrights, license info, and tagger markings.

Save and your done!

Thanks for trying my tutorial.

Tuesday, July 14, 2009

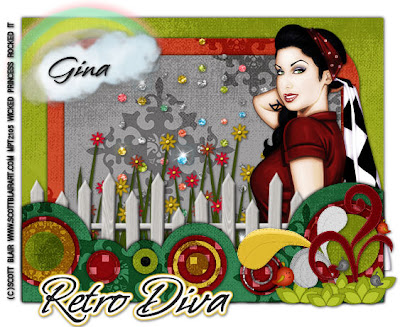
Retro Diva-PTU


Retro Diva-PTU


This tutorial was written on July 14, 2009 by Shani aka Wicked Princess. The concept of the tag is mine and mine alone. Any resemblance to any other tag/tut is pure coincidence. This was written for those with working knowledge of PSP.
Supplies Needed:

++Paint Shop Pro ( I used 10 but any version should work)

++Pleasentville by Kikeka Kits can be purchased from HERE

++Template 61 by Missy can be found HERE

++Tube of choice or the one I used. I used the work of Scott Blair which can be purchased from HERE

++Plug Ins:
Xero Radiance

Let’s get Started!

**NOTES:
-Add Drop shadow of choice as you go
-You can merger layers as you want to make things easier for yourself.

Open the template in PSP, using your shortcut keys on your keyboard (SHIFT+D) duplicate the template as a new image. Close the original.

Open several papers of choice, resizing as needed. For example, when I look at the blue bar where it tells me what I’ve opened (say like paper 2) it tells me what percentage I’m viewing it at. For me it’s usually 16%, so I resize to 16% bringing it to 100%. ( I hope that made sense!) Once you’ve done this, minimize for later use.


Next go to the bottom template layer and go to selections, select all, then float, selections defloat. Don’t forget to go to selections, none then delete the template layer. Repeat this process for the rest of the template.
**Note I chose to merge all the circles into one layer to make it easier for myself. This is optional.


Open the gem rain element and resize copy and paste as a new layer. Center it so that the top of it is on the first rounded rectangle layer. Move this layer to just above the second round rectangle layer.

Next open the tall flowers with grass. Center them in the second rounded rectangle. Move this layer just above the gem rain layer.

Open your tube of choice, add your plug in Xero, radiance to the random setting of your choice. Copy and paste as a new layer and move it to above the flower and grass layer.

Then open the fence layer and resize. Copy and paste as a new layer and move above the tube layer. Center and adjust as needed.

Add the doodle that has the grass and flowers next. Resize and copy and paste as a new layer in the bottom right corner of the tag. Make sure this layer is on the top layer.

Open the cloud and rainbow. Resize then copy and paste as a new layer moving to the upper left hand corner of the tag. Angle it to the left slightly and make the rainbow look loke its coming out of the cloud.

Add your text, copyrights, license number and tagger markings.

Save and your done!
Thanks for trying my tutorial

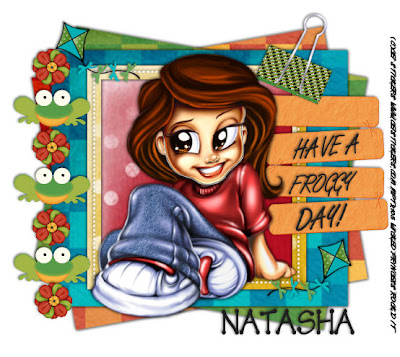
Have a froggy day-PTU


HAVE A FROGGY DAY-PTU


This tutorial was written on July 14, 2009 by Shani aka Wicked Princess. The concept of the tag is mine and mine alone. Any resemblance to any other tag/tut is pure coincidence. This was written for those with working knowledge of PSP.
Supplies Needed:

++Paint Shop Pro ( I used 10 but any version should work)

++Scrap Kit by Natasha at Sticky Kisses Designs called Froggy Day can be found HERE

++Template 165 by Missy can be found HERE

++Tube of choice or the one I used. I used the work of CEI stickers which can be purchased from HERE

Let’s get Started!

**NOTES:
-Add Drop shadow of choice as you go
-You can merger layers as you want to make things easier for yourself.

Open the template in PSP, using your shortcut keys on your keyboard (SHIFT+D) duplicate the template as a new image. Close the original.

Open several papers of choice, resizing as needed. For example, when I look at the blue bar where it tells me what I’ve opened (say like paper 2) it tells me what percentage I’m viewing it at. For me it’s usually 16%, so I resize to 16% bringing it to 100%. ( I hope that made sense!) Once you’ve done this, minimize for later use.


Next go to the bottom template layer and go to selections, select all, then float, selections defloat. Don’t forget to go to selections, none then delete the template layer. Repeat this process for the rest of the template.

Using your magic wand tool click inside the frame layer. Go to selections, modify and expand by 5. Add a new raster layer and flood fill with your choice of paper. Go to selections, none. Move this layer below the frame layer.

Open your choice of tags, resize then copy and paste as a new layer to the right side of the frame. Add a binder clip of choice to the top, angling to the right.

Next open a flower and frog of choice. Resize and copy and paste each as new layers to the left of the tag. Duplicate them three times and alternate them in a line. View tag as example.

Open the kit, resize it and copy and paste as a new layer. I put one up in the upper left corner of the tag and also in the lower right.

Add your tube, resizing and centering in the frame.

Add your text, license info, copyrights and tagger markings.

Save and your done.

Thank you for trying my tutorial!


Missy template 165

Monday, July 13, 2009

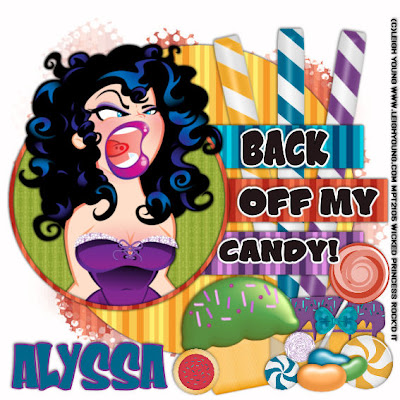
Back Off My Candy-PTU


Back off my Candy-PTU

This tutorial was written on July 13, 2009 by Shani aka Wicked Princess. The concept of the tag is mine and mine alone. Any resemblance to any other tag/tut is pure coincidence. This was written for those with working knowledge of PSP.
Supplies Needed:


++Paint Shop Pro ( I used 10 but any version should work)

++Scrap kit by Alyssa called Sugar Shock apart of the Starving Artist Collab can be purchased HERE or HERE

++Template by Alyssa can be found HERE

++Tube of choice, or the one I used. I used the artwork of Leigh young, you can purchase it HERE

++Mask and font of choice


Let’s get started!

**NOTES:
-Add Drop shadow of choice as you go
-You can merger layers as you want to make things easier for yourself.


Open several papers of choice, resizing as needed. For example, when I look at the blue bar where it tells me what I’ve opened (say like paper 2) it tells me what percentage I’m viewing it at. For me it’s usually 16%, so I resize to 16% bringing it to 100%. ( I hope that made sense!) Once you’ve done this, minimize for later use

Next go to the bottom template layer and go to selections, select all, then float, selections defloat. Don’t forget to go to selections, none then delete the template layer. Repeat this process for the rest of the template.

Add a new raster layer and flood fill with your choice of paper. Load your mask and merge visible. **NOTE: I chose to duplicate the mask and mirror then flip it. This is optional.

Next open the candy sticks. Pick three of them and copy and paste as a new layer. Move them to below the rectangle layer. The middle one I left straight up and down then angled the other two outwards.

Now your going to create your “sugar shock” pile. I piled up, jelly beans, candy, sucker, cake, cupcakes and a cookie in various places. This is pretty much up to you what you put here! Just load it up in a pile to give the effect that your going to put yourself in sugar shock lol.

Add your text, copyrights, license info, and tagger markings!

Save and your done

Thank you for trying my tutorial

Saturday, July 11, 2009

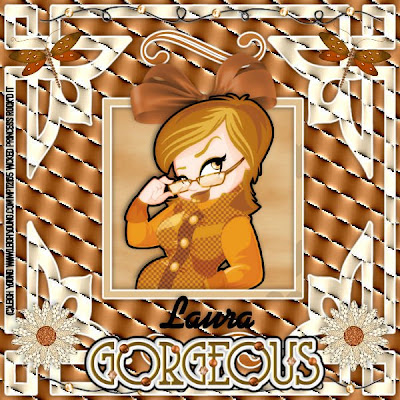
Gorgeous-FTU


Gorgeous-FTU

This tutorial was written on July 11, 2009 by Shani aka Wicked Princess. The concept of the tag is mine and mine alone. Any resemblance to any other tag/tut is pure coincidence. This was written for those with working knowledge of PSP.
Supplies Needed:


++Paint Shop Pro ( I used 10 but any version should work)

++Scrap kit by Laura called Punkin Love (FTU) Can be found HERE

++Template by me can be found HERE

++Tube of choice or the one I used. I used the artwork of Leigh Young and you can purchase her work
HERE

++Plug ins:
-Eye Candy 4000 Gradient Glow

++Font of choice


**NOTES:
-Add Drop shadow of choice as you go
-You can merger layers as you want to make things easier for yourself.


Open several papers of choice, resizing as needed. For example, when I look at the blue bar where it tells me what I’ve opened (say like paper 2) it tells me what percentage I’m viewing it at. For me it’s usually 16%, so I resize to 16% bringing it to 100%. ( I hope that made sense!) Once you’ve done this, minimize for later use

Next go to the bottom template layer and go to selections, select all, then float, selections defloat. Don’t forget to go to selections, none then delete the template layer. Add a gradient glow on the fat setting the colors of your choice. Repeat this process for the rest of the template.


Add a new raster layer and move it to the bottom. Fill with your choice of paper.

Using your magic wand tool click inside the square frame layer. Go to selections, modify expand by 3. Add a new raster layer and flood fill with your choice of paper. Move this layer to below the square frame layer. Go to selections, none.

Open your bead doodle of your choice. Copy and paste as a new layer and move to the bottom of the canvas. Duplicate it and go to image, flip. You should now have one at the top and bottom.

Add a butterfly of choice to both of the top corners. Then add a flower of choice to the bottom two corners.

Open a bow of choice and add it to the top of the square frame. Resize it as needed.

Next open your tube of choice and add to the frame. Resize and adjust.

Add the wordart of choice from the kit and add a gradient glow.

Add your text, license info, copyrights and tagger markings.

Save and your done!

Thank you for trying my tutorial!