Saturday, November 28, 2009
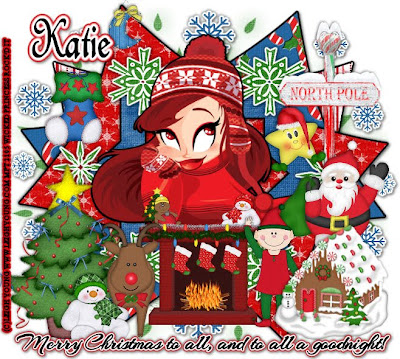
Christmas Goodnight PTU
This tutorial was written on November 25, 2009hani aka Wicked Princess. The concept of the tag is mine and mine alone. Any resemblance to any other tag/tut is pure coincidence. This was written for those with working knowledge of PSP.
Supplies Needed:
++Paint Shop Pro ( I used 10 but any version should work)
++Kit by Crazed Creations Called Christmas Magic can be found HERE
++Template 98 by Ali which can be found HERE
++Tube of choice. I used the artwork of Leigh Young, whom is no longer with MPT, you can visit her website to find out more information.
++Plug ins:
-Eye Candy Gradient Glow
++Font and mask of choice
**NOTES:
-Add Drop shadow of choice as you go
-You can merger layers as you want to make things easier for yourself.
Open the template in PSP, using your shortcut keys on your keyboard (SHIFT+D) duplicate the template as a new image. Close the original.
Open several papers of choice, resizing as needed. For example, when I look at the blue bar where it tells me what I’ve opened (say like paper 2) it tells me what percentage I’m viewing it at. For me it’s usually 16%, so I resize to 16% bringing it to 100%. ( I hope that made sense!) Once you’ve done this, minimize for later use.
Next go to the bottom template layer and go to selections, select all, then float, selections defloat. Don’t forget to go to selections, none then delete the template layer. Add the gradient glow of your choice to the layer. Repeat this process for the rest of the template.
Add a new raster layer and move it to the bottom of the palette. Flood fill with your choice of paper. Add your mask and merge the group.
Open your tube of choice, resize as needed then copy and paste as a new layer. Center it into the frame layer.
Next open up the North Pole sign, resize then copy and paste as a new layer. Move to the right of the tag. Then open the santa claus, resize then copy and paste as a new layer, move it low towards the bottom of the pole.
Now add the gingerbread house toward the bottom of the santa, and the elf to the left of it.
Open the fireplace, resize it then copy and paste as a new layer. Move to the center of the tag, at the bottom of the tube.
Add the reindeer, tree of choice and snowman to the bottom left of the tag. Then add the stocking of choice to the upper left and the star to the upper right.
Add your text, copyrights, license info and tagger markings.
Save and your done! Thank you for trying my tutorial!
Wednesday, November 25, 2009
Everybody Wants You PTU
Everybody wants you PTU
This tutorial was written on August 30, 2009 by Shani aka Wicked Princess. The concept of the tag is mine and mine alone. Any resemblance to any other tag/tut is pure coincidence. This was written for those with working knowledge of PSP.
Supplies Needed:
++Paint Shop Pro ( I used 10 but any version should work)
++Scrap kit by me called Sweet Rock can be purchased < HERE
++Template 81 by Kristin can be found HERE
++Tube of choice or the one I used. I used the artwork of Elias Chatzoudis which can be purchased HERE
++ Mask by Gabee “gabeemask1” can be found HERE
++Font of choice
++Plug ins:
-Eye Candy 4000 Gradient Glow
Let’s get Started!
**NOTES:
-Add Drop shadow of choice as you go
-You can merger layers as you want to make things easier for yourself.
Open the template in PSP, using your shortcut keys on your keyboard (SHIFT+D) duplicate the template as a new image. Close the original. Because this template is taking up the whole space we need to add more. Go to image, canvas size and make it 600x600.
Open several papers of choice, resizing as needed. For example, when I look at the blue bar where it tells me what I’ve opened (say like paper 2) it tells me what percentage I’m viewing it at. For me it’s usually 16%, so I resize to 16% bringing it to 100%. ( I hope that made sense!) Once you’ve done this, minimize for later use.
Next go to the bottom template layer and go to selections, select all, then float, selections defloat. Add your gradient glow of choice. Don’t forget to go to selections, none then delete the template layer. Repeat this process for the rest of the template.
Add a new raster layer and flood fill with your choice of paper. Add your mask and merge the group. Move this layer to the bottom of your layer palette.
Open the glitter doodle of your choosing. Resize it then copy and paste as a new layer. Move this layer just above the mask layer. Duplicate it and go to image, mirror, then image flip.
Then open your tube of choice. Copy and paste as a new layer, and move it below the frame layer. Resize it as you like, and move to the left part of the frame. Duplicate it and go to image, mirror. Use your magic wand tool and click inside the frame, go to selections, modify, expand by 9. Then go to selections, invert. Go to your tube layer and hit delete on your keyboard. Go to selections none. Close off all layers and merge your tube layers. Set the visibility to 75 percent. Make sure this layer is below the diamonds and sparkle layers.
Copy and paste your tube once again, and place in the frame as you like.
Open the double staples of your choice, resize then copy and paste as a new layer. Angle them so they hang over the frame slightly towards the bottom right. Duplicate it and move this one to the opposite corner.
Then open two of the guitars. Resize them and copy and paste as a new layer. Move one to the left side of the frame, with the base towards the bottom. Move the other one to the opposite side but flip the base towards the top.
Next open a button of choice, resize it then copy and paste as a new layer. Move to the upper left hand corner. Open the star of choice, resize then copy and paste as a new layer in the bottom right hand corner.
Add your text, copyrights and license info.
Save and your done!
Thank you for trying my tutorial!
Club Hopper PTU
Club Hopper PTU
This tutorial was written on November 25, 2009hani aka Wicked Princess. The concept of the tag is mine and mine alone. Any resemblance to any other tag/tut is pure coincidence. This was written for those with working knowledge of PSP.
Supplies Needed:
++Paint Shop Pro ( I used 10 but any version should work)
++Scrap kit Walking in a spiderweb by me can be purchased HERE OR HERE OR HERE OR HERE
++Template 183 by Missy can be found HERE
++Tube of choice or the one I used. I used the tube provided in the kit.
++Plug ins:
-Muera Meister Copies
-Eye Candy 4000 Gradient Glow
**NOTES:
-Add Drop shadow of choice as you go
-You can merger layers as you want to make things easier for yourself.
Open the template in PSP, using your shortcut keys on your keyboard (SHIFT+D) duplicate the template as a new image. Close the original. **Increase the canvas size by going to image, canvas size then increase it to 600x600.
Open several papers of choice, resizing as needed. For example, when I look at the blue bar where it tells me what I’ve opened (say like paper 2) it tells me what percentage I’m viewing it at. For me it’s usually 16%, so I resize to 16% bringing it to 100%. ( I hope that made sense!) Once you’ve done this, minimize for later use.
Next go to the bottom template layer and go to selections, select all, then float, selections defloat. Add a gradient glow of choice. Don’t forget to go to selections, none then delete the template layer. Repeat this process for the rest of the template.
Add a new raster layer, flood fill with your choice of paper. Add your mask, and merge group. Move this layer to the bottom.
Open one of the crumpled paper elements. Resize as needed then copy and paste at an angle towards the upper right hand side of the tag. Move this one below the template layer. Duplicate it and go to image, flip.
Then open the bottle cap of choice, resize as needed. Copy and paste as a new layer. Use your plug in Muera Meister copies on the encircle option. Set your x and y at 50. Adjust as needed.
Next open the pain droplets. Go to image, flip and resize them. Copy and paste as a new layer at the top of the palette. Move and adjust so they are sitting inside the rectangles. On the template layer go to selections, select all then float. Then selections, defloat. Now selections, invert. Go back to the paint drop layer and hit the delete key.
Now open the musical notes of your choosing, adding the gradient glow from before to it. Move this towards the top of the tag.
Add your tube of choice to the right of the tag, below the word art layer, adjust as needed.
Then add the skull you like to the musical note on the left side.
Open the lipstick, boom box, skateboard, flower, sachet bag and button. Arrange them how you like at the bottom of the tag.
Add any text, copyrights or license info. Save and your done!
Thank you for trying my tutorial!

Let it snow PTU
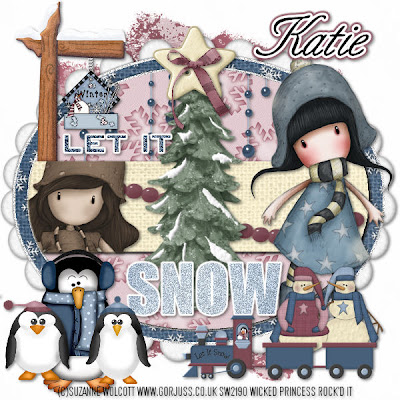
Let it Snow PTU
This tutorial was written on November 25, 2009hani aka Wicked Princess. The concept of the tag is mine and mine alone. Any resemblance to any other tag/tut is pure coincidence. This was written for those with working knowledge of PSP.
Supplies Needed:
++Paint Shop Pro ( I used 10 but any version should work)
++Scrap Kit by Crazed Creations called Snow Friends can be purchased HERE
++Template 2 by Tracy at Freebie Friends can be found HERE
++Two Tubes of choice, or the ones I used. I used the artwork of Suzanne Wolcott, which can be purchased HERE
++Plug ins:
-Meura Meister copies
++Font and mask of choice
**NOTES:
-Add Drop shadow of choice as you go
-You can merger layers as you want to make things easier for yourself.
Open the template in PSP, using your shortcut keys on your keyboard (SHIFT+D) duplicate the template as a new image. Close the original.
Open several papers of choice, resizing as needed. For example, when I look at the blue bar where it tells me what I’ve opened (say like paper 2) it tells me what percentage I’m viewing it at. For me it’s usually 16%, so I resize to 16% bringing it to 100%. ( I hope that made sense!) Once you’ve done this, minimize for later use.
Next go to the bottom template layer and go to selections, select all, then float, selections defloat. Don’t forget to go to selections, none then delete the template layer. Repeat this process for the rest of the template. **NOTE leave the glitter layers alone.
Add a new raster layer and move it to the bottom of the palette. Flood fill with your choice of paper. Add your mask and merge the group.
Open the snowball and resize it. Copy and paste as a new layer. Use your plug in Muera Meister Copies on the encircle option. Set your x at 90 and y at 70 with any number of snowballs you like!
Then open the dangle balls of your choice. Resize it then copy and paste as a new layer on the top oval layer. Erase the parts you don’t want seen outside the oval.
Add the winter sign of choice. Resize it and adjust as neede,d moving it to the upper left, below the rectangle layer. Have it sit just above the word art.
Next open the bead rope of your choice. Resize it then copy and paste as a new layer, across the rectangle layer. Erase the parts you don’t want seen outside the rectangle.
Now open the tree, resize in then copy and paste as a new layer just above the bead layer. Add a star button and bow respectfully at the top of the tree.
Open your first tube of choice, crop as needed. Copy and paste it as a new layer to the left of the rectangle layer. On the rectangle layer, go to selections, float then selections, defloat. Then selections, invert. Hit the delete key on that tube layer. Go to selections, none. Now change the color of the tube by going to effects, photo effects, sephia toning. Change it to the setting you like.
Then copy and paste the other tube after resizing to the right of the tag.
Next open the snowmen clipart of choice. Resize it then copy and paste as a new layer below the tube layer. Add the train to the bottom of the snowmen.
Open the three penguins, copy and paste after resizing to the left bottom of the tag, group them together.
Add any text you like, copyrights, license info and tagger markings.
Save and your done!
Thank you for trying my tutorial.
Beautiful View PTU
Beautiful View PTU
This tutorial was written on November 25, 2009hani aka Wicked Princess. The concept of the tag is mine and mine alone. Any resemblance to any other tag/tut is pure coincidence. This was written for those with working knowledge of PSP.
Supplies Needed:
++Paint Shop Pro ( I used 10 but any version should work)
++Scrap kit Enchanted Grace by me can be purchased HERE OR HERE OR HERE OR HERE
++Template 165 by Missy can be found HERE
++Tube of choice or the one I used. I used the one that is included in the kit.
++Plug ins:
-Eye Candy 4000 Gradient Glow
++Font and Mask of choice
**NOTES:
-Add Drop shadow of choice as you go
-You can merger layers as you want to make things easier for yourself.
Open the template in PSP, using your shortcut keys on your keyboard (SHIFT+D) duplicate the template as a new image. Close the original. **Increase the canvas size by going to image, canvas size then increase it to 600x600. Also I deleted the word art layer.
Open several papers of choice, resizing as needed. For example, when I look at the blue bar where it tells me what I’ve opened (say like paper 2) it tells me what percentage I’m viewing it at. For me it’s usually 16%, so I resize to 16% bringing it to 100%. ( I hope that made sense!) Once you’ve done this, minimize for later use.
Next go to the bottom template layer and go to selections, select all, then float, selections defloat. Add a gradient glow of choice. Don’t forget to go to selections, none then delete the template layer. Repeat this process for the rest of the template.
Add a new raster layer, flood fill with your choice of paper. Add your mask, and merge group. Move this layer to the bottom.
Using your magic wand tool, click inside the frame layer, go to selections, modify and expand by 6. Add a new raster layer and flood fill with your choice of paper. Go to selections, none. Move this layer below the frame layer.
Open the flourish doodle. Resize then copy and paste as a new layer. Move it to just above the mask layer. Move the flourish to the right side of the canvas at the top. Duplicate it and go to image, mirror. Then duplicate it again and go to image flip. Duplicate it again and go to image, mirror.
Then open the pin of choice, resizing it. Copy and paste as a new layer into the upper right hand corner, just above the flourish layer. Angle it as needed. Duplicate it, then go to image, mirror then image, flip. Adjust as needed.
Next we’re going to create the “scene” behind the frame. Open the long drapery (cream colored) resize it then copy and paste as a new layer below the frame layer. Move it to the left part of the frame. Add the drapery swag above this layer towards the top of the frame. Don’t worry about the excess beyond the frame, we’ll fix that in a moment. Add the clock after resizing, then move to the upper right hand corner of the frame, slightly hidden by the swag. Make sure this layer is below the swag. Then open the candleabara, resize it, then copy and paste as a new layer . Add the couch after resizing toward the right hand side of the frame. Add the piano and another candle to the other side.
Now using your magic wand tool, click inside the frame again. Go to selections, modify, expand by 6. Go to selections, invert. On each of the elements layers that we just put into the scene, hit the delete key. Go to selections, none.
Open the twirly satin ribbon with a bow on it. Copy and paste it as two separate layers on the top frame and the bottom one, mirroring each other.
Then open the water color rose cluster, resizing then copy and paste as new layer to opposite corners of each other. Add the fan to the top center of the frame.
Open and resize your tube, resizing as needed. Copy and paste to the left of the tag.
Add your text, copyrights and any licensing info needed. Save and your done!
Thank you for trying my tutorial.
Tuesday, November 24, 2009
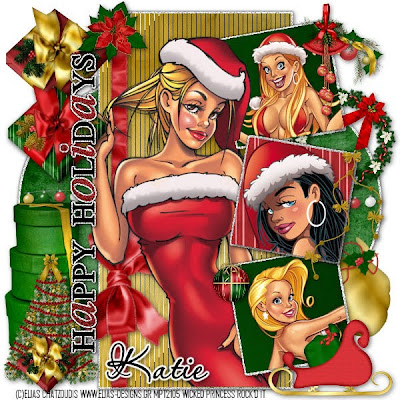
Happy Holidas (PTU)
This tutorial was written on November 24, 2009hani aka Wicked Princess. The concept of the tag is mine and mine alone. Any resemblance to any other tag/tut is pure coincidence. This was written for those with working knowledge of PSP.
Supplies Needed:
++Paint Shop Pro ( I used 10 but any version should work)
++Scrap Kit by Crazed Creations called Home for the Holidays can be purchased HERE
++Template 5 by Tracy at Freebie Friends can be found HERE
++4 tubes of choice or the ones I used. I used the artwork of Elias Chatzoudis and you can purchase his work HERE
++Plug ins needed:
-Tramages, tow the line
Let’s get started!
**NOTES:
-Add Drop shadow of choice as you go
-You can merger layers as you want to make things easier for yourself.
Open the template in PSP, using your shortcut keys on your keyboard (SHIFT+D) duplicate the template as a new image. Close the original.
Open several papers of choice, resizing as needed. For example, when I look at the blue bar where it tells me what I’ve opened (say like paper 2) it tells me what percentage I’m viewing it at. For me it’s usually 16%, so I resize to 16% bringing it to 100%. ( I hope that made sense!) Once you’ve done this, minimize for later use.
Next go to the bottom template layer and go to selections, select all, then float, selections defloat. Don’t forget to go to selections, none then delete the template layer. Repeat this process for the rest of the template. **NOTE leave the glitter layers alone.
Go to the large rectangle layer and use your plug Tramages, Tow The Line on the default settings.
Next open the wrap ribbon with bow of your choosing. Rotate it to the right by 90 degrees. Copy and paste as a new layer, moving it to the left of the tag. Make sure this is below the word art layers.
Open the ornaments string, resizing as needed. Copy and paste as a new layer, adjusting as needed. Move this down to just above the oval layer.
Now open up the santa’s gift bag of choice, resize it then copy and paste as a new layer. Move it and angle it slightly to the right and move below the bottom square layers.
Then open up your four tubes of choice. Start with the one that will go in the large rectangle layer. Move this below the square layers. Then crop each one of your others so that they will fit in the squares. Copy and paste as new layers into each of the squares.
Open the wreath, resize it then copy and paste as a new layer. Angle it to the right and move below the top square layer on the right side. Add the swag cluster just above this.
Next open the large stack of round boxes. Resize then copy and paste as a new layer to the left of the tag, moving it below the word art. Add the Christmas tree in front of it along with a square present to the bottom of the tree. Add two more presents to the top of the stack.
Open the poinsetta, add it after resizing to the top of the wrap ribbon bow. Add an ornament to the bottom and top squares in the corner. Also add the santa’s sleigh to the bottom right hand corner.
Add your text, copyrights, licensing info . Save and your done! Thank you for trying my tutorial
Saturday, November 21, 2009
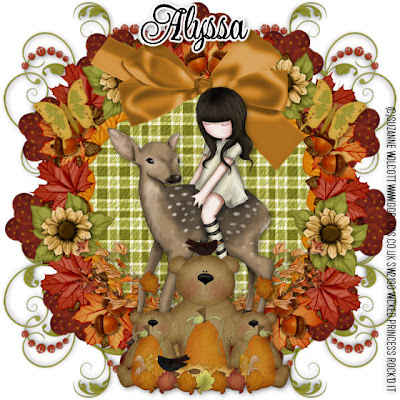
Bearly Autumn (PTU)
Bearly Autumn
This tutorial was written on November 212009 by Shani aka Wicked Princess. The concept of the tag is mine and mine alone. Any resemblance to any other tag/tut is pure coincidence. This was written for those with working knowledge of PSP.
Supplies Needed:
++Paint Shop Pro ( I used 10 but any version should work)
++Scrap kit called Bearly Autumn by Alyssa can be purchased HERE
++Tube of choice or the one I used. I used the artwork of Suzanne Wolcott which can be purchased HERE
++Plug ins:
-Muera Meister Copies
Let’s get Started!
**NOTES:
-Add Drop shadow of choice as you go
-You can merger layers as you want to make things easier for yourself
Open several papers of choice, resizing as needed. For example, when I look at the blue bar where it tells me what I’ve opened (say like paper 2) it tells me what percentage I’m viewing it at. For me it’s usually 16%, so I resize to 16% bringing it to 100%. ( I hope that made sense!) Once you’ve done this, minimize for later use.
Open a canvas of 600x600.
Open up one of the circle frames you like. Resize as needed then copy and paste as a new layer. Using your magic wand tool, click inside the frame. Go to selections, modify, expand by 10. Add a new raster layer, and flood fill with your choice of paper. Go to selections, none.
Next open a flourish of choice, resize it. Copy and paste as a new layer, moving it to the upper left hand corner of the tag. Duplicate it then go to image, mirror. Close off the other layers except for these and merge visible. Duplicate it and go to image, flip. Merge again. Then open up the other layers.
Then open the flower of choice, resize it then copy and paste as a new layer into the center of the canvas. Use your plug in muera meister copies plug in on the encircle option. Set your shift x and y to 70 and the number of flowers you like. Move this layer to below the frame flood fill layer.
Next open the leaves branches you like, resize then copy and paste as a new layer at the bottom of the frame to the left. Duplicate it and go to image, mirror.
Open your tube of choice, resize. Then copy and paste as a new layer into the center of the frame. Adjust it as needed. Add the clip art of choice to the bottom center of the tag. And then add a butterfly to either side of the bow at the top.
Finally add your text, copyrights, license number and tagger markings.
Save and your done! Thank you for trying my tutorial.
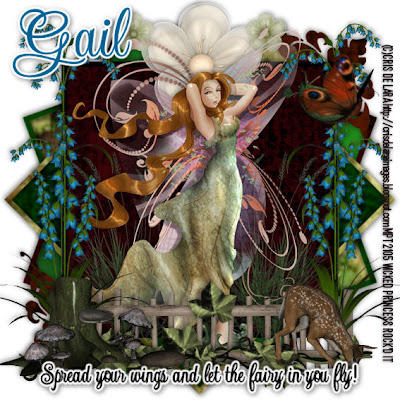
Fly (PTU)
This tutorial was written on November 9, 2009 by Shani aka Wicked Princess. The concept of the tag is mine and mine alone. Any resemblance to any other tag/tut is pure coincidence. This was written for those with working knowledge of PSP.
Supplies Needed:
++Paint Shop Pro ( I used 10 but any version should work)
++Scrap kit Faire Wylde by Aussie Scrap Designs which can be purchased Example Text
++Template 9 By Alyssa can be found HERE
++Tube of choice or the one I used. I used the artwork of Cris De Lara which can be purchased HERE
++Font and Mask of choice
Let’s get Started!
**NOTES:
-Add Drop shadow of choice as you go
-You can merger layers as you want to make things easier for yourself.
Open the template in PSP, using your shortcut keys on your keyboard (SHIFT+D) duplicate the template as a new image. Close the original.
Open several papers of choice, resizing as needed. For example, when I look at the blue bar where it tells me what I’ve opened (say like paper 2) it tells me what percentage I’m viewing it at. For me it’s usually 16%, so I resize to 16% bringing it to 100%. ( I hope that made sense!) Once you’ve done this, minimize for later use.
Next go to the bottom template layer and go to selections, select all, then float, selections defloat. Don’t forget to go to selections, none then delete the template layer. Repeat this process for the rest of the template. **Note I closed off all the layers, but the scallops, the top frame, and top background and merged them all. This was easier for me to do.
Open the gauzy flower of your choosing. Resize as needed, then copy and paste as a new layer towards the top center of your canvas. Add two smaller flowers to either side.
Next open the cat tail weeds, resizing as needed. Copy and paste as a new layer. Move below the top frame layer, moving it to the left. Duplicate it and go to image, mirror.
Then open your tube of choice, resizing as needed. Copy and paste as a new layer to the center of the tag. Adjust as needed.
Now open the fencing, resize then copy and paste as a new layer towards the bottom. Add the ivy string to the bottom of it.
Next open all the blue bonnet bouquets. First resize the double stranded one, then copy and paste as a new layer to the left of the tag. Duplicate it and go to image mirror. Then add the next two, repeating this process. Look at tag for example.
Open the tree stump with mushrooms, resize then copy and paste as a new layer to the right of the fence. Add the deer to the opposite side. Then the fairy boat of choice to the upper right portion of the tag.
Finally add your text, copyrights and tagger markings.
Save and your done! Thank you for trying my tutorial!
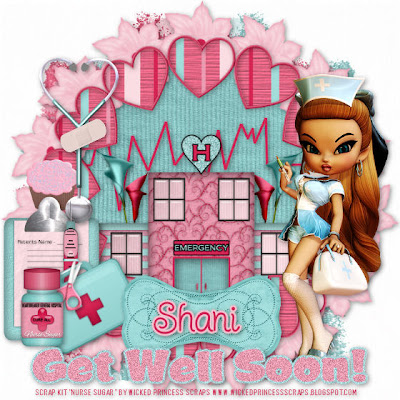
Get Well Soon (PTU)
This tutorial was written on November 21, 2009hani aka Wicked Princess. The concept of the tag is mine and mine alone. Any resemblance to any other tag/tut is pure coincidence. This was written for those with working knowledge of PSP.
Supplies Needed:
++Paint Shop Pro ( I used 10 but any version should work)
++Nurse Naughty Scrap kit by me can be purchased HERE OR HERE OR HERE OR HERE
++Tube of choice or the one I used. I used the tube that is provided in the kit.
++Plug ins:
-Muera Meister Copies
++Font and Mask of choice
**NOTES:
-Add Drop shadow of choice as you go
-You can merger layers as you want to make things easier for yourself.
Open a blank transparent canvas of 600x600
Open several papers of choice, resizing as needed. For example, when I look at the blue bar where it tells me what I’ve opened (say like paper 2) it tells me what percentage I’m viewing it at. For me it’s usually 16%, so I resize to 16% bringing it to 100%. ( I hope that made sense!) Once you’ve done this, minimize for later use.
Flood fill the canvas with your choice of paper. Add your mask and merge the group. NOTE: I added another raster layer, and repeated the process. On the second mask layer, I mirrored it. This is optional.
Next open the heart frame, copy and paste as a new layer into the center of the canvas.
Using your magic wand tool, click inside one of the hearts. Holding down your shift key on your keyboard, click inside each of the other one of the hearts, still with your magic wand tool. Go to selections, modify, expand by 2. Add a new raster layer and flood fill with your choice of paper. Go to selections, none. Move this layer below the frame layer.
Now add another raster layer, move it below the flood filled hearts layer. Go back to your hearts frame layer, and using you magic wand tool, click inside the frame. Go to selections, modify expand by 4. Flood fill on the new blank raster layer with your choice of paper. Go to selections, none.
Next open the flower of your choosing. Copy and paste as a new layer. Using your plug in muera meister copies, use the encircle option. Set the shift x and y at 80 and any number of flowers you like. Click ok. Then move this layer below the hearts frame and fill layers.
Then open the stat line, resize as needed and copy and paste as a new layer. Move this below the frame fill layer (hearts). Erase the end pieces that can be seen outside the frame.
Next open the hospital and resize it. Copy and paste as a new layer. Move it below the hearts frame and fill layers. Add the cala lilly bouquet after resizing to either side of the hospital, and move it below this layer.
Open the tube of your choosing, resize, then copy and paste as a new layer, to the right of the tag.
Then open up several elements, the pill bottle, clip board, syringe, cupcake, scissors and first aid kit. Resize them then copy and paste as new layers, arranging them as you like to the left.
Now open the bone tag of choice, and copy then paste as a new layer to the bottom center of the frame.
Open the stethoscope and resize. Copy and paste as a new layer to the upper left of the tag. Add a band aid over the center of the stethoscope.
Finally add your text of choice and any copyrights. Save and your done!
Thank you for trying my tutorial.
Wednesday, November 18, 2009
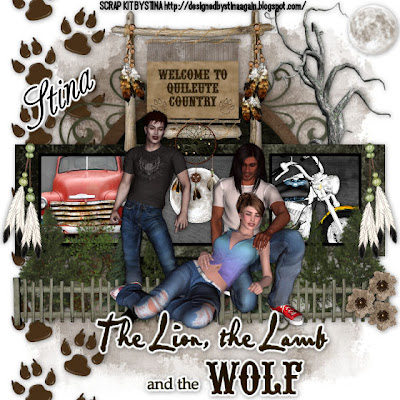
The Lion, The Lamb and the Wolf PTU
The Lion, The Lamb and The WOlf
This tutorial was written on November 17, 2009 by Shani aka Wicked Princess. The concept of the tag is mine and mine alone. Any resemblance to any other tag/tut is pure coincidence. This was written for those with working knowledge of PSP.
Supplies Needed:
++Paint Shop Pro ( I used 10 but any version should work)
++Scrap kit by Stina called Prelude to New Moon can be purchased HERE
++Template 14 by Alyssa can be found HERE
++Tubes of choice or the ones I used from the kit.
++Font and Mask of choice
Let’s get Started!
**NOTES:
-Add Drop shadow of choice as you go
-You can merger layers as you want to make things easier for yourself.
Open the template in PSP, using your shortcut keys on your keyboard (SHIFT+D) duplicate the template as a new image. Close the original.
Next go to the bottom template layer and go to selections, select all, then float, selections defloat. Don’t forget to go to selections, none then delete the template layer. Repeat this process for the rest of the template.
Open several papers of choice, resizing as needed. For example, when I look at the blue bar where it tells me what I’ve opened (say like paper 2) it tells me what percentage I’m viewing it at. For me it’s usually 16%, so I resize to 16% bringing it to 100%. ( I hope that made sense!) Once you’ve done this, minimize for later use.
Add a new raster layer, flood fill with your choice of paper. Add your mask, and merge group. Move this layer to the bottom.
Open the wolf tracks element, resize if you like then copy and paste as a new layer to the left of the tag. Move this layer to just above the mask layer.
Choose the tree with moon you like the best. Resize it then copy and paste as a new layer towards the upper right hand corner of the tag. Make sure this is below the frame layers though.
Next open the sign you like, resize then copy and paste as a new layer. Centering it behind the frames background layers. Adjust as needed.
Now open the bella’s truck tube, her motorcylcle and on of the moons. Resize them, crop and copy and paste as new layers into each of the frames. Move these layers below the frame layers.
Then open the tree line with fencing, resize then copy and paste as a new layer towards the bottom of the template layers. Adjust as needed.
Add the dream catcher of your choosing to the top of the middle frame, so that it overlapps the sign a little.
Now add a flower of your choice, duplicating it twice and moving in the arrangement you like to the bottom right hand corner of the framed layer.
Next open the feather and beads you like to either side of the frame. Adjust and resize as needed.
Add the tube of choice to the center of the tag, adjust as needed.
Also add the word art or text of choice. Add your copyrights and tagger markings
Save and your done!
Thank you for trying my tutorial!
Monday, November 9, 2009
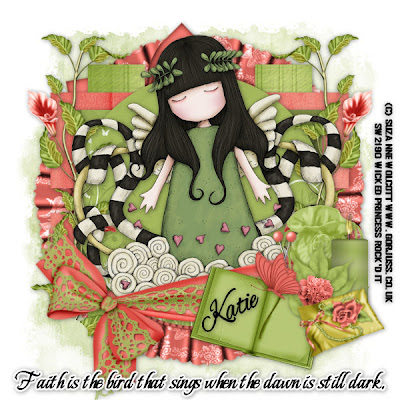
Faith Song PTU
Faith Song PTU
This tutorial was written on November 9, 2009 by Shani aka Wicked Princess. The concept of the tag is mine and mine alone. Any resemblance to any other tag/tut is pure coincidence. This was written for those with working knowledge of PSP.
Supplies Needed:
++Paint Shop Pro ( I used 10 but any version should work)
++Scrap kit by Crazed Creations called Vintage Dreams can be purchased HERE
++Template 51 by Yvette can be found HERE
++Tube of choice or the one I used. I used the artwork of Suzanne Wolcott and it can be purchased HERE
++Font and Mask of choice
Let’s get Started!
**NOTES:
-Add Drop shadow of choice as you go
-You can merger layers as you want to make things easier for yourself.
Open the template in PSP, using your shortcut keys on your keyboard (SHIFT+D) duplicate the template as a new image. Close the original. **Increase the canvas size by going to image, canvas size then increase it to 600x600.
Next go to the bottom template layer and go to selections, select all, then float, selections defloat. Don’t forget to go to selections, none then delete the template layer. Repeat this process for the rest of the template.
Open several papers of choice, resizing as needed. For example, when I look at the blue bar where it tells me what I’ve opened (say like paper 2) it tells me what percentage I’m viewing it at. For me it’s usually 16%, so I resize to 16% bringing it to 100%. ( I hope that made sense!) Once you’ve done this, minimize for later use.
Add a new raster layer, flood fill with your choice of paper. Add your mask, and merge group. Move this layer to the bottom.
Open the large ruffled frame, copy and paste as a new layer, moving below all the template layers. Angle it how you want.
Then open the Calla Lily Branches, copy and paste as a new layer to the left of the tag. Duplicate it and go to image, mirror.
Add your tube of choice after resizing, to the center of the circle template layer. Adjust and arrange as you like.
Open the wrap ribbon of choice, resize it then copy and paste as a new layer, moving it to the bottom of template layers.
Now open the book, sachet pillow, flower butterfly, sachet bag and pins you like. Also the candle. Resize them then group as you like in the bottom right hand corner of the tag.
Add your text of choice, copyrights, license info and tagger markings.
Save and your done!
Thanks for trying my tutorial.
Hot Stuff PTU
Hot Stuff –PTU
This tutorial was written on November 9, 2009 by Shani aka Wicked Princess. The concept of the tag is mine and mine alone. Any resemblance to any other tag/tut is pure coincidence. This was written for those with working knowledge of PSP.
Supplies Needed:
++Paint Shop Pro ( I used 10 but any version should work)
++Scrap kit by Creations by Jo called Obessive Rac Disorder (ORD) can be purchased HERE
++Template 51 by Kristen can be found HERE
++Tube of choice or the one I used. I used the work of Ismael Rac which can be purchased HERE You must have a valid license in order to use his work.
++Plug ins:
-Eye Candy 4000 Gradient Glow
-Penta, Jeans
-Xero, Soft Mood
++Font and Mask of choice
Let’s get Started!
**NOTES:
-Add Drop shadow of choice as you go
-You can merger layers as you want to make things easier for yourself.
Open the template in PSP, using your shortcut keys on your keyboard (SHIFT+D) duplicate the template as a new image. Close the original. **Increase the canvas size by going to image, canvas size then increase it to 600x600. Also I deleted the word art layer.
Open several papers of choice, resizing as needed. For example, when I look at the blue bar where it tells me what I’ve opened (say like paper 2) it tells me what percentage I’m viewing it at. For me it’s usually 16%, so I resize to 16% bringing it to 100%. ( I hope that made sense!) Once you’ve done this, minimize for later use.
Open the tube of choice. Resize and copy and paste as a new layer. Center it into your flame layer. Duplicate it and on the top tube layer, use Xero, Soft Mood plug in. Set it at the random setting you like. Then use the Penta Jeans plug in on whatever setting you like. Go to the flame layer, go to selections, select all, selections float then defloat. Then go to selections, invert. Go to the top tube layer that you did all the plug ins to and hit the delete key. Add a very slight drop shadow to this layer. On the bottom tube layer, erase the bottom part of her. You want her to look like she’s right at the edge of the rectangle frame layer.
Next go to the bottom template layer and go to selections, select all, then float, selections defloat. Add a gradient glow of choice. Don’t forget to go to selections, none then delete the template layer. Repeat this process for the rest of the template.
Add a new raster layer, flood fill with your choice of paper. Add your mask, and merge group. Move this layer to the bottom.
Open one of the barbed wire circles you like. Copy and paste as a new layer and move it to the upper left hand corner of the tag, just above the circle template layer. Duplicate it and go to image, mirror then image, flip.
Next open the doodle of your choosing. Resize it then add a fat gradient glow in white. Change it so that it is standing up right, then copy and paste as a new layer. Move to the left of the tag, on top of the skinny rectangle layers. Then add the bead string of choice to the top of the rectangle frame layer.
Then open the flower string, resize then copy and paste as a new layer to the left of the tube on the rectangle frame layer. Duplicate it and go to image, mirror.
Now open the ribbon with word art you like, resize it then copy and paste as a new layer. Move to the bottom of the tube layers. Adjust as needed. Add a clip flower you like to either end and a star to the center.
Add any text you like, license info, copyrights and tagger markings.
Save and your done! Thank you for trying my tutorial!
Subscribe to:
Posts (Atom)