Tuesday, May 25, 2010
Fan Club (FTU)
This tutorial was written on May 25, 2010 Shani aka Wicked Princess. The concept of the tag is mine and mine alone. Any resemblance to any other tag/tut is pure coincidence. This was written for those with working knowledge of PSP.
Supplies Needed:
++Paint Shop Pro ( I used 10 but any version should work)
++Scrap kit by called Friendship Collection: Missy can be found HERE
++Template 340 By Missy can be found HERE
++ 3 Tubes of choice or the one I used. I used the artwork of Elias Chatzoudis can be purchased from HERE
++Font and mask of choice
++Plug Ins:
-Eye candy 4000
**NOTES:
-Add Drop shadow of choice as you go
-You can merger layers as you want to make things easier for yourself.
Open the template in PSP, using your shortcut keys on your keyboard (SHIFT+D) duplicate the template as a new image. Close the original.
Open several papers of choice, resizing as needed. For example, when I look at the blue bar where it tells me what I’ve opened (say like paper 2) it tells me what percentage I’m viewing it at. For me it’s usually 16%, so I resize to 16% bringing it to 100%. ( I hope that made sense!) Once you’ve done this, minimize for later use.
Next go to the bottom template layer and go to selections, select all, then float, selections defloat. Don’t forget to go to selections, none then delete the template layer. Repeat this process for the rest of the template. NOTE: I only added a glow to the word art AND moved it down.
Go to the background layer at the bottom of the layers palette, and flood fill the background layer with your choice of paper. Add your mask of choice.
Open the glitter splatter of your choosing. Resize then copy and paste as a new layer. Move it down to just above the mask layer. Also move it to the bottom left. Duplicate it and go to image, mirror, then image, flip.
Then open your first tube. Note that I used close ups that I had. Crop if needed, resize then copy and paste as a new layer below the first square frame layer to the left. Adjust as needed. Do the same thing for the other frame and tube.
Next open the torn paper, resize then copy and paste as a new layer. Move it to below the frame layers, just at the top of the frames. Duplicate it and go to image, flip. You should now have one above and below.
Now open the wrap bow you like. Resize then copy and paste as a new layer. Move it to the left of the frame, make sure it is above the frame layer. Duplicate it and go to image, mirror. Adjust as needed.
Then open the heart scatter, resize then copy and paste as a new layer to the left of the frame. Duplicate it and go to image, mirror. Note this should be above the bow layers.
Open the checkered arrows, resize then copy and paste as a new layer. Move to the upper left of the canvas, just above the frames and paper layers. Duplicate and go to image, mirror.
Next open both guitars. Resize them then copy and paste as a new layer. Move to the center between the two frame layers. Angle it so that the base of the guitar is pointing to the upper right of the canvas. Duplicate it then go to image, mirror then image, flip. Do this for the other guitar too.
Then open the stapled ribbon, resize then copy and paste as new layers. Move them to the upper left and upper right of the coordinating frames.
Now open the puffy lips. Resize then copy and paste as a new layer. Move to the upper left of the frame on the left. Then duplicate it and move to the bottom right of the other frame. Add the skull heart, placing it in opposite corners of the frame too.
Open your final tube of choice, resize then copy and paste as a new layer. Paste in the center between the frames. Make sure it’s below the word art layer.
Finally add your text, copyrights and license info! Save and your done! Thank you for trying my tutorial!
Monday, May 24, 2010
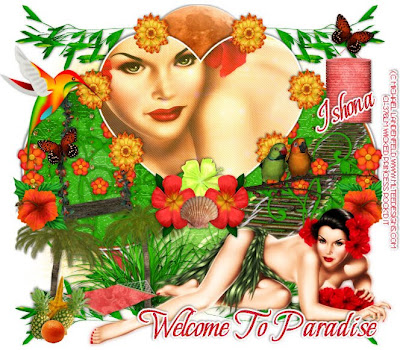
Tropical Paradise PTU
This tutorial was written on May 23, 2010 Shani aka Wicked Princess. The concept of the tag is mine and mine alone. Any resemblance to any other tag/tut is pure coincidence. This was written for those with working knowledge of PSP.
Supplies Needed:
++Paint Shop Pro ( I used 10 but any version should work)
++Scrap kit by called Tropical Paradise by Athena Designs can be found HERE
++Template 290 By Missy can be found HERE
++Tube of choice or the one I used. I used the artwork of Michael Landenfeld and can be purchased from HERE
++Font and mask of choice
++Plug Ins:
-Eye candy 4000
-penta jeans
**NOTES:
-Add Drop shadow of choice as you go
-You can merger layers as you want to make things easier for yourself.
Open the template in PSP, using your shortcut keys on your keyboard (SHIFT+D) duplicate the template as a new image. Close the original.
Open several papers of choice, resizing as needed. For example, when I look at the blue bar where it tells me what I’ve opened (say like paper 2) it tells me what percentage I’m viewing it at. For me it’s usually 16%, so I resize to 16% bringing it to 100%. ( I hope that made sense!) Once you’ve done this, minimize for later use.
Next go to the bottom template layer and go to selections, select all, then float, selections defloat. Don’t forget to go to selections, none then delete the template layer. Repeat this process for the rest of the template. NOTE: I deleted the word art layers. I also only added a gradient glow to all layers BUT the inter circle layers.
Go to the background layer at the bottom of the layers palette, and flood fill the background layer with your choice of paper. Add your mask of choice.
Then open the leafy branches. Resize then copy and paste as a new layer. Move it to the top and behind all the template layers. Duplicate it and go to image, mirror. Merge down one layer then duplicate it and go to image, flip.
Now open moon element, resize it then copy and paste as a new layer. Move it below the heart template layer at the top.
Open the glitter rain you like, resize then copy and paste as a new layer. On the circle layers, go to selections, select all, selections, defloat then selections, invert. On the rain layer, hit the delete key and then go to selections, none.
Next open the viney flower, resize then copy and paste as a new layer to the left of the circle layer on the left.
Then open the grass bunch, resize it then copy and paste as a new layer to the bottom left of the canvas. Duplicate it then go to image, mirror.
Open the swing, resize it then copy and paste as a new layer to the upper center of the circle layer on the left. Erase the parts you don’t want seen outside of the frame. Add the butterfly you like to one side of the
Now open the bamboo bridge, resize then copy and paste as a new layer. Place over the circle layer where you like it. On the circle layer , go to selections, select all, selections, defloat then selections, invert. On the bridge layer, hit the delete key and then go to selections, none.
Go back to the viney flower layer on the right, duplicate it then go to image, mirror. Move this to above the bridge layer.
Open your tube of choice. I ‘m using the close up that came with the tube I chose. Copy and paste your tube, centering it in the heart as you like it. Duplicate it then go to adjust, blur, guassian blur set to 3.00. Change the blend mode to opacity and merge down one layer. Using your plug in penta, jeans, set it to the setting you like. On the heart layer go to selections, select all, selections, float then selections, defloat. Now selections, invert and on the tube layer, hit the delete key. Go to selections, none. Change the opacity to 75.
Add the flower of your choosing after resizing to around the heart.
Then open the parrots on the twig, resize then copy and paste as a new layer. Move it to the right circle layer, around the center of it.
Next open the palm trees with the hammock you like, resize then copy and paste as a new layer to the bottom left of the canvas. Add two pineapples, orange and the starfish you like to the bottom left of the palm tree.
Open the paper lantern light, resize then copy and paste as a new layer to the upper right of the canvas. Add a butterfly to the top of it.
Then open the hibiscus flower of your choosing, resize it then copy and paste as a new layer on the left side, just above the palm trees. Duplicate then go to image, mirror.
Now open the other hibiscus flower you like, resize then copy and paste as a new layer. Move to the bottom center of the heart. Add another flower you like to either side of that. Add a shell to the bottom center of these flowers.
Next open the hummingbird you like resize then copy and paste as a new layer to the upper left of the circles.
Add your tube of choice to the bottom left of the tag.
Finally add your text, copyrights, license info and tagger markings! Save and your done! Thank you for trying my tutorial!
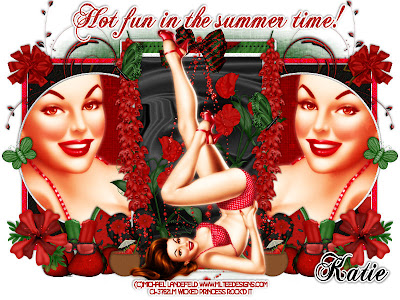
Hot Fun (PTU)
This tutorial was written on May 23, 2010 Shani aka Wicked Princess. The concept of the tag is mine and mine alone. Any resemblance to any other tag/tut is pure coincidence. This was written for those with working knowledge of PSP.
Supplies Needed:
++Paint Shop Pro ( I used 10 but any version should work)
++Scrap kit by called For Fruitylicious by Crazed’s Creations can be found HERE
++Template 331 By Missy can be found HERE
++Tube of choice or the one I used. I used the artwork of Michael Landenfeld and can be purchased from HERE
++Font and mask of choice
**NOTES:
-Add Drop shadow of choice as you go
-You can merger layers as you want to make things easier for yourself.
Open the template in PSP, using your shortcut keys on your keyboard (SHIFT+D) duplicate the template as a new image. Close the original.
Open several papers of choice, resizing as needed. For example, when I look at the blue bar where it tells me what I’ve opened (say like paper 2) it tells me what percentage I’m viewing it at. For me it’s usually 16%, so I resize to 16% bringing it to 100%. ( I hope that made sense!) Once you’ve done this, minimize for later use.
Next go to the bottom template layer and go to selections, select all, then float, selections defloat. Don’t forget to go to selections, none then delete the template layer. Repeat this process for the rest of the template. .
Go to the background layer at the bottom of the layers palette, and flood fill the background layer with your choice of paper. Add your mask of choice.
Open the doodle of your choosing. Resize it then copy and paste as a new layer. Move it to just below the middle rectangle layers and to the left. Duplicate it and go to image, mirror. Adjust as needed.
Then open you tube of choice. I used the close up that came with the tube I chose. The original close up lays to the side. I rotated it and then moved it to where I liked it on the left circle. Duplicate it then go to adjust, blur, guassian blur set to 3.00. Change the blend mode on this layer to overlay. Merge down one layer. Change the blend mode on this layer to screen. Duplicate it and then go to image, mirror. Back on the left circle layer, go to selections, select all then selections, defloat. Now selctions, invert and on the tube layer hit the delete key. Go to selections, none. Do the same thing for the opposite side.
Next open the vine flower you like, resize then copy and paste as a new layer. Move it to the center rectangle layer, towards the top. Duplicate it and move the other one to the bottom right of the rectangle.
Then open the butterfly you like, resize then copy and paste as a new layer to outside of the circle on the left, where you like it. Duplicate it and move to the other side where you like it.
Open the spray doodle you like, resize then copy and paste as a new layer. Move it to the upper center of the rectangle you like, then add a bow of your choosing to the top of that.
Now open a bow of your choosing then resize and copy and paste as a new layer to the upper left corner of the outside rectangles at the top. Duplicate it then go to image, mirror.
Next open the heather flower stalks, resize then copy and paste as a new layer. Move them to the outside of the center rectangle. Duplicate it then go to image, mirror. Adjust as needed.
Now we’re going to make our groupings on the bottom of the circle layers. First open the strawberry bundle. Resize then copy and paste as a new layer at the bottom of the circle layer. To make things easier, just assume your going to duplicate it all and mirror it to the other side. Now add the watermelon slice, moving it below the strawberries and angle it. Move it toward the right of the strawberries. Now open both Popsicles, resize them and paste them to the left of the watermelon. Cross and angle them like in the example. Pick the flip flop you like, resize then copy and paste as a new layer. Move them to the right of the watermelon, again all under the strawberries layer. Duplicate the flip flop to make a “pair” angle them as you like. Add a pair of sunglasses to the top (and above the ) strawberries. Then add a coconut drink to the right of the strawberries. And finally the flower of your choice to the corner above the strawberries. Add another butterfly you like through out the tag.
Open you other tube of choice, resize then copy and paste as a new layer into the center of the canvas.
Add your text, copyrights and tagger markings. Save and your done!
Thank you for trying my tutorial!
New Tut's coming!
Morning all :) Or afternoon really LOL!
I've got several tut's coming later today. A few PTU and a FTU! I have another kit I snagged that I'll be making a tut out of...FTU again! I'll try to do more of a mix for you all.
There are tons of awesome FTU kits! I need to start snagging :)
Look back later for more!
Shani
I've got several tut's coming later today. A few PTU and a FTU! I have another kit I snagged that I'll be making a tut out of...FTU again! I'll try to do more of a mix for you all.
There are tons of awesome FTU kits! I need to start snagging :)
Look back later for more!
Shani
Thursday, May 13, 2010
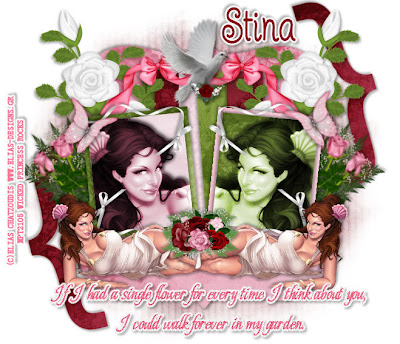
Rose Garden PTU
This tutorial was written on April 15, 2010 Shani aka Wicked Princess. The concept of the tag is mine and mine alone. Any resemblance to any other tag/tut is pure coincidence. This was written for those with working knowledge of PSP.
Supplies Needed:
++Paint Shop Pro ( I used 10 but any version should work)
++Scrap kit by Designs by Stina called Rose Gardencan be purchased HERE
++Template 9 by Rachel at Scraps of Enchantment. You can find it HERE
++Tube of choice or the one I used. I used the artwork of Elias Chatzoudis and you can purchase his work from HERE
++Font and mask of choice
**NOTES:
-Add Drop shadow of choice as you go
-You can merger layers as you want to make things easier for yourself.
Open the template in PSP, using your shortcut keys on your keyboard (SHIFT+D) duplicate the template as a new image. Close the original.
Open several papers of choice, resizing as needed. For example, when I look at the blue bar where it tells me what I’ve opened (say like paper 2) it tells me what percentage I’m viewing it at. For me it’s usually 16%, so I resize to 16% bringing it to 100%. ( I hope that made sense!) Once you’ve done this, minimize for later use.
Next go to the bottom template layer and go to selections, select all, then float, selections defloat. Don’t forget to go to selections, none then delete the template layer. Repeat this process for the rest of the template.
Go to the background layer at the bottom of the layers palette, and flood fill the background layer with your choice of paper.
Now open the rose cluster you like, resize then copy and paste as a new layer to the right side. Move it all the way down on your palettes layer just above the skinny rectangle layers. Duplicate it and go to image, mirror.
Then open the bow you like. Resize it then copy and paste as a new layer to the right. Place it above the skinny rectangle layers. Adjust as you like it then duplicate it and go to image mirror. Move it over slightly so it looks like they are joined. Add the dove, to the center of where they meet.
Open the rose bouquet you like. Resize it then copy and paste as a new layer. Move it below the square layers, move it the left and at an angle. Duplicate it and go to image, mirror. Adjust as needed.
Next open your tube of choice. Now I used one that had a close up in the pack. Copy and paste your tube, resize it then move it to the top square layer. Adjust as you need to. On the square layer, go to selections float, selections, defloat then selections invert. On the tube layer, hit the delete key. Go to selections none. Repeat this for the opposite square. Merge down one layer. Duplicate the tubes, go to adjust, blur, guassin blur at 3. On your layers palette, on the blend mode change it to Luminance. You should now see it with a cool effect.
Then open the curly ribbon you like. Resize it then copy and paste as a new layer. Move it to the upper right of the square where your tube is. Duplicate it and go to image mirror. Duplicate it again and go to image, flip. Do the same thing on the other side. Adjust them as you need to. It will look like it’s hugging the square. Add a butterfly to the opposite corners at the top.
Now open the tube again, on this one, I used the tube that was laying down. Resize then copy and paste as a new layer. Move to the bottom of the canvas. Duplicate it and go to image, mirror. Add a rose cluster to the center where they join.
Finally add your text, copyrights and tagger markings. Save and your done!
Thanks for trying my tut!
Tuesday, May 4, 2010
Jealous Much PTU
This tutorial was written on May 3, 2010 Shani aka Wicked Princess. The concept of the tag is mine and mine alone. Any resemblance to any other tag/tut is pure coincidence. This was written for those with working knowledge of PSP.
Supplies Needed:
++Paint Shop Pro ( I used 10 but any version should work)
++Scrap kit by Athena Designs called October Romance can be purchased HERE
++Template 346 by Missy can be found HERE
++Tubes of choice or the one I used. I used the artwork of Keith Garvey and it can be purchased from HERE
++Font and mask of choice
**NOTES:
-Add Drop shadow of choice as you go
-You can merger layers as you want to make things easier for yourself.
Open the template in PSP, using your shortcut keys on your keyboard (SHIFT+D) duplicate the template as a new image. Close the original.
Open several papers of choice, resizing as needed. For example, when I look at the blue bar where it tells me what I’ve opened (say like paper 2) it tells me what percentage I’m viewing it at. For me it’s usually 16%, so I resize to 16% bringing it to 100%. ( I hope that made sense!) Once you’ve done this, minimize for later use.
Add a new layer, flood fill with your choice of paper. Add your mask of choice and merge the group. Move to the bottom of the layers palette.
Then open the rose of choice. Resize then copy and paste as a new layer. Move it below the large circle’s glitter layer. Move it so it’s at a slight angle. Duplicate it and move the rose next to the other one.
Now open the lacey moon. Resize then copy and paste as a new layer. Move it to just above the bottom left circle layer. Duplicate and go to image, mirror. Move it up to the top circle layer on the right. Using your magic wand tool, click inside the one circle layer, go to selections, float then selections default. On the moon layer hit the delete key. Do the same for the moon at the upper right.
Next open the fan you like, resize then copy and paste as a new layer. Move it to the left of the frame layer, behind the background. Angle it as you like. Duplicate it and move it to the upper right side. Angle it the way you like it.
Open the wrapped bow, resize it then copy and paste as a new layer at the top of the big circle layer. Erase the parts that are hanging over the circle.
Add the bracket of your choice after resizing to the bottom left of the frame and the upper right of the frame.
Now open your first tube, resize then copy and paste as a new layer. Move it to the top right of the frame, adjust as needed.
Then open your other tubes, copy and paste after resizing and place where you want them in the frame. Using your magic wand tool, click inside the frame layer. Go to selections, modify, expand. Go to selections, invert. On the tube layer, hit the delete key. Then continue it for the other frames and tubes.
Open your butterflies of choice, resize them then copy and paste as a new layer. Move them at an angle around the top circle layer as you like.
Next open the flower you like, resize then copy and paste as a new layer. Duplicate it then place on either side of the bottom rectangle.
Add any text you like, copyrights, license info and tagger markings. Save and your done! Thanks for trying my tutorial.
Saturday, May 1, 2010
Bliss PTU
This tutorial was written on May 1, 2010 Shani aka Wicked Princess. The concept of the tag is mine and mine alone. Any resemblance to any other tag/tut is pure coincidence. This was written for those with working knowledge of PSP.
Supplies Needed:
++Paint Shop Pro ( I used 10 but any version should work)
++Scrap kit by Tootypup Scraps called Fairy Tale Dreams and can be purchased at any of the stores listed on her blog HERE
++Template 65 by Ali at Designs by Ali HERE
++Tube of choice or the one I used. I used the artwork Jamie Kidd and you can purchase her work from CILM
++Font and mask of choice
**NOTES:
-Add Drop shadow of choice as you go
-You can merger layers as you want to make things easier for yourself.
Open the template in PSP, using your shortcut keys on your keyboard (SHIFT+D) duplicate the template as a new image. Close the original.
Open several papers of choice, resizing as needed. For example, when I look at the blue bar where it tells me what I’ve opened (say like paper 2) it tells me what percentage I’m viewing it at. For me it’s usually 16%, so I resize to 16% bringing it to 100%. ( I hope that made sense!) Once you’ve done this, minimize for later use.
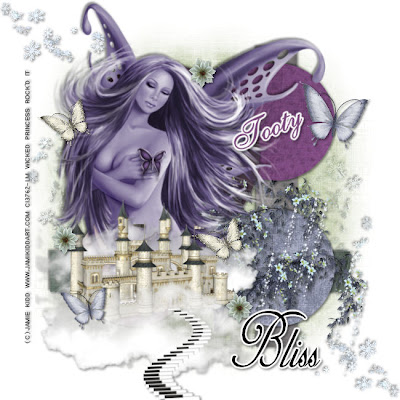
Now open the flower spray, resize it then copy and paste as a new layer. Move it to the upper left corner of the canvas, and also to the bottom of the layers palette. Duplicate it and go to image, mirror then image, flip.
Next open your tube of choice, resize then copy and paste as a new layer. Move to the left a little, adjusting as you like it. Add the tree bush that you like, angle it and move below the tube to the right.
Choose a castle you like, resize it then copy and paste as a new layer. Move it to the bottom left of the tube. You want it to look like the girl is overlooking the castle.
Open one butterfly you like, resize it then copy and paste as a new layer.
Duplicate it and resize it a bit more. Move it to somewhere on the other side of the canvas. Repeat this with another butterfly.
Then open a flower of your choosing, resize it then copy and paste to several spots through out the cavas.
add your text, copyrights and tagger markings
Save and your done.
Thanks for trying my tutorial.
Subscribe to:
Posts (Atom)