Wednesday, August 5, 2009

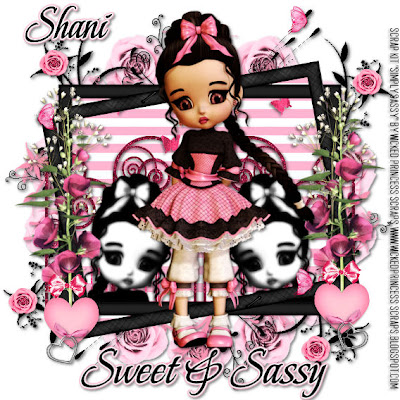
Sweet & Sassy-PTU


Sweet and Sassy-PTU

This tutorial was written on August 5, 2009 by Shani aka Wicked Princess. The concept of the tag is mine and mine alone. Any resemblance to any other tag/tut is pure coincidence. This was written for those with working knowledge of PSP.

Supplies Needed:

++Paint Shop Pro ( I used 10 but any version should work)

++Scrap kit by me called Sweet and Sassy can be purchased from HERE OR HERE

++Tube of choice or the one included.

++Plug ins:
-Penta, Jeans
-Xero greytinter
-Xero, Radiance
-Xero, Soft Mood
-Muera Meister Copies

Let’s get started!

**NOTES:
-Add Drop shadow of choice as you go
-You can merger layers as you want to make things easier for yourself.


Open several papers of choice, resizing as needed. For example, when I look at the blue bar where it tells me what I’ve opened (say like paper 2) it tells me what percentage I’m viewing it at. For me it’s usually 16%, so I resize to 16% bringing it to 100%. ( I hope that made sense!) Once you’ve done this, minimize for later use.


Next open the double frame of your choice. Resize then copy and paste as a new layer. Go to image, free rotate and rotate to the left 90 degrees. Use your magic wand tool and click inside the frame. Add a new raster layer and flood fill with your choice of paper. Go to selections, none.

Open your rose of choice. Resize then copy and paste into the center of the canvas. Use your plug in muera meister copies on the encircle option. I set the x and y shift to 75 and the number of roses is up to you. Move and adjust so its in the center of the canvas. Move below the frame and background layer.

Add a doodle brush you like to the center of the canvas. Move this layer above the rose ring you just made. Add another one in a different color, resize and rotate so it stands out.

Next open the glitter doodles with the butterflies. Resize then copy and paste as a new layer and move to below the frame layer. Duplicate it and go to, image mirror.

Now open your tube from the kit. Crop it then copy and paste as a new layer. For right now its ok to have it in the center of the canvas. We’re going to use a series of plug ins on it to get the effect I have.

First go to penta, jeans and use the setting you like. I used the default setting that was already there. Then go to Xero, greytinter and set it with everything to 0. Add Xero, radiance at what ever random setting you like. Finally add Xero, soft mood at what ever setting to kind of soften it.

Once this is all done, resize if needed then move it to the bottom left hand corner. Erase the parts you don’t want seen outside the frame. Duplicate it then go to image, mirror. Adjust as needed.

Open the babys breath element. Resize then copy and paste as a new layer to the left of the frame, towards the top a little. Duplicate it then go to image, mirror. Add the flower and stems you like. You’ll see on mine I erased the large leaves on either side. Resize and move towards the bottom of the frame on the left. Duplicate it then go to image, mirror.

Next add one of the faded hearts after resizing to the bottom of both the flowers. Then add a hanging heart charm to the bottom of those. Add a bow of choice right above the hearts.

Open another rose you like. Resize then copy and paste at random all over the tag as many as you like. Do the same with a butterfly of choice.

Open the tube again, resize it, then copy and paste as a new layer into the center of the tag. Adjust as needed.

Add your text of choice, copyrights if you use a different tube and any license info. If you use the tube from the kit, and just the stuff from the kit, please credit me with the name of the kit, designer name and url for my blog

Save and your done! Thank you for trying my tutorial

Monday, August 3, 2009

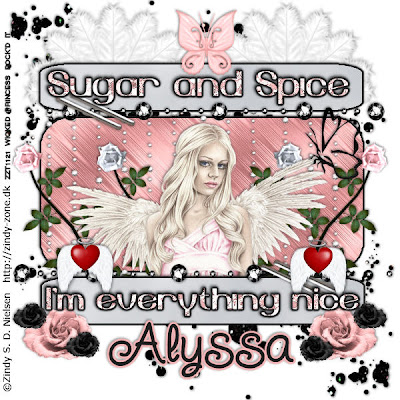
Everything Nice PTU


Everything Nice PTU

This tutorial was written on August 3, 2009 by Shani aka Wicked Princess. The concept of the tag is mine and mine alone. Any resemblance to any other tag/tut is pure coincidence. This was written for those with working knowledge of PSP.
Supplies Needed:


++Paint Shop Pro ( I used 10 but any version should work)

++Scrap kit by Alyssa called Good Vs. Evil can be purchased HERE

++Template 17 by Bev @ Horseplays Pasture can be found HERE

++Tube of choice or the one I used. I used the artwork of Zindy Nielsen can be purchased HERE

++Plug ins:

Eye Candy 4000 Gradient glow


++Mask and font of choice

++Plug ins:
-Eye Candy 4000 Gradient Glow

**NOTES:
-Add Drop shadow of choice as you go
-You can merger layers as you want to make things easier for yourself.

Open the template in PSP, using your shortcut keys on your keyboard (SHIFT+D) duplicate the template as a new image. Close the original.

Open several papers of choice, resizing as needed. For example, when I look at the blue bar where it tells me what I’ve opened (say like paper 2) it tells me what percentage I’m viewing it at. For me it’s usually 16%, so I resize to 16% bringing it to 100%. ( I hope that made sense!) Once you’ve done this, minimize for later use.


Next go to the bottom template layer and go to selections, select all, then float, selections defloat. Don’t forget to go to selections, none then delete the template layer. Add a gradient glow on the fat setting the colors of your choice. Repeat this process for the rest of the template.

Add a new raster layer, and flood fill with your choice of paper. Add your mask and merge group. Send this to the bottom of the layers palette.

Open the glitter splat of choice, resize then copy and paste as a new layer to the upper left part of the canvas. Move this to the bottom layer. Duplicate it and go to image mirror.

Choose a new bling rain you like. Resize then copy and paste as a new layer, moving below the smaller rectangle layer. Adjust so it looks like its blanketing behind them.

Open two roses you like. Resize, then copy and paste as new layers. Angle slightly to the left, spaced apart a bit. Duplicate then go to image, mirror.

Add your tube of choice so that it sits behind the rectangle layers. Adjust the roses as needed.

Open the feather fan you like. Copy and paste as a new layer to the upper left hand side below the rectangle layer. Duplicate it then go to image, mirror. Add a butterfly of your choice to the center.

Next add the single string of bling you like between the large rectangle and the smaller one at the top. Duplicate it then go to image, mirror then image flip. Adjust and move as needed.

Open the two roses you like, resize then copy and paste as new layers in bundles at the bottom corners of the lower rectangle layers.

Next add the staples to both rectangle layers as well as the wings with a heart. Move these to the outer side of the tube.

Add your text, copyrights, license number and tagger markings.

Save and your done!

Thanks for trying my tutorial.

Lion and the Lamb PTU


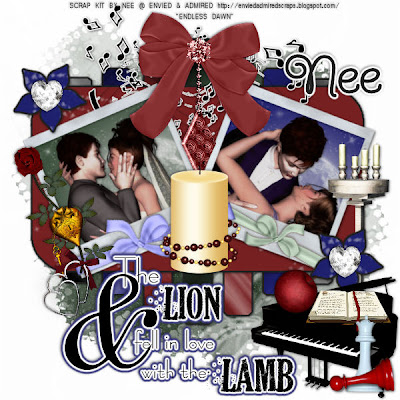
Lion & the Lamb-PTU

This tutorial was written on August 3, 2009 by Shani aka Wicked Princess. The concept of the tag is mine and mine alone. Any resemblance to any other tag/tut is pure coincidence. This was written for those with working knowledge of PSP.
Supplies Needed:

++Paint Shop Pro ( I used 10 but any version should work)

++Scrap kit called Endless Dawn by Nee @ Envied and Admired Scraps can be purchased HERE OR HERE OR HERE

++Template 3 by Bev @ Horseplays Pasture can be found HERE

++Plug ins:
Xero, radiance
Eye Candy 4000 gradient glow


++Font and mask of choice

Let’s get Started!

**NOTES:
-Add Drop shadow of choice as you go
-You can merger layers as you want to make things easier for yourself.

Open the template in PSP, using your shortcut keys on your keyboard (SHIFT+D) duplicate the template as a new image. Close the original.

Open several papers of choice, resizing as needed. For example, when I look at the blue bar where it tells me what I’ve opened (say like paper 2) it tells me what percentage I’m viewing it at. For me it’s usually 16%, so I resize to 16% bringing it to 100%. ( I hope that made sense!) Once you’ve done this, minimize for later use.


Next go to the bottom template layer and go to selections, select all, then float, selections defloat. Add a gradient glow that you like. Don’t forget to go to selections, none then delete the template layer. Repeat this process for the rest of the template.


Add a new raster layer, flood fill with your choice of paper. Add your mask and merge group. Move this to the very bottom of your layers palette.

Ok now we’re going to make the Polaroid pics. Open the Polaroid frame of your choice, resize it. Use your magic wand tool and click inside the frame and expand by 6. Add a new raster layer, and flood fill with your choice of paper. Go to selections, none. Crop the tube from the kit you want to use, and copy and paste as a new layer. Move it below the frame layer. Edit, copy merged and then paste into your canvas. Angle it to the left and place to the left of the template. Repeat this process for another framed picture. **NOTE I used Xero, Radiance at a random setting for the tubes.

Open the musical notes you like, then copy and paste as a new layer and add a gradient glow to it, I used white on the fat settings. Move to the top of the template.

Add a wrap ribbon to each Polaroid frame. Resize and angle as needed.

Next open the bow with charm you like to the upper center of the template. Resize as needed.

Open the piano, chess pieces, apple, book and candelabra. Resize, copy and paste as new layers to the bottom right of the tag.


Next add the big candle you like to the center of the two frames. Then add the rose and lock to the left hand side of the left frame.

Open the heart diamond, resize then copy and paste into one of the flowers from the template. Duplicate it and put it into the other one.

Add your word art and add the gradient glow you like.

If you choose to not use any outside tubes, please credit the Designer on the tag.

Add your text and your done!

Thank you for trying my tutorial.

Red Hawt-PTU (Animated)


Photobucket

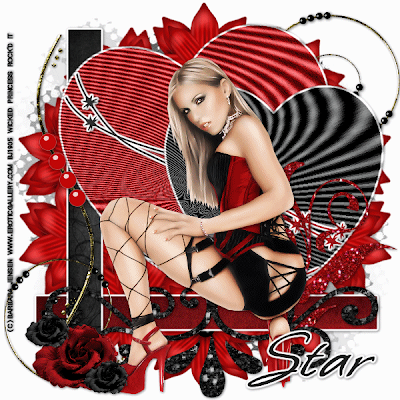
Red Hawt PTU (Animated)

This tutorial was written on August 3, 2009 by Shani aka Wicked Princess. The concept of the tag is mine and mine alone. Any resemblance to any other tag/tut is pure coincidence. This was written for those with working knowledge of PSP.
Supplies Needed:

++Paint Shop Pro ( I used 10 but any version should work)

++Animation Shop 3

++Scrap kit by Stargazer Musings called Love or Lust can be purchased HERE

++Template 19 by Bev at Horseplays Pastures can be found HERE

++Tube of choice or the one I used. I used the artwork of Barbara Jensen and you can purchase it
HERE

++Plug ins:

-Eye Candy 4000 Gradient Glow
-Muera Meister Copies
-Xero, Radiance
-Tramages, Moving Screen

++Font and mask of choice

**NOTES:
-Add Drop shadow of choice as you go
-You can merger layers as you want to make things easier for yourself.

Open the template in PSP, using your shortcut keys on your keyboard (SHIFT+D) duplicate the template as a new image. Close the original.

Open several papers of choice, resizing as needed. For example, when I look at the blue bar where it tells me what I’ve opened (say like paper 2) it tells me what percentage I’m viewing it at. For me it’s usually 16%, so I resize to 16% bringing it to 100%. ( I hope that made sense!) Once you’ve done this, minimize for later use.


Next go to the bottom template layer and go to selections, select all, then float, selections defloat. Don’t forget to go to selections, none then delete the template layer. Add a fat gradient glow in white. Repeat this process for the rest of the template

Add a new raster layer and flood fill with your choice of paper. Add your mask layer and merge group. I chose to duplicate the mask layer then flipped and mirrored it.

Open a flower of your choice, copy and paste as a new layer in the center of the canvas. Use your plug in Muera Meister Copies on the encircle option. Use 65 for shift x and y and set to your choice of number of flowers. Move this layer to above the mask layers.

Next open the doodle of your choice, copy and paste it as a new layer and move to the upper right hand portion of the canvas. Move this to the bottom above the flower layer. Duplicate it then go to image, mirror then image flip.

Open the glitter flower doodle of your choice, resize it. Copy and paste as a new layer and move it towards the bottom of the template.

Next open the glitter scroll doodle of choice. Resize then copy and paste as a new layer and center in the bottom of the tag.

Add your tube, use your plug in xero, radiance on whatever setting you like. I just used a random one.

Open a pearl doodle you like and copy and paste as a new layer, moving to the left of the tag.

Add three roses you like, resized towards the bottom left hand corner of the tag.

Add your text, copyrights, license info and tagger markings. Save as a psp image if you wish to go on to do the animation. If not save as a jpeg or png.


ANIMATION

Open Animation shop and minimize it, we’ll go to in just a minute.

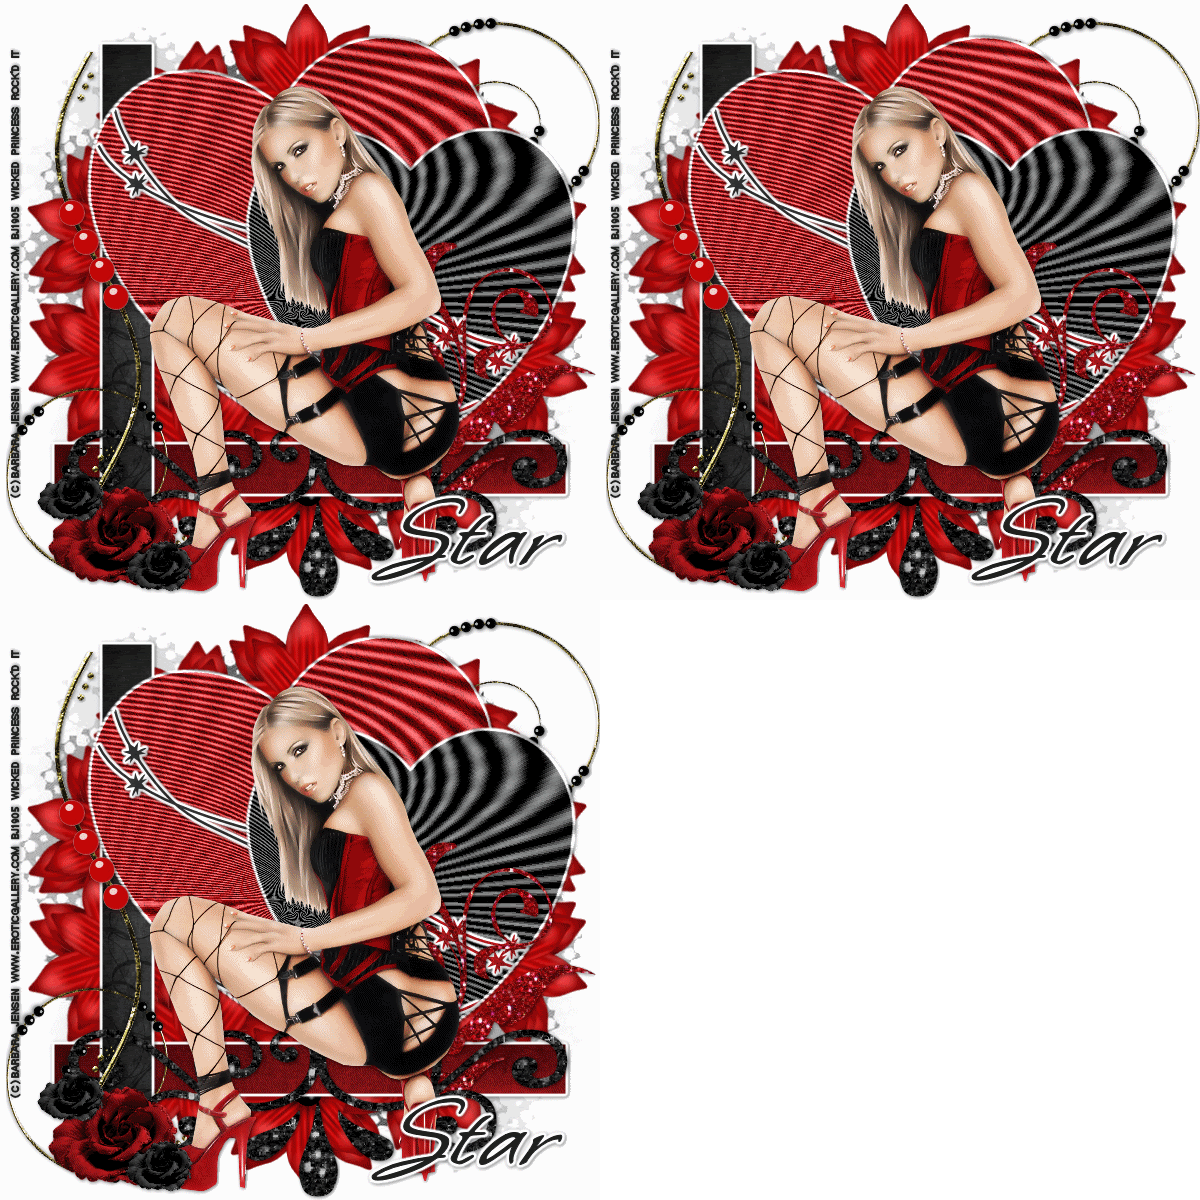
Back in PSP duplicate each of your hearts twice so that you have three hearts each.

Go to the bottom red heart layer and use your Tramages, Moving Screen plug in. I used the default setting and click ok. Add this plug in to the next one up, and change the frequency a bit higher. Do the same thing for the third heart layer.

Next go to the bottom black heart layer and do the same series of things with the plug in.

Now close off the top two heart layers on both the black and red. Go to edit, copy merged. Maximize Animation Shop and right click. Click on paste as new animation.

Back in PSP, close off the bottom hearts, and open the middle ones. Edict, copy merged, and back over to animation shop. Go to edit, paste after current frame.

Repeat this step for the final hearts.

Click on the little film strip at the top and animate it. If your satisfied, save it as a gif and your done!

Thank you for trying my tutorial!

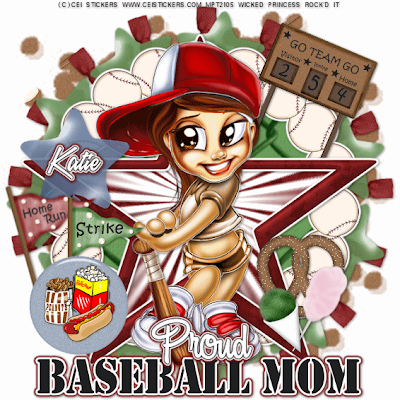
Proud Baseball Mom (PTU, Animated)


Photobucket


Proud Baseball Mom-PTU (ANIMATED)


This tutorial was written on August 3, 2009 by Shani aka Wicked Princess. The concept of the tag is mine and mine alone. Any resemblance to any other tag/tut is pure coincidence. This was written for those with working knowledge of PSP.
Supplies Needed:

++Paint Shop Pro ( I used 10 but any version should work)

++Animation Shop 3


++Scrap kit by Katie at Crazed Creations called Baseball Dayz Tagger size can be purchased HERE

++Tube of choice, or the one I used. I used the work of CEI Stickers which can be purchased HERE

++Plug ins:
-Muera Meister Copies
-Tramages Starmaker
-Eye candy 4000 Gradient Glow

++Font and mask of choice

**NOTES:
-Add Drop shadow of choice as you go
-You can merger layers as you want to make things easier for yourself.

Open several papers of choice, resizing as needed. For example, when I look at the blue bar where it tells me what I’ve opened (say like paper 2) it tells me what percentage I’m viewing it at. For me it’s usually 16%, so I resize to 16% bringing it to 100%. ( I hope that made sense!) Once you’ve done this, minimize for later use.


Open a canvas of 600x600, this may seem large but you can always resize and crop later!

Flood fill the canvas with your choice of paper. Add your mask layer and merge group.

Next open the baseball frame, copy and paste as a new layer into the center of the canvas. Add a fat gradient glow with white. Using your magic wand tool, click inside the frame and go to selections, modify, expand by 6. Add a new raster layer and flood fill with your choice of paper. Go to selections, none. Move this layer below the frame layer.

Open your choice of ribbon, resize. Copy and paste into the center of the canvas. Using your plug in, muera meister copies on the encircle option, and shifty x and y at 65. Use whatever number of ribbons you like. Move this layer below the baseball frame layer.

Do the same with your choice of balloon.

Next open the star frame, copy and paste as a new layer into the center of the canvas. Add a fat gradient glow with white. Use your magic wand tool, click inside the frame and go to selection, modify, expand by 7. Add a new raster layer and flood fill with your choice of paper. Go to selections, none. Move this layer below the star frame layer.

Open the scoreboard, copy and paste as a new layer, resize and angle slightly. Move this to the right of the frame, and below the star frame and background layer.

Add your tube of choice, and move to the center of the frame. Resize if you need to.

Next add a balloon, two flags and button of your choice to the right towards the bottom. You’ll need to resize and adjust.

Do the same with the pretzel, snow cone and cotton candy on the opposite side.

Add your text, copyright info, license and tagger markings.

Save it to this point. If you don’t want to do animation, then your done!

ANIMATION:

Go to the star background layer and duplicate it twice. You should now have three off them.

Go to the bottom one and use your plug in Tramages. Starmaker. I used the default setting on the first one and clicked ok.

Next go to the one above that and use the plug in again, but change the beam to a few higher. Repeat this for the last one.

Now to animate!

Open your Animation Shop. Go back to PSP, close off the top two background layers, then go to edit, copy merged. Over to animation shop… right click and the pop up menu will come up. Click on paste as new animation.

Back to PSP, close off the bottom layer, open up the middle one. Edit, copy, merged and back to animation shop. Go to Edit, paste after current frame.

In PSP close off the middle layer, and open the top one. Go to edit, copy, merged and back to animation shop. Go to edit, paste after current frame.

Click on the film strip button at the top and animate it. You should now have the background of the star animated!

Save it as a gif and your done. Thank you for trying my tutorial!

Saturday, August 1, 2009

New FREEBIE kit on my scrap blog!


Make sure you jump over to my scrap blog and grab this kit! Just click on the link up above below my header!