Friday, December 11, 2009

Teach our Children Page Layout (PTU)


**SPECIAL TY TO MY FRIEND KELLI FOR THE USE OF HER PICTURES!**

This tutorial was written on December 11, 2009 Shani aka Wicked Princess. The concept of the tag is mine and mine alone. Any resemblance to any other tag/tut is pure coincidence. This was written for those with working knowledge of PSP.
Supplies Needed:

++Paint Shop Pro ( I used 10 but any version should work)

++Scrap kit by Sticky Kisses Designs called Christmas Time can be purchased HERE


++ Template 4 by Yanti Scraps can be found HERE

++Photo of your choice, a smaller one works best.


**NOTES:
-Add Drop shadow of choice as you go
-You can merger layers as you want to make things easier for yourself.

We’re doing something a little different, as this is a scrap page layout or picture tag.

Open the template in PSP, using your shortcut keys on your keyboard (SHIFT+D) duplicate the template as a new image. Close the original. ***NOTE I RESIZED THE TEMPLATE BY 15%

Open several papers of choice, resizing as needed. For example, when I look at the blue bar where it tells me what I’ve opened (say like paper 2) it tells me what percentage I’m viewing it at. For me it’s usually 16%, so I resize to 16% bringing it to 100%. ( I hope that made sense!) Once you’ve done this, minimize for later use.

Next go to the bottom template layer and go to selections, select all, then float, selections defloat. Don’t forget to go to selections, none then delete the template layer. Repeat this process for the rest of the template.

Open your photo, do any cleaning up of your photo that you like. For instance I usually go to adjust, remove digital camera noise and just use the default setting. This usually softens the picture a bit and gives it a pretty glow. Now resize it and put it behind your frame layer. Using your magic wand tool, click inside the frame and go to selections, modify expand by 4. Go to selections, invert then on the picture layer, hit the delete key. Now go to selections, none.

Open the glitter border, and then copy and paste as a new layer. Move it below the frame clusters. Adjust it so that its sits to the left of the cluster a bit.

Now open the paper bell, resize it then copy and paste as a new layer. Move it to the upper right hand corner of the page. Add the peppermint candy ornaments on either side at an angle. Then add a flower of choice after resizing to the top of the bell, where everything meets.

Next open two flowers of your choosing, resize them then copy and paste in a cluster at the upper right hand corner of the frame cluster. Arrange how you like.

Your going to use your glitter border again, move it 90 degree’s so its horizontal. Copy and paste as a new layer, moving it towards the bottom of the page. Add a button of your choosing to where the two borders intersect.

Add any text you like then save!

Your all done and congrats you’ve just made a page layout!

Thanks for trying my tutorial.

Thursday, December 10, 2009

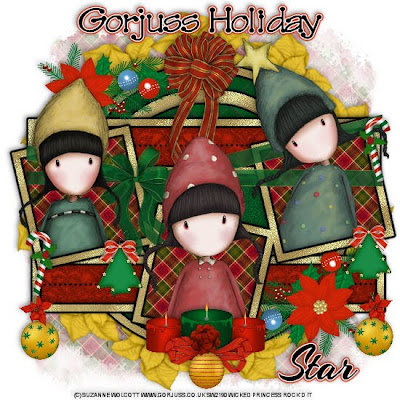
Gorjuss Holiday PTU


This tutorial was written on December 10, 2009 Shani aka Wicked Princess. The concept of the tag is mine and mine alone. Any resemblance to any other tag/tut is pure coincidence. This was written for those with working knowledge of PSP.
Supplies Needed:

++Paint Shop Pro ( I used 10 but any version should work)

++Scrap kit by Stargazer Muzings called Christmas Time can be purchased HERE

++ Template 81 by Melissa’s Creationz can be found HERE


++3 tubes of choice or the ones I used. I used the artwork of Suzanne Wolcott and her work can be purchased HERE

++Plug ins:
-Gradient Glow
-Muera Meister Copies

++Font and mask of your choice

**NOTES:
-Add Drop shadow of choice as you go
-You can merger layers as you want to make things easier for yourself.


Open the template in PSP, using your shortcut keys on your keyboard (SHIFT+D) duplicate the template as a new image. Close the original.

Open several papers of choice, resizing as needed. For example, when I look at the blue bar where it tells me what I’ve opened (say like paper 2) it tells me what percentage I’m viewing it at. For me it’s usually 16%, so I resize to 16% bringing it to 100%. ( I hope that made sense!) Once you’ve done this, minimize for later use.

Next go to the bottom template layer and go to selections, select all, then float, selections defloat. Add a gradient glow of your choosing. Don’t forget to go to selections, none then delete the template layer. Repeat this process for the rest of the template.

Add a new raster layer and move it to the bottom of the palette. Flood fill with your choice of paper. Add your mask and merge the group.

Open the poinsetta of your choosing. Resize it then copy and paste as a new layer. Use your plug in muera meister copies and set the x and y shift to 70. From there set the number to whatever you want it to be. Move this layer to below the template layers and above the mask layer.

Now open the poinsetta/ornament cluster. Resize then copy and paste as a new layer, towards the top of the template. Move it below the square frame layer and to the left. Duplicate it and go to image, mirror then image, flip.

Open the large ribbon with bow that you like, resize then copy and paste as a new layer. Arrange it so it looks like its wrapped around the triple frame.

Next open your tubes of choice, resize then copy and paste each one into the three frames you like. Note that I made mine look like they are popping out of the frame. To do this you move the tubes where you like them, then duplicate them. Move one set below the ribbon layer. Back on the top layer, use your eraser tool and erase the parts you don’t want seen outside the tube. Then go to the bottom tube layer and erase the parts you don’t want seen also. Thus giving the look like they are climbing out of the frame so to speak.

Then open the big poofy ribbon and bow of your choice. Resize it then copy and paste as a new layer. Move it to the top of the template and adjust as needed.

Now open the Christmas tree ornament, resize it then copy and paste as a new layer Move to the left hand frame towards the bottom, placing where you like. Duplicate it and move it to the right hand side frame where you like it.

Open the ornament of choice and resize. Copy and paste as a new layer towards the bottom of the template, on the bottom rectangle layer. Duplicate it and go to image, mirror. Add the poinsetta of choice after resizing to the top of the ornament.

Next open two candles of choice, resizing them. Group them together into the center bottom of the tag. Add an ornament of choice to the center of them, then a two bows above it.

Now add any text you like, copyrights and tagger markings. Save and your done! Thank you for trying my tutorial.

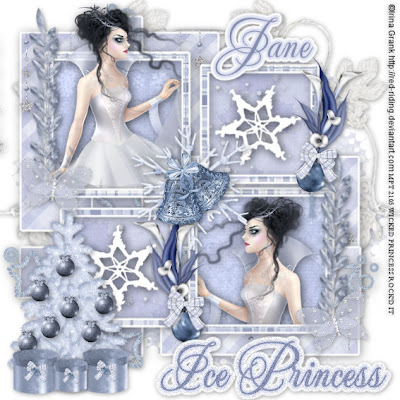
Ice Princess (PTU)


This tutorial was written on December 10, 2009 Shani aka Wicked Princess. The concept of the tag is mine and mine alone. Any resemblance to any other tag/tut is pure coincidence. This was written for those with working knowledge of PSP.
Supplies Needed:

++Paint Shop Pro ( I used 10 but any version should work)

++Scrap kit by JT Designs called Winter Icicle can be purchased HERE

++ Christmas template 4 by Melissa’s Creationz can be found HERE

++Tube of choice or the one I used. I used the artwork of Irina Grank which can be purchased from MPT HERE

++Plug ins:
-Gradient Glow

++Font and mask of your choice

**NOTES:
-Add Drop shadow of choice as you go
-You can merger layers as you want to make things easier for yourself.

++This is a full size kit! You will need to resize dramatically.


Open the template in PSP, using your shortcut keys on your keyboard (SHIFT+D) duplicate the template as a new image. Close the original.

Open several papers of choice, resizing as needed. For example, when I look at the blue bar where it tells me what I’ve opened (say like paper 2) it tells me what percentage I’m viewing it at. For me it’s usually 16%, so I resize to 16% bringing it to 100%. ( I hope that made sense!) Once you’ve done this, minimize for later use.

Next go to the bottom template layer and go to selections, select all, then float, selections defloat. Add a gradient glow of your choosing. Don’t forget to go to selections, none then delete the template layer. Repeat this process for the rest of the template. **Note I deleted the word art layer as I didn’t need it.

Add a new raster layer and move it to the bottom of the palette. Flood fill with your choice of paper. Add your mask and merge the group.

Open the leaf string, resize as needed. Copy and paste as a new layer and move to the upper right hand corner of the tag. Move this layer to just above the mask layer. Duplicate and go to image, mirror then image, flip. Adjust as you need to.

Then open the glitter string stars of your choice, resize as needed. Copy and paste as a new layer, moving it to the bottom square layer and erasing the parts you don’t want shown. Do this to the opposite one also.

Next open the glitter star and circle border. Copy and paste as a new layer, moving it to below the square layers, just above the skinny rectangle layer on the bottom. Adjust as needed. Add the same one to the other rectangle that goes up and down.

Open your tube of choice. Crop it as needed then copy and paste as a new layer. In the upper left hand frame, I made her look like she was popping out of the frame. To do this, duplicate the tube layer, and move the bottom one below the frame layer. On the top frame layer use your eraser tool, erasing what you don’t want seen outside the frame. On the one below the frame layer, remove the excess outside the frame.

Copy and paste your tube again, then go to image, mirror. Move this one below the frame layer and adjust. Use your magic wand tool and click inside the frame layer and go to selections, modify expand by 3 and go to your tube layer then hit delete. Go to selections, none.

Now open the snowflake with the bling. Resize it then copy and paste into the center of the tag. Move it so that it sits pretty much at the center connection of the frames. Add the bells to the center of that after resizing.

Next open the Christmas lilies, resize then copy and paste as a new layer. Move it to the left side of the bottom right hand side frame. Add an ornament and bow to the bottom of it. Do the same thing again for the frame directly above it but the opposite side.

Add a tree of choice, after resizing to the bottom left hand corner of the tag. Add your choice of ornaments and the gift box. Duplicate the box three times and resize one of them further. Place the smallest in the center of the other two and adjust as needed.

Then open the leaves, resize them then copy and paste as a new layer. Move to the upper left hand frame, and duplicate three times. Arrange them so they overlap each other slightly. Add a butterfly to the bottom of it. Do this process for the frame on the bottom left side, on the opposite frame.

Finally add any text you like, copyrights, and tagger markings. Save and your done!

Thanks for trying my tutorial.

Saturday, December 5, 2009

Winter Giggles PTU


This tutorial was written on December 5, 2009 Shani aka Wicked Princess. The concept of the tag is mine and mine alone. Any resemblance to any other tag/tut is pure coincidence. This was written for those with working knowledge of PSP.
Supplies Needed:

++Paint Shop Pro ( I used 10 but any version should work)

++Scrap kit by Tishia called Winter Dreams can be found HERE

++Template105 by Ali can be found HERE

++Tube of choice or the one I used. I used the artwork of Suzanne Wolctoot you can purchase her work HERE

++Plug ins:

-Gradient Glow

**NOTES:
-Add Drop shadow of choice as you go
-You can merger layers as you want to make things easier for yourself.


Open the template in PSP, using your shortcut keys on your keyboard (SHIFT+D) duplicate the template as a new image. Close the original.

Open several papers of choice, resizing as needed. For example, when I look at the blue bar where it tells me what I’ve opened (say like paper 2) it tells me what percentage I’m viewing it at. For me it’s usually 16%, so I resize to 16% bringing it to 100%. ( I hope that made sense!) Once you’ve done this, minimize for later use.

Next go to the bottom template layer and go to selections, select all, then float, selections defloat. Add a gradient glow of your choosing. Don’t forget to go to selections, none then delete the template layer. Repeat this process for the rest of the template. **Note I deleted the word art layer as I didn’t need it.

Add a new raster layer and move it to the bottom of the palette. Flood fill with your choice of paper. Add your mask and merge the group.


Open the knotted ribbon you like. Resize then copy and paste as a new layer. Move it to below the snowflake layers.

Then open your tube of choice and resize it. Copy and paste as a new layer into the center of the tag.

Next open the tree, resize then copy and paste as a new layer. Move to the left of the tag. Add several ribbons and buttons to the branches, arranging as you like.

Open the snow globe and resize it. Copy and paste as a new layer and move it to the bottom of the tree.

Now open the tag of your choosing, resize then copy and paste as a new layer. Move it to the upper right of the tag, adding a binder clip to the top of it. Place a bird of your choice to the right side of it.

Next open the sled, resize it then copy and paste as a new layer. Copy and paste it as a new layer, and angle it . Move to the right of the tag. Duplicate it and angle it the other way.

Open the snow man and the penguin. Resize both then copy and paste as new layers in front of the sleds.

Now add your text, copyrights, license info and tagger markings. Save and your done!

Thank you for trying my tutorial!

Thursday, December 3, 2009

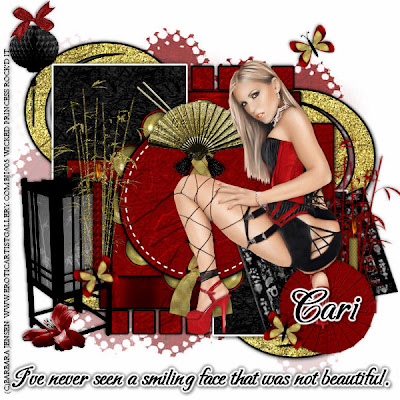
Beautiful Smiling PTU


This tutorial was written on December 3, 2009 Shani aka Wicked Princess. The concept of the tag is mine and mine alone. Any resemblance to any other tag/tut is pure coincidence. This was written for those with working knowledge of PSP.
Supplies Needed:

++Paint Shop Pro ( I used 10 but any version should work)

++Scrap kit by A SwtlyreCreation called Orient Express can be purchased HERE

++Template 7 by Wacky Scraps can be found HERE

++Tube of choice or the one I used. Used the artwork of Barbara Jensen and you may purchase her artwork HERE

++Plug ins:

-Gradient Glow
-Muera Meister Copies

++Font and Mask of choice

Open the template in PSP, using your shortcut keys on your keyboard (SHIFT+D) duplicate the template as a new image. Close the original.

Open several papers of choice, resizing as needed. For example, when I look at the blue bar where it tells me what I’ve opened (say like paper 2) it tells me what percentage I’m viewing it at. For me it’s usually 16%, so I resize to 16% bringing it to 100%. ( I hope that made sense!) Once you’ve done this, minimize for later use.

Next go to the bottom template layer and go to selections, select all, then float, selections defloat. Add a gradient glow of your choosing. Don’t forget to go to selections, none then delete the template layer. Repeat this process for the rest of the template.

Add a new raster layer and move it to the bottom of the palette. Flood fill with your choice of paper. Add your mask and merge the group.

Open the bead of choice. Resize it then copy and paste as a new layer. Use your plug in muera meister copies on the encircle option. Set the x and y at 40. Use whatever number you like. Move this layer below the circle template layer.

Then open the light box of choice. Resize it and copy then paste as a new layer to the bottom left of the tag. Add the flower of choice to the bottom of it.

Next open the divider of your choice. Resize it then copy and paste as a new layer to the right of the tag, angle it a little.

Now open the flower branch you like, resize then copy and paste as a new layer. Move it to the center of the divider and add a candle. Then add the umbrella towards the bottom of this bundle.

Then open up the other flower branch you like, copy and paste as a new layer and move over by the light box. Add a candle of choice, and then a butterfly to the bottom of it.

Open the laced bow, resize it then copy and paste as a new layer. Move it to the center of the circle layer. Towards the top add a set of chopsticks, angled then add the fan and tassels you like to the center.

Now open the ball light of your choice, resize it then copy and paste as a new layer into the upper left of the tag. Add a bow of choice to the very top. Now add a butterfly you like over the tag as you like.

Add your text, copyrights, license and tagger markings.

Save and your done!

Thanks for trying my tutorial.

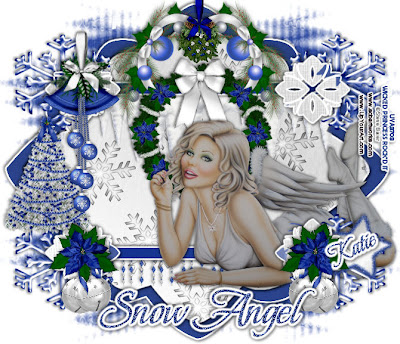
Snow Angel PTU


Snow Angel PTU

This tutorial was written on December 3, 2009 Shani aka Wicked Princess. The concept of the tag is mine and mine alone. Any resemblance to any other tag/tut is pure coincidence. This was written for those with working knowledge of PSP.
Supplies Needed:

++Paint Shop Pro ( I used 10 but any version should work)

++Scrap Kit by Crazed Creations called Silver Bells can be purchased HERE

++Template 87 by Ali can be found HERE

++Tube of choice or the one I used. I used the artwork of Steve Baier. You must have a valid license in order to use his work. You can purchase it from HERE

++Plug ins:
-Eye Candy 4000 Gradient Glow

++Font and mask of choice

**NOTES:
-Add Drop shadow of choice as you go
-You can merger layers as you want to make things easier for yourself.

Open the template in PSP, using your shortcut keys on your keyboard (SHIFT+D) duplicate the template as a new image. Close the original.

Open several papers of choice, resizing as needed. For example, when I look at the blue bar where it tells me what I’ve opened (say like paper 2) it tells me what percentage I’m viewing it at. For me it’s usually 16%, so I resize to 16% bringing it to 100%. ( I hope that made sense!) Once you’ve done this, minimize for later use.

Next go to the bottom template layer and go to selections, select all, then float, selections defloat. Add a gradient glow of your choosing. Don’t forget to go to selections, none then delete the template layer. Repeat this process for the rest of the template.

Add a new raster layer and move it to the bottom of the palette. Flood fill with your choice of paper. Add your mask and merge the group.

Open the snow drift, resize it then copy and paste as a new layer, below the top rectangle layer. What I did was leave it fairly big, then after copying and pasting I went to the top scalloped layer and did selections, float, selections, defloat then selections invert. Then go to the snow drift layer and hit the delete layer. Go to selections, none.

Add the glitter gems to the bottom below the rectangle layer on the bottom. Repeat the process above.

Next open the wreath, resize it then copy and paste as a new layer, to the top portion of the template layer. Move it down just a bit.

Then open the bundle of pine, ornaments and bows. Resize it then copy and paste as a new layer. Move it to the top left of the tag. Notice we’re going to put it into center, but you need to angle it as you like. Once you have it, duplicate and go to image, mirror. Then add the mistletoe you like to the center of that.

Add your tube of choice after you have resized it. Copy and paste as a new layer. Move her below the ornamental layer and adjust as needed.

Now open the snowflake you like, resize it then copy and paste as a new layer. Move to the upper right hand side of the tag, move it also below the ornamental layer. Duplicate it go to image, mirror then duplicate it again. Go to image, flip. Duplicate once more and go to duplicate and image mirror.

Open the Christmas tree you like, resize it then copy and paste as a new layer to the left of the tag. Add the bells of choice to the top left ornamental layer.

Then open the ornaments you like, resize then copy and paste as a new layer to the bottom ornamental layer. Duplicate it and go to image mirror. Add the poinsetta to each of the top of the ornaments.

Add your text of choice, copyrights, license info, tagger markings and your done!

Don’t’ forget to save.

Thank you for trying my tutorial.