Tuesday, June 29, 2010

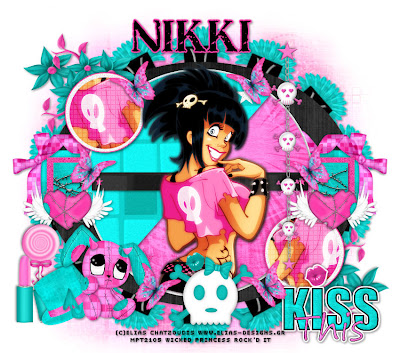
Kiss This PTU


This tutorial was written on June 29, 2010 Shani aka Wicked Princess. The concept of the tag is mine and mine alone. Any resemblance to any other tag/tut is pure coincidence. This was written for those with working knowledge of PSP.

Supplies Needed:

++Paint Shop Pro ( I used 10 but any version should work)

++Scrap kit by Nikki of Creative Intentionz called Yeah Kiss This can be purchased from HERE

++Template 271 By Missy can be found HERE

**NOTE: Scroll down on her blog and look on the left hand side to find the bundled template download links.


++ Tube of choice or the one I used. I used the work of Elias Chatzoudis and you can purchase it from MPT

++Font and mask of choice

++Plug Ins:


-penta, dot and cross
-muera meister copies


**NOTES:
-Add Drop shadow of choice as you go
-You can merger layers as you want to make things easier for yourself.

Open the template in PSP, using your shortcut keys on your keyboard (SHIFT+D) duplicate the template as a new image. Close the original.

Open several papers of choice, resizing as needed. For example, when I look at the blue bar where it tells me what I’ve opened (say like paper 2) it tells me what percentage I’m viewing it at. For me it’s usually 16%, so I resize to 16% bringing it to 100%. ( I hope that made sense!) Once you’ve done this, minimize for later use.

Next go to the bottom template layer and go to selections, select all, then float, selections defloat. Don’t forget to go to selections, none then delete the template layer. Repeat this process for the rest of the template.

Add a new raster layer and flood fill with your choice of paper. Send it to the bottom of the palette and add your mask of choice. Merge the group.

Now open the binder clip flower you like. Resize then copy and paste as a new layer. Use your plug in Muera Meister copies with the x and y set to 80. Also to whatever number of clips you like. Adjust as needed then move to the bottom of the palette just above the mask layer.

Then open the ribbon you like, resize then copy and paste as a new layer. Move it to the left, and the bottom rectangle layer. Adjust and duplicate. Go to image, mirror.

Open the barbed wire strand, resize then copy and paste as a new layer. Move it to just above the top rectangle layer.

Next open the flower vine bundle you like, resize then copy and paste as a new layer to the left hand corner, just below the small circle layer. Duplicate it then go to image, mirror then image, flip.

Now open your tube of choice. Copy and paste as a new layer. Duplicate then go to adjust, blur, guassian blur set to 3. Set the blend mode to overlay and merge down one layer. Duplicate the tube again, then move over the top of the circle in the upper left hand corner. Adjust where you want it. Add your plug in penta dot and cross. Duplicate it one more time and move it over to the circle on the bottom. On the circle layer go to selections, select all, selections, float then selections defloat then selections, invert. On the tube layer, hit the delete key. Repeat this for the other circle and tube.

Now make sure you tube is centered the way you like it in the center of the circles.
Add the lips tube to the “rear” of the tube.

Then open the winged heart. Resize then copy and pste as a new layer towards the bottom of the rectangle layers. Also to the left. Duplicate it and go to image, mirror.

Open the emo bunny, top hat, sucker and lipstick. Copy and paste them in a grouping to the bottom left of the tag.

Open the butterfly you like and then copy and paste around the circle as you like them. In between the two bottom ones, copy and paste the skull you like. Add the skull chain to the right of the tag towards the top.

Add the word art you like in the kit, to the bottom right of the tag.

Finally add your test, copyrights, license number and tagger markings, save and your done!

Thanks for trying my tutorial

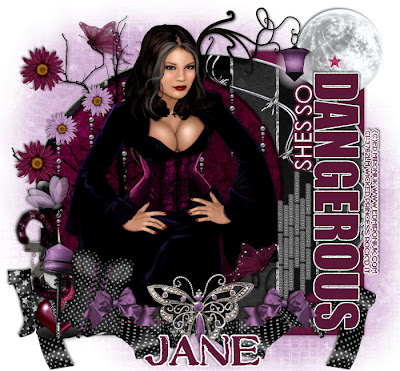
She's So Dangerous PTU


This tutorial was written on June 28, 2010 Shani aka Wicked Princess. The concept of the tag is mine and mine alone. Any resemblance to any other tag/tut is pure coincidence. This was written for those with working knowledge of PSP.

Supplies Needed:

++Paint Shop Pro ( I used 10 but any version should work)

++Scrap kit by JT Designs called Temptation can be found HERE

++Template 291 By Missy can be found HERE


++Tube of choice or the one I used. I used the artwork of Ed Mirounik and can be purchased from HERE

++Font and mask of choice

++Plug Ins:

-Eye candy 4000


**NOTES:
-Add Drop shadow of choice as you go
-You can merger layers as you want to make things easier for yourself.

Open the template in PSP, using your shortcut keys on your keyboard (SHIFT+D) duplicate the template as a new image. Close the original.

Open several papers of choice, resizing as needed. For example, when I look at the blue bar where it tells me what I’ve opened (say like paper 2) it tells me what percentage I’m viewing it at. For me it’s usually 16%, so I resize to 16% bringing it to 100%. ( I hope that made sense!) Once you’ve done this, minimize for later use.

Next go to the bottom template layer and go to selections, select all, then float, selections defloat. Don’t forget to go to selections, none then delete the template layer. Repeat this process for the rest of the template. NOTE: I only added a gradient glow to She’s So.

Go to the background layer at the bottom of the layers palette, and flood fill the background layer with your choice of paper. Add your mask of choice.

Open the folded ribbon of choice. Add to the left of the tag, towards the bottom. Duplicate it and go to image, mirror.

On the large circle behind the others, copy and paste the barb wire. Erase the parts that are hanging over the circle. Do this I go to Selections, float then selections defloat. Then go to selections, invert. On the wire layer, hit the delete key.

Then open the moon, and move it below the big circle layer and move to the right. Adjust it so it sits kind of centered behind the word art.

Now add the light pole, behind the top circle layer to the left a bit.

Open the beaded rain, resize then copy and paste as a new layer. Move it so it’s over the circle layer. go to Selections, float then selections defloat. Then go to selections, invert. On the beaded rain layer, hit the delete key.

Next open the tree and resize, copy and paste as a new layer over the top circle layer and move to the right. Add your choice of flowers through out the tree and a butterfly.

Now open your tube of choice. Resize then copy and paste as a new layer into the center of the circle. Duplicate it and on the bottom layer we’re going to erase some. On your circle layer go to Selections, float then selections defloat. Then go to selections, invert. On the bottom tube layer, hit the delete key. On the top tube layer erase the parts on the bottom you don’t want seen outside the circle.

Then open the handcuffs, corset, zippered heart, candle and boot you like. Cluster them together on te bottom left of the tag. Add the butterfly of your choice into the center of the ribbons where they meet. Add the bows you like to other side.

Finally add any text you like, copyrights, license info and tagger markings. Save and your done! Thanks for trying my tutorial.

Sunday, June 27, 2010

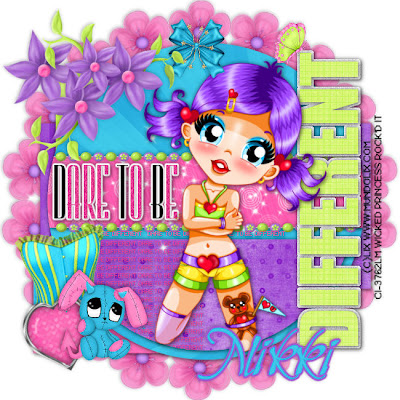
Dare To Be FTU


This tutorial was written on May 25, 2010 Shani aka Wicked Princess. The concept of the tag is mine and mine alone. Any resemblance to any other tag/tut is pure coincidence. This was written for those with working knowledge of PSP.

Supplies Needed:

++Paint Shop Pro ( I used 10 but any version should work)

++Scrap kit by called Smitten can be found HERE

++Template 297 By Missy can be found HERE **Note you have to scroll down her page some and look on the left for template links. download templates 291-310 to get them!


++ Tube of choice or the one I used. I used the work of Lix which can be purchased from HERE

++Font and mask of choice

++Plug Ins:

-Eye candy 4000
-penta, dot and cross
-muera meister copies


**NOTES:
-Add Drop shadow of choice as you go
-You can merger layers as you want to make things easier for yourself.

Open the template in PSP, using your shortcut keys on your keyboard (SHIFT+D) duplicate the template as a new image. Close the original.

Open several papers of choice, resizing as needed. For example, when I look at the blue bar where it tells me what I’ve opened (say like paper 2) it tells me what percentage I’m viewing it at. For me it’s usually 16%, so I resize to 16% bringing it to 100%. ( I hope that made sense!) Once you’ve done this, minimize for later use.

Next go to the bottom template layer and go to selections, select all, then float, selections defloat. Don’t forget to go to selections, none then delete the template layer. Repeat this process for the rest of the template. NOTE: I only added a glow to the word art

Open up the flower you like, resize then copy and paste as a new layer. Use your plug in, muera meister copies on the encircle option. set at 80 for the x and y and any number for the flowers. Move this below the templates laterys.

Next open the beaded string. Resize then copy and paste as a new layer. Move above the rectangle layer in the middle of the circle. Move it to the top of the rectangle. Duplicate it and go to image, flip. Move it to the bottom part of the rectanble.

Now open your tube of choice, resize then copy and paste as a new layer just to the left of the different word art.

Next open the corset, emo bunny and heart brad you like. Resize then copy and paste as a new layer to the bottom left of the tag.

Open the vined bundle flower, resize then copy and paste as a new layer to the upper left of the tag. Add the bow of your choice to the top center of the circle. Also a butterfly to the tip of the word art on the side.

Finally add your copyrights, tagger markings and license information.

Save and your done!

Thanks for trying my tutorial.

Sweet Valentine-PTU


This tutorial was written on June 27, 2010 Shani aka Wicked Princess. The concept of the tag is mine and mine alone. Any resemblance to any other tag/tut is pure coincidence. This was written for those with working knowledge of PSP.

Supplies Needed:

++Paint Shop Pro ( I used 10 but any version should work)

++Scrap kit by Tootypup Scraps called Black Rose and can be purchased at any of the stores listed on her blog HERE

++Template 117 by Ali HERE

++Tube of choice or the one I used. I used the tube that was in the kit. Please credit the artist HERE


++Font and mask of choice


**NOTES:
-Add Drop shadow of choice as you go
-You can merger layers as you want to make things easier for yourself.

Open the template in PSP, using your shortcut keys on your keyboard (SHIFT+D) duplicate the template as a new image. Close the original.

Open several papers of choice, resizing as needed. For example, when I look at the blue bar where it tells me what I’ve opened (say like paper 2) it tells me what percentage I’m viewing it at. For me it’s usually 16%, so I resize to 16% bringing it to 100%. ( I hope that made sense!) Once you’ve done this, minimize for later use.

Next go to the bottom template layer and go to selections, select all, then float, selections defloat. Don’t forget to go to selections, none then delete the template layer. Repeat this process for the rest of the template. NOTE: I deleted the doodle layers.


add a new raster layer, flood fill with your choice of paper. Add the mask you like, then merge group.

Next open the doodle that has the hearts, lips and stars. Resize then copy and paste as a new layer. Move to the top of the canvas, still under the template layers. Duplicate it and go to image, flip.

Now open the arch and gate covered in roses. Resize then copy and paste as a new layer. Move below the frame layer. Using your magic wand tool click inside the frame. Go to selections, modify expand by 2. Go to selections, invert. On the arch layer hit the delete key.

Then open the stair case covered in roses that has the tube on it also. Resize it then copy and paste as a new layer. Move to the left of the template, again above the frame layer. Adjust how you like it. Add the table and chair to the bottom of this.

Open the rose vine swag, resize then copy and paste as a new layer. Move it to the top of the canvas, then duplicate it. Go to image, flip.

Next open the lamp pole. Resize then copy and paste as a new layer to the right side of the frame. Adjust as needed.

Now open the my valentine music scroll, resize then copy and paste it slightly to the right of the lamp. Angle it as you like it. Add the feathered cupid’s bow of your choice to the side of it.

Then open the piano, resize then copy and paste as a new layer to the bottom of the scroll. Adjust as needed.

Open the rose bouquet then copy and paste as a new layer. Move it to the right of the piano.

Finally add your text, copyrights and tagger markings. Save and your done! Thank you for trying my tutorial.

Sunday, June 20, 2010

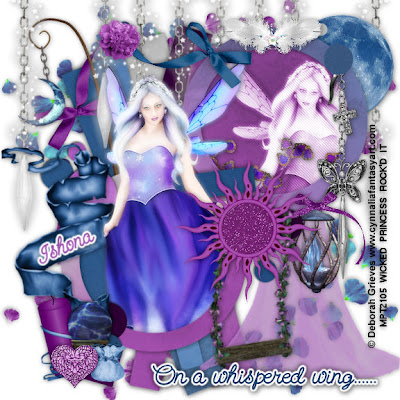
Whispered Wing PTU


This tutorial was written on June 20th 2010 Shani aka Wicked Princess. The concept of the tag is mine and mine alone. Any resemblance to any other tag/tut is pure coincidence. This was written for those with working knowledge of PSP.

Supplies Needed:

++Paint Shop Pro ( I used 10 but any version should work)

++Scrap kit by called Myth’s and Magic by Athena Designs can be found HERE

++Template 187 by Designs by Ali can be found HERE


++Tube of choice or the one I used. I used the artwork of Deborah Grieves and her work can be purchased from HERE

++Font

++Plug Ins:

-penta jeans


**NOTES:
-Add Drop shadow of choice as you go
-You can merger layers as you want to make things easier for yourself.

Open the template in PSP, using your shortcut keys on your keyboard (SHIFT+D) duplicate the template as a new image. Close the original.

Open several papers of choice, resizing as needed. For example, when I look at the blue bar where it tells me what I’ve opened (say like paper 2) it tells me what percentage I’m viewing it at. For me it’s usually 16%, so I resize to 16% bringing it to 100%. ( I hope that made sense!) Once you’ve done this, minimize for later use.

Next go to the bottom template layer and go to selections, select all, then float, selections defloat. Don’t forget to go to selections, none then delete the template layer. Repeat this process for the rest of the template. NOTE: I deleted the star layers.

Open the flower petal scatter you like first. Resize it then copy and paste as a new layer. Move it to the bottom of the layers palette, below all the template layers. Now move it to the upper left, position where you want it. Duplicate it and go o image, mirror. Then to image, flip. Merge down one layer. Do the same in the opposite corner with the other one.

Now open the bow that has the long side on one side, resize then copy and paste as a new layer to the upper part of the tag, towards the center. Open the other, and resize it the same. This time turn it around with your pick tool so that the tail ends meet. Put the flower of choice right in the middle of where they meet.

Next open the moon chain resize then copy and paste as a new layer. Move it below the background layer to the circle on the left. Arrange it and adjust it as you like.

Open the curtain/drapery you like, resize then copy and paste as a new layer. Move to below the top circle background layer. Also move it to there so it looks like it’s falling beneath it.

Next open the chain with crystals on them. Resize then copy and paste as a new layer. Move to the upper left of the tag. Duplicate it and go to image, mirror.

Now open the moon you like, resize tehn copy and paste as a new layer. Make sure this is also below the circle background layer and move it to the right of the circle frame.

Open your tube of choice. Resize then copy and paste as a new layer. Crop it where you will only need part of it. The upper half. Move it to below the circle frame layer on the right. Adjust where you like it. Duplicate it then go to adjust, blur, guassian blur set to 3. Then set the blend mode to overlay. Merge down one layer. Add your plug in, penta, jeans on the setting you like. Now change the blend mode to luminance. Erase the parts you don’t want seen outside of the circle frame.

Open the jeweled flower petals, crop then resize. Copy and paste as a new layer over the tube layer. Move where you like. Erase the parts you don’t want seen outside of the circle.

Then open the jeweled cage. Resize then copy and paste as a new layer. Move it to the bottom of the circle frame on the right.

At this point I have merged all the small circles together.

Now open the silver chain with the butterfly and cross on it. Copy and paste it to the right, just below the merged circles layer.

Next open the scroll banner you like, resize then copy and paste as a new layer to the left of the tag.

Open your tube again, resize it then copy and paste as a new layer. You want to position it over the second circle frame on the left. Duplicate it and go to adjust, blur, guassian blur set to 3. Change the blend mode to overlay and merge down one layer. Duplicate it again and move it to below the circle frame. On the top tube layers, erase the parts you don’t want showing outside of the frame. Go back to the other tube and erase the parts that shouldn’t show outside either.

Then open the candle, crystal ball, heart and bag of your choosing. Resize them then copy and paste as a new layer to the left of the tag, by the banner scroll. Group them as you like.

Open the swing, resize then copy and paste as a new layer and move it to the bottom of the upper circle frame. Add the sun of your choosing over that.

Next open the feather wings, resize then copy and paste as a new layer to the center of the upper circle frame.

Finally add your text, copyrights, license info and tagger markings. Save and your done!

Thanks for trying my tutorial.

Saturday, June 19, 2010

Rainbow Rockz PTU


**SCROLL DOWN AT THE BOTTOM FOR SECOND EXAMPLE**

This tutorial was written on April 15, 2010 Shani aka Wicked Princess. The concept of the tag is mine and mine alone. Any resemblance to any other tag/tut is pure coincidence. This was written for those with working knowledge of PSP.

Supplies Needed:

++Paint Shop Pro ( I used 10 but any version should work)

++Scrap kit by called Rockin’ with Attitude by Crazed’s Creations can be found HERE

++Template 157 by Ali can be found HERE

++Tube of choice or the one I used. In the main example I used the artwork of Kenny Kiernan, which is a PTU artist. Check artists Web Site to find out where to purchase. and in the second example I used the tubes provided made by DNscraps

++Plug ins:
-Penta, dot and cross

++Font and mask of choice


**NOTES:
-Add Drop shadow of choice as you go
-You can merger layers as you want to make things easier for yourself.

Open the template in PSP, using your shortcut keys on your keyboard (SHIFT+D) duplicate the template as a new image. Close the original.

Open several papers of choice, resizing as needed. For example, when I look at the blue bar where it tells me what I’ve opened (say like paper 2) it tells me what percentage I’m viewing it at. For me it’s usually 16%, so I resize to 16% bringing it to 100%. ( I hope that made sense!) Once you’ve done this, minimize for later use.

Next go to the bottom template layer and go to selections, select all, then float, selections defloat. Don’t forget to go to selections, none then delete the template layer. Repeat this process for the rest of the template.

Go to the background layer at the bottom of the layers palette, and flood fill the background layer with your choice of paper.

Open the glitter rain. Resize then copy and paste as a new layer. Move to the top of the canvas, just above the mask layer.

Then open the star glitter trails. Resize then copy and paste as a new layer. Move at an angle to the right side then duplicate and go to image, mirror.

Next open the spiral piano keys. Resize then copy and paste as a new layer into the center of the canvas. Move it do below the star template layer. Duplicate it and move this layer above it. On the bottom layer, erase the parts you don’t want shown over the star. Note I did the top part of the star

Now open the glitter butterfly train, resize then copy and paste as a new layer. Move to either side of the star. Adjust as you like. Copy and paste the rose you like next to them also.

Open your tube of choice, resize then copy and paste as a new layer. Move it into the frame so that it is to the left some. Duplicate it then go to adjust, blur, guassian blur. Change the blend mode to overlay. Merge down one layer. Duplicate it and go to image mirror, then move it below or above the original as you like.Again, just to the side. Duplicate it and go to image, mirror. Add your drop shadows and merge down one layer. Add your plug in, penta dot and cross on the setting you like. Change the blend mode to Lumincance. Using your magic wand tool, click inside the frame layer and go to selections, modify, expand by 3. On the merged tubes layer, hit the delete key. Go to selections, none.

Open the tube again, resize then copy and paste as a new layer to the right of the frame, adjusting as needed.

Then open the lipstick, drum set, makeup container, shoe , microphone and butterfly you like. Copy and paste as you like in a cluster to the bottom right of the tag.

Now open the guitar, and turn it up at an angle, resize it then copy and paste as a new layer. Move it to the left of the tag, below the small start layer.

Add the license plate, to the bottom left of the canvas. Add your text, copyrights, license info and tagger markings. Save and your done. Thanks for trying my tutorials.

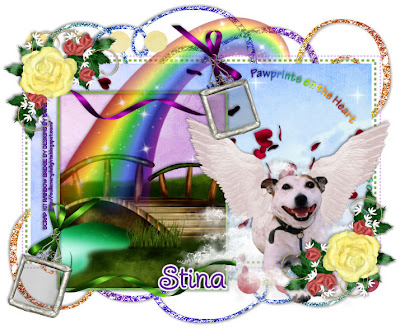
Pawprints PTU


This tutorial was written on June 19, 2010 Shani aka Wicked Princess. The concept of the tag is mine and mine alone. Any resemblance to any other tag/tut is pure coincidence. This was written for those with working knowledge of PSP.

Supplies Needed:

++Paint Shop Pro ( I used 10 but any version should work)

++Scrap kit by Designs by Stina called Rainbow Bridge can be purchased from any of the stores Stina sells at. You can find them on her blog

++Template 150 By Designs by Ali can be found HERE

++Tube of choice or the one I used. I used the puppy with wings included in the kit

++Font and mask of choice


**NOTES:
-Add Drop shadow of choice as you go
-You can merger layers as you want to make things easier for yourself.

Open the template in PSP, using your shortcut keys on your keyboard (SHIFT+D) duplicate the template as a new image. Close the original.

Open several papers of choice, resizing as needed. For example, when I look at the blue bar where it tells me what I’ve opened (say like paper 2) it tells me what percentage I’m viewing it at. For me it’s usually 16%, so I resize to 16% bringing it to 100%. ( I hope that made sense!) Once you’ve done this, minimize for later use.

Next go to the bottom template layer and go to selections, select all, then float, selections defloat. Don’t forget to go to selections, none then delete the template layer. Repeat this process for the rest of the template.

Now open the glitter doodle you like. Resize then copy and paste as a new layer. Move to the bottom of the template layer. Duplicate it and go to image, mirror then image, flip. Arrange as you need to.

Open the circle word art you like. Resize then copy and paste as a new layer. Move to the right of the tag, below the frame and background layers.

Next open the heart cutouts splatter. Resize then copy and paste as a new layer. Move it where you like on the canvas. Make sure it’s still below the frame and background layers.

Now open the bridge scene with rainbow you like. Resize it then copy and paste as a new layer. Adjust it where you want it under the frame layer. Make sure it’s situated just as you want it. Duplicate it and move one layer above the frame layer. On the frame layer, use your magic wand tool and click inside the frame. Go to selections, modify, expand by 2. On the bottom bridge layer, hit the delete key. Go to selections none. On the top rainbow bridge layer, erase the parts all around that you do not want showing outside of the frame EXCEPT the rainbow at the top. Now it should look like the rainbow is shooting out of the top of it.

Then open the tube of choice or the puppy as I did. Resize then copy and paste as a new layer to the right of the frame. Adjust as you like it.

Open the ribbon with frame, resize it then copy and paste as a new layer to the bottom left of the frame. Add another one to the upper part of the frame, but mirrored. They should look like they are opposite of each other.

Next open the jasmine and rose cluster bouquet you like. Resize then copy and paste as a new layer. Move to the upper left of the tag. Duplicate it and go to image, mirror then image, flip.


Finally add your text, any copyrights, license info and tagger markings. Save and your done!

Thank you for trying my tutorials.

Monday, June 14, 2010

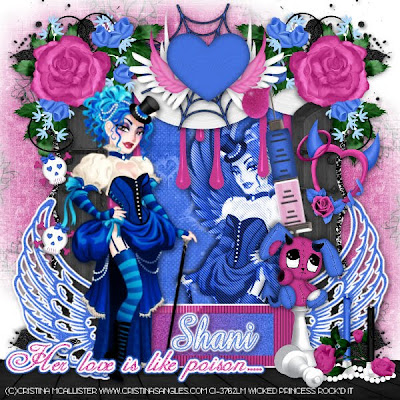
Her Love Is Like Poison PTU


This tutorial was written on June 13, 2010 Shani aka Wicked Princess. The concept of the tag is mine and mine alone. Any resemblance to any other tag/tut is pure coincidence. This was written for those with working knowledge of PSP.

Supplies Needed:

++Paint Shop Pro ( I used 10 but any version should work)

++Scrap kit by Poisoned Rain by Wicked Princess Scraps (me) and can be purchased from HERE or HERE


++ Tube of choice or the one I used. I used the artwork of Cristina McAllister which can be purchased from CILM

++Font and mask of choice

++Plug Ins:

-Penta.com jeans


**NOTES:
-Add Drop shadow of choice as you go
-You can merger layers as you want to make things easier for yourself.

Open the template in PSP, using your shortcut keys on your keyboard (SHIFT+D) duplicate the template as a new image. Close the original.

Open several papers of choice, resizing as needed. For example, when I look at the blue bar where it tells me what I’ve opened (say like paper 2) it tells me what percentage I’m viewing it at. For me it’s usually 16%, so I resize to 16% bringing it to 100%. ( I hope that made sense!) Once you’ve done this, minimize for later use.

Open a canvas of 650x650. You ran resize it later if you like. Flood fill with your choice of paper. Add the mask you like and merge the group.


First open the glitter bracket. Resize just a bit. Copy and paste as a new layer. Using your magic wand tool, click inside the frame. Go to selections, modify, expand by 3. Add a new raster layer and flood fill with your choice of paper. Go to selections, none. Move this layer to below the bracket layer.

Open the glitter splat, resize then copy and paste as a new layer. Move it to below the background layer. Move it to the left bottom corner. Duplicate it then go to image, mirror. Merge down one layer. Duplicate it then go to image, flip. Adjust as you need to.

Then open the black flooring. Resize it then copy and paste as a new layer. Move it to the bottom of the canvas. You want it to really like a stage of sorts.

Now we’re going to work with our tube. Open your tube of choice, resize then copy and paste as a new layer. Adjust it where you want it. Note that I mirrored one of the tubes so it looks like they are facing each other. Once your satisfied with the placement of your tube, move it below the bracket layer. Duplicate it and go to adjust, blur, guassian blur set to 3.00. Then change that layers blend mode to overlay. Merge down one layer. Now using your penta plug in on the jeans setting, set to where you like it. Add your drop shadow you like also. Change the blend mode now to luminance. On your bracket layer use your magic wand tool and click inside the bracket. Go to selections, modify and expand by 3. On your tube layer, hit the delete key. Go to selections none. Pretty cool right?

Next open the paint drips. Resize then copy and paste as a new layer. Move below the bracket layer, at the top. Move them as you like them to the left. Duplicate it and go to image, mirror. Merge down one layer. Erase the parts you don’t want seen outside of the frame.

Open the valance swag. Resize then copy and paste as a new layer. Move to the upper part of the frame layer. Again, we’re working below it. Erase the parts you don’t want showing outside of the frame.

Then open the gothic door, resize then copy and paste to the left of the frame. Move it down some so you can see the top of the door a little. I moved it about half way to the left too. Duplicate it and go to image, mirror. Merge down one layer. On your bracket layer use your magic wand tool and click inside the bracket. Go to selections, modify and expand by 3. On the doors layer, hit the delete key.

Now open the web, resize it then copy and paste as a new layer. Move it towards the top, working above the bracket layer now. You want it kind of centered.

Next open the rose cluster. Resize then copy and paste as a new layer to the upper left hand corner. Duplicate it and go to image, mirror. Then add the winged heart to the center of the web.

Open the winged banner. Resize then copy and paste as a new layer to the bottom center of the tag. Adjust and move as you like it.

Then open the heart frame with horns. Resize then copy and paste as a new layer to the right of the frame. Angle it the way you like it.

Next open the skull and crossbones, resize it then copy and paste to the left of the frame. Duplicate it and then angle each to opposite directions.

Open your tube again, resize then copy and paste as a new layer to the left of the frame. Adjust it so it looks like she’s standing on the floor.

Then open the syringe. Resize then copy and paste as a new layer to the left of the frame. Next to the horn frame. Angle it towards the center. Open the poison drops and crop to one drop. Resize then copy and paste so that it looks like its coming out of the syringe.

Now open the candle cluster. Resize then copy and apste as a new layer. Move to the bottom right of the frame. It should look like its sitting on the floor. Add white chess pieces to the left of it.

Next add the emo bunny to the top part of the winged banner to the right.

Add your text, copyrights, tagger markings and text.

Save and your done!

Thank you for trying my tutorial.

Sunday, June 13, 2010

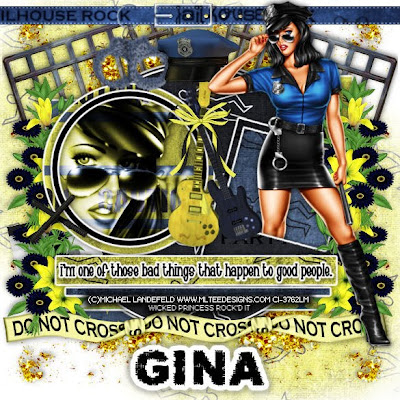
Bad Things PTU


This tutorial was written on June 13, 2010 Shani aka Wicked Princess. The concept of the tag is mine and mine alone. Any resemblance to any other tag/tut is pure coincidence. This was written for those with working knowledge of PSP.

Supplies Needed:

++Paint Shop Pro ( I used 10 but any version should work)

++Scrap kit by called Jail House Rock by Kikeka Kits can be purchased from either of her stores listed on her blog HERE

++Template 355 By Missy can be found HERE


++ Tube of choice or the one I used. I used the artwork of Michael Landfeld and you can purchase his work from HERE

++Font and mask of choice

++Plug Ins:

-Eye candy 4000


**NOTES:
-Add Drop shadow of choice as you go
-You can merger layers as you want to make things easier for yourself.

Open the template in PSP, using your shortcut keys on your keyboard (SHIFT+D) duplicate the template as a new image. Close the original.

Open several papers of choice, resizing as needed. For example, when I look at the blue bar where it tells me what I’ve opened (say like paper 2) it tells me what percentage I’m viewing it at. For me it’s usually 16%, so I resize to 16% bringing it to 100%. ( I hope that made sense!) Once you’ve done this, minimize for later use.

Next go to the bottom template layer and go to selections, select all, then float, selections defloat. Don’t forget to go to selections, none then delete the template layer. Repeat this process for the rest of the template. NOTE: I used the magic wand tool and clicked inside the Polaroid center. Hit the delete key and go to selections, none. Also I changed the opacity to the inside circle back to 100%

Go to the background layer at the bottom of the layers palette, and flood fill the background layer with your choice of paper. Add your mask of choice.

Open the glitter splatter you like. Resize then copy and paste as a new layer. Move to the bottom left of the tag, just above the mask layer. Move and adjust as you like it. Duplicate and go to image, mirror. Merge down one layer. Duplicate it and go to image, flip. Merge down so now all four splats are on the same layer.

Next open the metal jail doors, resize then copy and paste as a new layer. Move below to just above the glitter splat layers. Move towards the top and angle to the left. Duplicate it and go to image, mirror. Adjust as needed.

Now open the bouquet of flowers you like. Resize it then copy and paste as a new layer. Move to the left side of the tag, towards the top. Just below the circles and Polaroid layers. Duplicate it and move to the end of that one. Merge down one layer then duplicate, image mirror.

Now open your tube. Resize it then copy and paste as a new layer. Duplicate it then go to adjust, blur, guassian blur set at 3.00. Change the blend mode to overlay. Change the opacity down to about 75 or just a bit less. This is so it’s not as strong. Merge down one layer. Move the tube so that it’s sitting over the Polaroid frame. We’re going to make it look like she is stepping outside of the frame. Duplicate it then move it below the frame. Erase the bottom part of her leg on the left. You don’t want that part seen. Now on the top tube layer, also remove the part you don’t want seen. Erase it a bit above so that it looks like she is literally stepping outside of it.

I used the close up that came with the tube I purchased. But you can do this just as easily by resizing your tube and cropping. Open your tube, resize it then copy and paste where you like it. Move below the circle frame layer. Duplicate it then go to adjust, blur, guassian blur set to 3.00. Change the blend mode to overlay. Set the opacity to what you like on this layer like you did before. Then merge down one. Change the blend mode to luminance. Using your magic wand tool, click inside the circle frame layer. Go to selections, modify, expand by 4. Go to selections, invert. Then go to selections, none. You know hove a pretty cool effect with out having to use a plug in!

Then open the baton’s, resize then copy and paste as a new layer to the left of the circle frame layer.

Now open two guitars you like, resize then copy and paste as new layer. Move them to the center, between the circle and the other frame. Add a bow towards the top where they meet. Add the police hat towards the top of the guitars, between the doors. Move this layer below the guitars and tube.

Now open the do not cross ribbon, resize then copy and paste as a new layer. Move to the bottom of templates layer. Move so that it is below the flowers layer.

Open the jailhouse rock buckle with the handcuffs. Resize it then copy and paste as a new layer to the top of the tag. Move it below the tube layer though so it’s not covering her.

Finally add your copyrights, license info, tagger markings and text.

Save and your done! Thanks for trying my tutorial.

Saturday, June 12, 2010

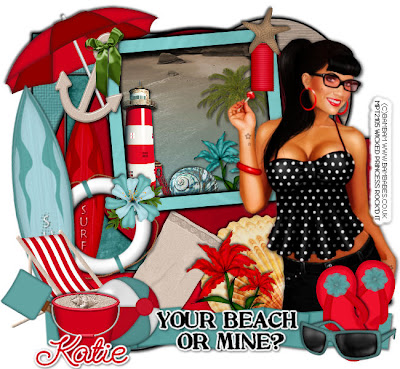
Your Beach or Mine? PTU


This tutorial was written on June 11, 2010 Shani aka Wicked Princess. The concept of the tag is mine and mine alone. Any resemblance to any other tag/tut is pure coincidence. This was written for those with working knowledge of PSP.

Supplies Needed:

++Paint Shop Pro ( I used 10 but any version should work)

++Scrap kit by called Seaside Getaway by Crazed’s Creations can be found HERE

++Template 354 by Missy can be found HERE

++Tube of choice or the one I used. I used the artwork of Bam Bam and you can purchase his work from HERE

++Plug ins:
-Eye Candy 4000 Gradient Glow


++Font and mask of choice


**NOTES:
-Add Drop shadow of choice as you go
-You can merger layers as you want to make things easier for yourself.

Open the template in PSP, using your shortcut keys on your keyboard (SHIFT+D) duplicate the template as a new image. Close the original.

Open several papers of choice, resizing as needed. For example, when I look at the blue bar where it tells me what I’ve opened (say like paper 2) it tells me what percentage I’m viewing it at. For me it’s usually 16%, so I resize to 16% bringing it to 100%. ( I hope that made sense!) Once you’ve done this, minimize for later use.

Next go to the bottom template layer and go to selections, select all, then float, selections defloat. Don’t forget to go to selections, none then delete the template layer. Repeat this process for the rest of the template. Add a gradient glow of your choosing also. NOTE: ** I removed the word art from the template.

First we are going to build the “scene” inside the top square frame. Using your magic wand tool, click inside the frame. Go to selections, Modify, expand by 8. On a new raster layer flood fill with the beach scene paper. Go to selections, none.

Open the light house you like, resize it then copy and paste to the bottom left corner of the frame. Add the palm tree you like to the opposite side of the frame. Pick the flower and shell you like resize tehm then add towards the bottom of the frame.

Then open your tube of choice, resize then copy and paste as a new layer to the right of the tag. Duplicate it and go to adjust, blur, guassian blur and set it to 3. On the blend mode option in the layers palette, change it to overlay. Then change the opacity of the layer down to where you like.

Next open both the surfboards. Resize them then copy and paste as new layers to the left of the tag. Make sure they are below the background frame layer. Angle them in opposite directions.

Now open the lifesaver, resize it then copy and paste as a new layer. Move to the bottom left frame layer. Add a flower you like over that.

Add the towel you like, resize then copy and paste as a new layer. Move down below the frame layer and angel it to the right. Add a sea shell to the opposite side. Also add the flower you like in between these two items. Remember to adjust as you like.

Then open the folded ribbon you like. Resize then copy and paste as a new layer. Move it to the bottom of the tag as you like it. Make sure it covers the bottom of the tube layer.

Open the chair, beach ball, pail and shovel. Arrange them as you like to the left of the tag.

Then open the flip flop you like. Duplicate it and arrange them to the right side of the ribbon to make them a pair. Add the sunglasses you like also.

Next open the umbrella you like, resize then copy and paste as a new layer. Move to the upper left corner behind the frame and background layer. Angle it to the left. Add the anchor and bow of your choosing.

On the opposite corner add the paper lantern and starfish you like.

Finally add your copyrights, tagger markings, license number and save.

Thanks for trying my tutorial!

Saturday, June 5, 2010

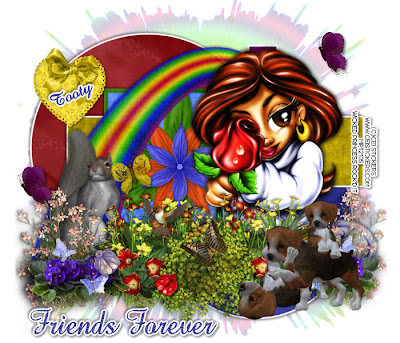
Friends Forever PTU


This tutorial was written on June 5, 2010 Shani aka Wicked Princess. The concept of the tag is mine and mine alone. Any resemblance to any other tag/tut is pure coincidence. This was written for those with working knowledge of PSP.

Supplies Needed:

++Paint Shop Pro ( I used 10 but any version should work)

++Scrap kit by Tootypup Scraps called Rainbow Bridge and can be purchased at any of the stores listed on her blog HERE

++Template 190 by Ali at HERE

++Tube of choice or the one I used. I used the artwork CEI Stickers and you can purchase her work from HERE


++Font and mask of choice


**NOTES:
-Add Drop shadow of choice as you go
-You can merger layers as you want to make things easier for yourself.

Open the template in PSP, using your shortcut keys on your keyboard (SHIFT+D) duplicate the template as a new image. Close the original.

Open several papers of choice, resizing as needed. For example, when I look at the blue bar where it tells me what I’ve opened (say like paper 2) it tells me what percentage I’m viewing it at. For me it’s usually 16%, so I resize to 16% bringing it to 100%. ( I hope that made sense!) Once you’ve done this, minimize for later use.

Next go to the bottom template layer and go to selections, select all, then float, selections defloat. Don’t forget to go to selections, none then delete the template layer. Repeat this process for the rest of the template. NOTE: I deleted the hearts layers and added a gradient glow to the rest of them.


First open the rainbow splatter you like. This will become the “mask” we use for the tag. Resize it then copy and paste as a new layer. Move it down to the bottom, below all the templates.

Then open three of the flowers you like. Resize one, then copy and paste as a new layer. Move it to the center of the square layer. Do this again over that particular flower again, and finally a third time. Resizing them just a bit smaller.

Next choose the rainbow with flower scene you like, resize then copy and paste as a new layer to the left of the tag. Move it so it’s towards the bottom of the template layer.

Open your tube of choice, resize then copy and paste as a new layer to the right of the tag. Duplicate it and go to blur, guassian blur. Add a blur of 3.00. Then change the blend mode on tube layer to overlay. Merge down one layer.

Now open another set of the foliage you like, but the one with animals. Resize it then copy and paste as a new layer. Move to the bottom of the templates (but still the top layer) and over the foliage of the rainbow.

Add a few butterflies and lady bugs through out as you like.

Add the heart tag with bow you like to the upper left of the tag.

Finally add your text, copyrights and tagger markings. Save and your done!

Thanks for trying my tutorial!