Monday, September 28, 2009
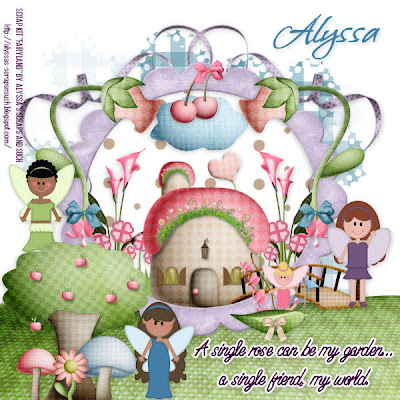
Fairy Garden PTU
Fairy Garden PTU
This tutorial was written on September 28, 2009 by Shani aka Wicked Princess. The concept of the tag is mine and mine alone. Any resemblance to any other tag/tut is pure coincidence. This was written for those with working knowledge of PSP.
Supplies Needed:
++Paint Shop Pro ( I used 10 but any version should work)
++Scrap kit by Alyssa called Fairyland can be purchased HERE OR HERE
++ Font and mask of choice
**NOTE I didn’t use any outside tubes. I used the clipart from the kit.
**NOTES:
-Add Drop shadow of choice as you go
-You can merger layers as you want to make things easier for yourself.
Open several papers of choice, resizing as needed. For example, when I look at the blue bar where it tells me what I’ve opened (say like paper 2) it tells me what percentage I’m viewing it at. For me it’s usually 16%, so I resize to 16% bringing it to 100%. ( I hope that made sense!) Once you’ve done this, minimize for later use.
Open a canvas of 600x 600. You can always resize later. Flood fill with your choice of paper. Add your mask, merge the group.
Open the grass hill, resize then copy and paste as a new layer. Move to the bottom of the canvas.
Next open the frame of your choice. Resize it then copy and paste as a new layer. Adjust it and center into the canvas as you like. Using your magic wand tool, click inside the frame. Go to selections, modify, expand by 6. Add a new raster layer and flood fill with your choice of paper. Go to selections, none. Move this layer below the frame layer.
Then open the flower of choice, resize then copy and paste as a new layer. Move it below the frame layer and towards the left of the frame. Duplicate it, go to image, mirror.
Now open the flower bed of your choice, resize then copy and paste as a new layer. Repeat the process you did with the flowers above.
Open the grass element, resize it then copy and paste as a new layer, moving it below the frame layer also. Erase the parts of these elements you don’t’ want seen outside the frame.
Now open the fairy house of your choice. Resize it then copy and paste as a new layer, move below the frame layer. Adjust and center in between the large flowers. Add a balloon of choice behind the house. And also the cloud above the house.
Open the bridge element. Copy and paste as a new layer. Move it to the bottom part of the frame layer, making it look like its coming OUT of the frame.
Then open the ribbons of choice. Resize it then copy and paste as a new layer. Move below the frame layer to the left hand side. Duplicate it then go to image, mirror.
Next open the large “bell”flower. Resize it then copy and paste as a new layer, to the left of the frame. Duplicate it then go to image, mirror.
Add the cherries with a bow at the top of the frame.
Now open the tree, two mushrooms, and a flower of choice. Resize them and bunch them at the bottom left hand part of the canvas.
Open the fairy boat and the long stem bell flowers. Resize them then copy and paste as new layers next to the bridge. Adjust as you like.
Then open the other bell type flower. Resize it, then copy and paste as a new layer. Move them to the bottom of the stem on the bell flower. Duplicate it and go to image, mirror. Add a bow to each one.
Add the fairy clip art through out the tag where you like them.
Add your text, copyrights, credits and tagger markings.
Save and your done!
Thank you for trying my tutorial.
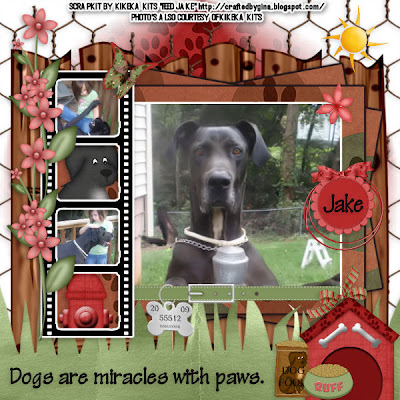
Feed Jake PTU
This tutorial was written on September 28, 2009 by Shani aka Wicked Princess. The concept of the tag is mine and mine alone. Any resemblance to any other tag/tut is pure coincidence. This was written for those with working knowledge of PSP.
Supplies Needed:
++Paint Shop Pro ( I used 10 but any version should work)
++Scrap kit by KiKeka Kits called Feed Jake can be purchased HERE
++Template 26 by Horseplay’s Pasture can be found ++Template 41 by Horseplays Pastures can be found HERE
++ Picture of choice or tubes of your choosing. I chose to use three pictures supplied by Gina. **Note there ARE tubes in the kit.
++Plug ins:
-Eye Candy 4000 Gradient glow
++font and mask of choice
**NOTES:
-Add Drop shadow of choice as you go
-You can merger layers as you want to make things easier for yourself.
Open the template in PSP, using your shortcut keys on your keyboard (SHIFT+D) duplicate the template as a new image. Close the original.
Open several papers of choice, resizing as needed. For example, when I look at the blue bar where it tells me what I’ve opened (say like paper 2) it tells me what percentage I’m viewing it at. For me it’s usually 16%, so I resize to 16% bringing it to 100%. ( I hope that made sense!) Once you’ve done this, minimize for later use.
Next go to the bottom template layer and go to selections, select all, then float, selections defloat. Add a gradient glow of your choice. Don’t forget to go to selections, none then delete the template layer. Repeat this for the remainder of the template. *Note I removed the doodle on the upper right hand side. You won’t need this.
Go to your large rectangle layer. Duplicate it twice. Select the bottom rectangle and using your pick tool, angle it to the left where you like it. On the second layer, Angle it the opposite direction. It should now look like a few fanned out cards.
Add a new raster layer and send it to the bottom. Flood fill with your choice of paper. Add your mask of choice and merge the group.
Now open the wire fencing of your choice. Resize then copy and paste as a new layer, moving it above the mask layer.
Then open the wooden fence element. Resize as needed and copy and paste as a new layer above the wire fencing. Adjust as needed.
Take your first photo, resize it then copy and paste as a new layer. On the smaller rectangle layer, go to selections, select all, selections, float then defloat. Now do selections, invert. On the picture layer, hit the delete key. Delete the rectangle layer. Add a gradient glow of your choice. Add the collar of choice to the bottom of the photo where you like it.
Now open the grass element. Resize as needed then copy and paste as a new layer towards the bottom of the canvas.
Open and resize your other two pictures. Copy and paste each one into the first and third frame on the left hand side, in the film strip. Use your magic wand tool, click inside the top frame, expand by 5 and hit delete on the picture layer. Repeat this for the other picture. Add the puppy dog and fire hydrant to the other frame openings and repeat the cropping process of before.
Open the flower of choice, resize it then copy and paste as a new layer at the upper right hand corner of your picture. Add a bow of choice to the bottom left hand corner.
Then open the flower sprigs you like, resize then copy and paste as a new layer to the left hand side of the film strip layer. Duplicate it and move one above the other. Adjust as needed. Then add a butterfly of choice to the right hand corner of this frame at the top.
Next add the dog house, doggie bowl and dog food bag to the bottom right hand corner of the tag.
Open the sun , resize it then copy and paste as a new layer in to the upper right hand corner of the tag.
Add any copyrights, credits, and tagger markings.
Save and your done!
Thanks for trying my tutorial
Saturday, September 26, 2009
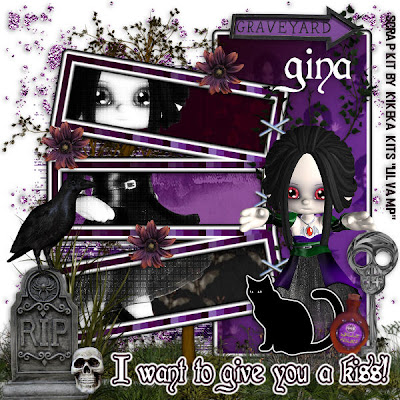
I want to give you a kiss! PTU
This tutorial was written on September 26, 2009 by Shani aka Wicked Princess. The concept of the tag is mine and mine alone. Any resemblance to any other tag/tut is pure coincidence. This was written for those with working knowledge of PSP.
Supplies Needed:
++Paint Shop Pro ( I used 10 but any version should work)
++Scrap kit by KiKeka Kits called Lil Vamp can be purchased HERE
++Template 41 by Horseplays Pastures can be found HERE
++Tube of choice or the one I used. I used the tube that was in the kit.
++Plug ins:
-Xero, Radiance
-Xero Grayscaler
-Penta dot and cross
-Eye Candy Gradient Glow
++Font and mask of choice
++font and mask of choice
**NOTES:
-Add Drop shadow of choice as you go
-You can merger layers as you want to make things easier for yourself.
Open the template in PSP, using your shortcut keys on your keyboard (SHIFT+D) duplicate the template as a new image. Close the original.
Open several papers of choice, resizing as needed. For example, when I look at the blue bar where it tells me what I’ve opened (say like paper 2) it tells me what percentage I’m viewing it at. For me it’s usually 16%, so I resize to 16% bringing it to 100%. ( I hope that made sense!) Once you’ve done this, minimize for later use.
Next go to the bottom template layer and go to selections, select all, then float, selections defloat. Add a gradient glow of your choice. Don’t forget to go to selections, none then delete the template layer. Repeat this for the remainder of the template.
Add a new raster layer, and send to the bottom Flood fill with your choice of paper and add your mask and remember to merge group.
Open the glitter splat of choice. Resize it if needed then copy and paste as a new layer. Move this layer below the template layers. Also move to the upper right hand side. Duplicate it, go to image, mirror. Duplicate it again and go to image, flip. Once more duplicate and go to image, mirror.
Add the grass element to the bottom of the canvas. Duplicate it and move as you need to fill in the areas you need.
Open the tree you like, resize it as needed. Copy and paste as a new layer. Move it below the template frame layers. Center it as needed.
Now open one of the tubes. Copy and paste as a new layer. Move it below the template frame layers. Add your plug in, Xero Greyscaler on the default setting. Then Penta dot and cross on the default setting. Finally, Xero Radiance on what ever setting you like. Using your magic wand tool, click inside the template frame layers. Go to selections, expand by 5. Go to selections, invert. On the tube layer, hit delete. Go to selections none.
Open the ivy branch, resize it as needed. Copy and paste as a new layer, moving it to the right hand side of the rectangle layer.
Add your tube to the center of the up right rectangle layer. Adjust as you like and move it below the cat layer.
Now add the tall grass to the right hand side of the canvas, at the bottom left corner. Add a tombstone above that layer. Also add the skull. Then add the crow of choice to the top of the tombstone.
Add the potion bottle next to the cat. And then add a flower of choice where you like it between the frames.
Finally add your text of choice, copyright and any licensing info. Notice I didn’t use any outside tubes so I credited the scrap designer.
Save and your done! Thank you for trying my tutorial.
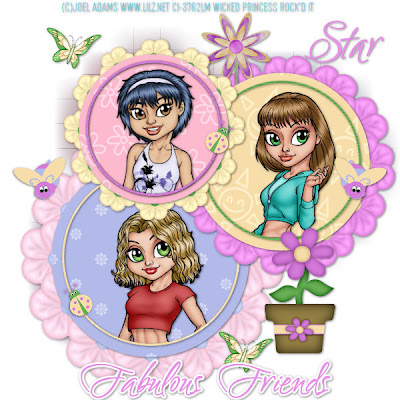
Fabulous Friends PTU
This tutorial was written on September 26, 2009 by Shani aka Wicked Princess. The concept of the tag is mine and mine alone. Any resemblance to any other tag/tut is pure coincidence. This was written for those with working knowledge of PSP.
Supplies Needed:
++Paint Shop Pro ( I used 10 but any version should work)
++Scrap kit by Stargazer Musings called Spring Fling can be purchased HERE OR HERE
++Template 70 by Blissfully Beth can be found HERE
++3 tubes of choice or the one I used. I used the artwork of Joel Adams which can be purchased HERE
++Plug ins:
-Muera Meister Copies
++font of choice
**NOTES:
-Add Drop shadow of choice as you go
-You can merger layers as you want to make things easier for yourself.
Open the template in PSP, using your shortcut keys on your keyboard (SHIFT+D) duplicate the template as a new image. Close the original.
Open several papers of choice, resizing as needed. For example, when I look at the blue bar where it tells me what I’ve opened (say like paper 2) it tells me what percentage I’m viewing it at. For me it’s usually 16%, so I resize to 16% bringing it to 100%. ( I hope that made sense!) Once you’ve done this, minimize for later use.
Next go to the bottom template layer and go to selections, select all, then float, selections defloat. Don’t forget to go to selections, none then delete the template layer. Repeat this for the remainder of the template. **NOTE I kept the faded mask layers
Open the flower of your choice, resize as needed and use your plug in muera meister copies. I used different settings for each one, its really about adjusting it to your liking. Move this layer below the circle layer. Repeat this for the other circles.
Now open your three tubes of choice. Crop them as needed then copy and paste into each circle frame layer. Move them below this layer. Use the magic wand tool and click inside one of the frames and go to selections, modify, expand by 2. Go to selections, invert and hit the delete key on the tube layer. Repeat this for the other tubes.
Next open the flower pot and flower you like. Resize and copy and paste at the bottom of the right hand side of the canvas.
Open your choice of flower and resize. Copy and paste at the top of the canvas. Move the layer below the flowers layer.
Next open the lady bugs and butterflies of choice, resize then copy and paste as a new layer through out the tag.
Add your text, copyrights and licensing number as well as tagger markings.
Save and your done! Ty for trying my tutorial.
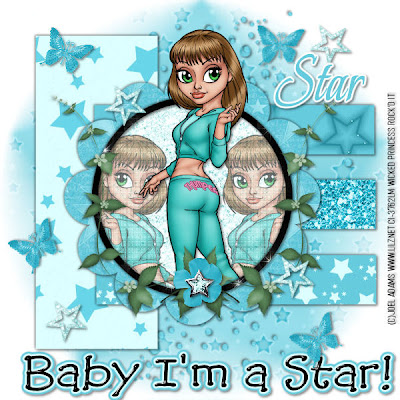
Baby I'm A Star PTU
This tutorial was written on September 26, 2009 by Shani aka Wicked Princess. The concept of the tag is mine and mine alone. Any resemblance to any other tag/tut is pure coincidence. This was written for those with working knowledge of PSP.
Supplies Needed:
++Paint Shop Pro ( I used 10 but any version should work)
++Scrap kit by Stargazer Musings called Starlight Starbright can be purchased HERE OR HERE
++Template 13 can be found HERE
++Tube of choice or the one I used. I used the artwork of Joel Adams which can be purchased HERE
++Plug in:
-Penta, dot and cross
++font and mask of choice
**NOTES:
-Add Drop shadow of choice as you go
-You can merger layers as you want to make things easier for yourself.
Open the template in PSP, using your shortcut keys on your keyboard (SHIFT+D) duplicate the template as a new image. Close the original.
Open several papers of choice, resizing as needed. For example, when I look at the blue bar where it tells me what I’ve opened (say like paper 2) it tells me what percentage I’m viewing it at. For me it’s usually 16%, so I resize to 16% bringing it to 100%. ( I hope that made sense!) Once you’ve done this, minimize for later use.
Next go to the bottom template layer and go to selections, select all, then float, selections defloat. Don’t forget to go to selections, none then delete the template layer. Repeat this for the remainder of the template.
Add a new raster layer, and send to the bottom Flood fill with your choice of paper and add your mask and remember to merge group.
Open the bubbles element and resize as needed. Copy and paste as a new layer moving it below the templates layer. Also move it to the upper right hand part of the canvas. Duplicate it and go to image, mirror.
Now open your tube of choice, crop as needed. Copy and paste as a new layer and move it below the circle frame layer. Move the tube to the left, as far as you like it. Add your plug in Penta Dot and Cross on the default setting. Change the opacity on the layers palette to 60. Duplicate it and go to image, mirror. Adjust as needed. Using your magic wand tool click inside the frame, go to selections, modify, expand and expand by 5. On the tube layers, hit the delete key. Then go to selections, none.
Copy and paste the tube once more, centering it in the circle frame. I chose to make her look like she was “popping” out of the frame. To do this, duplicate the tube, and move the bottom layer below the circle frame. On the top layer, erase the parts you don’t want seen outside the frame. Go to the bottom layer and erase the parts you don’t want seen.
Then open the ivy element. Resize it then copy and paste as a new layer. Move it to the right hand side of the circle frame, adjusting as you like. Duplicate it then go to image, mirror. Add a flower and star to the center of the ivy where it meets.
Open the stars and butterflies of your choice. Resize then and then copy and paste through out the tag as you like.
Finally add your text, copyrights, license info and tagger markings!
Save and your done!
Thank you for trying my tutorial!
Thursday, September 24, 2009
Autumn Beauty PTU
This tutorial was written on September 24th, 2009 by Shani aka Wicked Princess. The concept of the tag is mine and mine alone. Any resemblance to any other tag/tut is pure coincidence. This was written for those with working knowledge of PSP.
Supplies Needed:
++Paint Shop Pro ( I used 10 but any version should work)
++Scrap kit by Halo Designs called Autumn Romance can be purchased HERE
++Template 57 by Blissfully Beth can be found HERE
++Tube of choice or the one I used. I used the work of Barbara Jensen which you can purchase HERE
++Plug Ins:
-Penta-Jeans
-Muera Meister, copies
++Font and mask of choice
Let’s get started!
**NOTES:
-Add Drop shadow of choice as you go
-You can merger layers as you want to make things easier for yourself.
Open the template in PSP, using your shortcut keys on your keyboard (SHIFT+D) duplicate the template as a new image. Close the original.
Open several papers of choice, resizing as needed. For example, when I look at the blue bar where it tells me what I’ve opened (say like paper 2) it tells me what percentage I’m viewing it at. For me it’s usually 16%, so I resize to 16% bringing it to 100%. ( I hope that made sense!) Once you’ve done this, minimize for later use.
Next go to the bottom template layer and go to selections, select all, then float, selections defloat. Don’t forget to go to selections, none then delete the template layer. Repeat this process for the rest of the template.
Add a new raster layer and flood fill with your choice of paper. Add your mask and merge group.
Open the leaf branch of choice. Resize it then copy and paste as a new layer to the upper right hand side. Also move below the bottom template layer. Duplicate it, then go to image, mirror then image flip.
Then open your tube of choice, crop as needed. Copy and paste as a new layer and move below the circle frame layer. Note I also went to image, mirror and mirrored my tube so she’s facing the other direction. Move and adjust where you want her on the right side of the circle. Using your magic wand tool, click inside the circle frame layer. Go to selections, modify, expand it by 7. Then go to selections, invert. On the tube layer, hit the delete key. Then go to selections none.
Back to the tube layer, use your plug in Penta, jeans on the default setting. Change the opacity to what you like.
Next open the flower of your choice then copy and paste it as a new layer into the center of the tag. Go to your plug in muera meister copies on the encircle option. Set the x and y to 50 and any number of flowers you like. Move this layer to below the bottom circle template layer.
Now copy and paste your tube of choice again, this time placing in the center of the rectangle layer. Adjust and move her where you like.
Open the leaf you like and resize it. Copy and paste as a new layer, moving it to the bottom corner of the rectangle frame. Duplicate it then mirror it so its on the other corner. Add the flower clip you like to each side also. Then add a butterfly you like to the center of it.
Add a tag of choice to the upper left hand corner.
Finally add your text, copyrights, and license info as well as tagger markings.
Save and your done. Thank you for trying my tutorial!
Wednesday, September 23, 2009
Fall is in the air ptu
This tutorial was written on September 23, 2009 by Shani aka Wicked Princess. The concept of the tag is mine and mine alone. Any resemblance to any other tag/tut is pure coincidence. This was written for those with working knowledge of PSP.
Supplies Needed:
++Paint Shop Pro ( I used 10 but any version should work)
++Scrap Kit by Crazed’s Creations called Fall Fever can be purchased HERE
++Template 3 by Horseplays Pasture can be found HERE
++Tube of choice or the one I used. I used the artwork of Leigh Young. At this time I’m not sure WHERE you can get her work, but will update when I get a chance to find out sorry!
++Font and Mask of choice
++Plug ins needed:
-Tramages, Tow the line
Let’s get Started!
**NOTES:
-Add Drop shadow of choice as you go
-You can merger layers as you want to make things easier for yourself.
Open the template in PSP, using your shortcut keys on your keyboard (SHIFT+D) duplicate the template as a new image. Close the original. Because this template is taking up the whole space we need to add more. Go to image, canvas size and make it 600x600.
Open several papers of choice, resizing as needed. For example, when I look at the blue bar where it tells me what I’ve opened (say like paper 2) it tells me what percentage I’m viewing it at. For me it’s usually 16%, so I resize to 16% bringing it to 100%. ( I hope that made sense!) Once you’ve done this, minimize for later use.
Next go to the bottom template layer and go to selections, select all, then float, selections defloat. Add your gradient glow of choice. Don’t forget to go to selections, none then delete the template layer. Repeat this process for the rest of the template.
Add a new raster layer and flood fill with your choice of paper. Add your mask and merge the group.
Go to your rectangle template layer and use your tramages tow the line plug in. I just used the default one.
Open your tube of choice and resize. Copy and paste as a new layer. Move it to the right side of the rectangle.
Next open the sunflower of your choice. Resize then copy and paste as a new layer towards the top of the rectangle.
Choose a doodle you like, resize then copy and paste as a new layer towards the left hand side on the bottom of the rectangle. Duplicate it and go to image, mirror. Add the leave bundle on top of one of them and duplicate it going to image, mirror.
Then open the leaf and pine cone set. Resize it then copy and paste as a new layer to the bottom left hand corner.
Next open the flower of choice, resize it then copy and paste as a new layer. Move it towards the bottom of the tag. Duplicate it and go to image, mirror.
Now open the raffia bow bunch you like. Angle it the way you want it, resize and copy and paste as a new layer and paste into the center of the two doodles on the bottom.
Add the candle bunch you like over it and then a leaf of choice over that.
Open the leaf of choice. Resize then copy and paste as a new layer towards the bottom of the left hand side of the rectangle layer. Duplicate it then angle it in a different way. Repeat this all the way up the left hand side. Add the butterfly of choice also overlapping the leaves.
Add your text of choice, copyrights, and licensing info.
Save and your done!
Thank you for trying my tutorial.
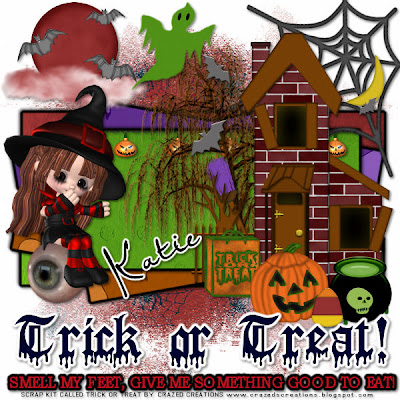
Trick or Treat PTU
Trick or Treat
This tutorial was written on September 23, 2009 by Shani aka Wicked Princess. The concept of the tag is mine and mine alone. Any resemblance to any other tag/tut is pure coincidence. This was written for those with working knowledge of PSP.
Supplies Needed:
++Paint Shop Pro ( I used 10 but any version should work)
++Scrap Kit by Crazed’s Creations called Trick or Treat can be purchased HERE
++Template 54 by Tracy at Freebie Friends can be found HERE
++Tube of choice or the one I used. I used the one from the kit. If you choose to not use any outside tubes, please do credit the designer on your tag.
++Font of choice
++Plug ins:
-Eye Candy 4000 Gradient Glow
Let’s get Started!
**NOTES:
-Add Drop shadow of choice as you go
-You can merger layers as you want to make things easier for yourself.
Open the template in PSP, using your shortcut keys on your keyboard (SHIFT+D) duplicate the template as a new image. Close the original. Because this template is taking up the whole space we need to add more. Go to image, canvas size and make it 600x600.
Open several papers of choice, resizing as needed. For example, when I look at the blue bar where it tells me what I’ve opened (say like paper 2) it tells me what percentage I’m viewing it at. For me it’s usually 16%, so I resize to 16% bringing it to 100%. ( I hope that made sense!) Once you’ve done this, minimize for later use.
Next go to the bottom template layer and go to selections, select all, then float, selections defloat. Add your gradient glow of choice. Don’t forget to go to selections, none then delete the template layer. Repeat this process for the rest of the template.
Add a new raster layer and flood fill with your choice of paper. Add your mask and merge the group.
Open the spiderweb element and resize. Copy and paste as a new layer moving it to the top right hand corner of the tag.
Then open the pumpkin lights and resize. Copy and paste them as a new layer. Move them to the top of the rectangle box.
Now open the haunted house, resize it then copy and paste as a new layer. Move it to the left of the tag. Add the tree of choice after resizing and move below the house layer. Make the tree peek out from behind the house. Then also add the broom of choice to it.
Add the moon and ghost to the top left and center of the tag.
Open the cauldron, candy, and pumpkin of choice. Resize then group them at the bottom of the haunted house, arranging them as you like. Open the bag of choice and post to the left.
Open your tube of choice, resize and then paste where you like
Add your text, copyrights, credits and tagger markings. Save and your done! Ty for trying my tutorial!
Monday, September 21, 2009
Proud Nascar Babe PTU
Proud Nascar Babe
This tutorial was written on September 21, 2009 by Shani aka Wicked Princess. The concept of the tag is mine and mine alone. Any resemblance to any other tag/tut is pure coincidence. This was written for those with working knowledge of PSP.
Supplies Needed:
++Paint Shop Pro ( I used 10 but any version should work)
++Scrap kit by Me called Hot Rod Dreams can be purchased HERE **NOTE: This kit is EXCLUSIVE to this store, and the only place you will find it.
++Template 124 by Ali can be found ++Template 79 by Ali can be found HERE
++Tube of choice or the one I used. I used the FTU artwork of Popeye Wong and you can find it HERE
++Font of choice
++Plug ins:
-Eye Candy 4000 Gradient Glow
Let’s get Started!
**NOTES:
-Add Drop shadow of choice as you go
-You can merger layers as you want to make things easier for yourself.
Open the template in PSP, using your shortcut keys on your keyboard (SHIFT+D) duplicate the template as a new image. Close the original. Because this template is taking up the whole space we need to add more. Go to image, canvas size and make it 600x600.
Open several papers of choice, resizing as needed. For example, when I look at the blue bar where it tells me what I’ve opened (say like paper 2) it tells me what percentage I’m viewing it at. For me it’s usually 16%, so I resize to 16% bringing it to 100%. ( I hope that made sense!) Once you’ve done this, minimize for later use.
Next go to the bottom template layer and go to selections, select all, then float, selections defloat. Add your gradient glow of choice. Don’t forget to go to selections, none then delete the template layer. Repeat this process for the rest of the template.
Open up the horizontal road and resize as needed. Copy and paste as a new layer, moving this layer to the bottom of the layers palette. Also move it to the bottom of your canvas.
Next open up two of the torn papers you like. Resize as needed. Take the first one, then copy and paste as a new layer. Move it below the road layer. Add the next torn paper layer and mirror it. Duplicate both of them and mirror them opposite of each other and move on up to the top so now you have what looks like colored mountains in the back ground.
Then open a glitter splat of your choosing. Copy and paste as a new layer. Move it to just above the road layer and center it where you like.
Add a flag of your choice, moving the layer below the template layer and to the upper left. Duplicate it and go to image, mirror.
Now open the railroad crossing sign you like, and copy and paste as a new layer after resizing. Move it to just below the middle circle layer. I moved mine slightly to the left.
Open the flame of choice. Resize then copy and paste as a new layer, placing in the middle of the center circle.
Then open the pit pass and speed limit signs you like. Resize them and copy and paste to the upper left and bottom of the middle circle.
Open the speedometer, bottle cap, and steering wheel you like. Resize them then copy and paste as new layers into the center of each of the circles on the right side.
Add your tube of choice, centering it where you like.
Then add your traffic light of choice to the bottom left of the tag.
Add any text you like, copyrights and tagger markings. Save and your done! Thank you for trying my tutorial!!
Saturday, September 19, 2009
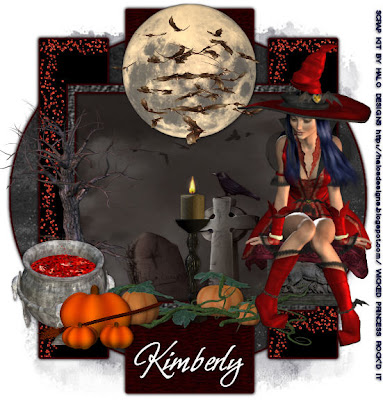
Spooked PTU
This tutorial was written on August 28, 2009 by Shani aka Wicked Princess. The concept of the tag is mine and mine alone. Any resemblance to any other tag/tut is pure coincidence. This was written for those with working knowledge of PSP.
Supplies Needed:
++Paint Shop Pro ( I used 10 but any version should work)
++Scrap kit by Halo Designs called Halloween can be purchased HERE
++Template 79 by Ali can be found HERE
++Tube of choice or the one I used. I used the tube from the kit. If you choose to use this tube and the kit with no extra’s, please credit the designer for the kit with their url.
++Font and mask of choice
Let’s get started!
**NOTES:
-Add Drop shadow of choice as you go
-You can merger layers as you want to make things easier for yourself.
Open the template in PSP, using your shortcut keys on your keyboard (SHIFT+D) duplicate the template as a new image. Close the original.
Open several papers of choice, resizing as needed. For example, when I look at the blue bar where it tells me what I’ve opened (say like paper 2) it tells me what percentage I’m viewing it at. For me it’s usually 16%, so I resize to 16% bringing it to 100%. ( I hope that made sense!) Once you’ve done this, minimize for later use.
Next go to the bottom template layer and go to selections, select all, then float, selections defloat. Add a gradient glow of choice. Don’t forget to go to selections, none then delete the template layer. Repeat this process for the rest of the template.
Add a new raster layer and flood fill with your choice of paper. Add your mask and merge group.
Open the tree element, resize then copy and paste as a new layer to the left hand side of the frame.
Then open the cauldron resizing and copy and paste as a new layer below the tree. Have it so it overlaps it a bit. Then add both sets of pumpkin bunches to the right of it.
Add the candle to the center of the tag, resize it and move below the pumpkin layers.
Add a moon of choice to the top center.
Open the stone table you like, resize then copy and paste as a new layer. Add the tube of choice, pasting where you like it. I moved it to look like it was sitting on top of the table.
Add your copyrights and any needed license numbers.
Save and your done.
Thank you for trying my tutorial.

Tuesday, September 15, 2009
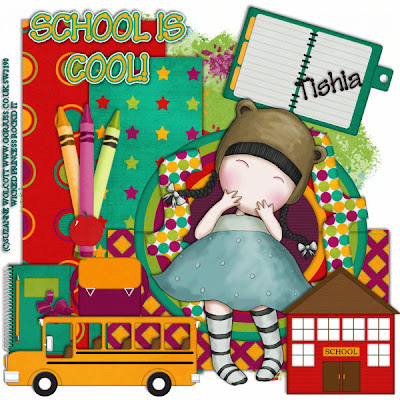
School is Cool PTU
School is Cool PTU
This tutorial was written on September 14, 2009by Shani aka Wicked Princess. The concept of the tag is mine and mine alone. Any resemblance to any other tag/tut is pure coincidence. This was written for those with working knowledge of PSP.
Supplies Needed:
++Paint Shop Pro ( I used 10 but any version should work)
++Scrap kit by Tishia called School Daze can be purchased HERE
++Template 21 by Horseplays Pasture can be found HERE
++Tube of choice or the one I used. I used the artwork of Suzanne Wolcott which can be purchased HERE
++Font and mask of choice
**NOTES:
-Add Drop shadow of choice as you go
-You can merger layers as you want to make things easier for yourself.
-This a FULL size kit. You will need to resize as you go!
Open the template in PSP, using your shortcut keys on your keyboard (SHIFT+D) duplicate the template as a new image. Close the original.
Open several papers of choice, resizing as needed. For example, when I look at the blue bar where it tells me what I’ve opened (say like paper 2) it tells me what percentage I’m viewing it at. For me it’s usually 16%, so I resize to 16% bringing it to 100%. ( I hope that made sense!) Once you’ve done this, minimize for later use.
Next go to the bottom template layer and go to selections, select all, then float, selections defloat. Don’t forget to go to selections, none then delete the template layer. Repeat this process for the rest of the template. *Note I deleted the circle dash layer
Add a new raster layer and send it to the bottom. Flood fill with your choice of paper. Add your mask and merge group.
Next open the rainbow and resize to 15 %. Copy and paste it as a new layer. Move it towards the top of the circle layer and adjust it as needed. You’ll be trying to make it look like it’s a frame. Duplicate it and go to image, mirror. Move it and adjust as you like. You should now have a rainbow frame around the circle.
Now open the brackets of choice and resize. Copy and paste as a new layer, moving it and angle it over the rainbow layers.
Open the school house and resize. Copy and paste as a new layer in the lower right hand side of the tag.
Then open the school bus, resize and copy and paste as a new layer. Move to the lower left hand side of the tag.
Add a backpack, notebook, pencil, crayon shavings and apple of your choice and arrange them as you like above the bus.
Next open three crayons, resize then copy and paste as a new layer above your bundled items. Move the first one in the center, then the other two on either side, pointing out.
Add the notebook of your choice to the upper right hand side.
Then add your tube of choice, centering in the brackets.
Add your copyrights, text, license number and tagger marking
Save and your done! Thanks for trying my tutorial
Monday, September 14, 2009
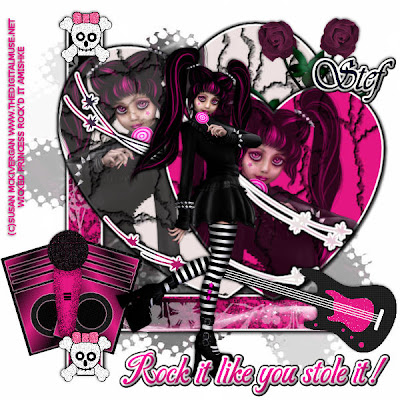
Rock it like you stole it PTU
This tutorial was written on September 14, 2009by Shani aka Wicked Princess. The concept of the tag is mine and mine alone. Any resemblance to any other tag/tut is pure coincidence. This was written for those with working knowledge of PSP.
Supplies Needed:
++Paint Shop Pro ( I used 10 but any version should work)
++Scrap kit called Girls Can Rock Too by Stef can be purchased HERE
++Template 19 by Horeseplays Pasture can be found HERE
++Tube of choice or the one I used. I used the artwork of Susan Mckivergan which can be purchased HERE
++Plug ins:
-Eye Candy 4000 Gradient Glow
++Font and mask of choice
**NOTES:
-Add Drop shadow of choice as you go
-You can merger layers as you want to make things easier for yourself.
Open the template in PSP, using your shortcut keys on your keyboard (SHIFT+D) duplicate the template as a new image. Close the original.
Open several papers of choice, resizing as needed. For example, when I look at the blue bar where it tells me what I’ve opened (say like paper 2) it tells me what percentage I’m viewing it at. For me it’s usually 16%, so I resize to 16% bringing it to 100%. ( I hope that made sense!) Once you’ve done this, minimize for later use.
Next go to the bottom template layer and go to selections, select all, then float, selections defloat. Don’t forget to go to selections, none then delete the template layer. Add a gradient glow of your choosing. Repeat this process for the rest of the template
Add a new raster layer and send it to the bottom. Flood fill with your choice of paper. Add your mask and merge group.
Open the swirl of your choice, resize then copy and paste as a new layer towards the bottom, on the bottom rectangle.
Next open the rose of choice, resize it. Copy and paste as a new layer below the hearts layer, to the right. Duplicate it and go to image, mirror. Adjust it as needed.
Then open your tube of choice. Note that I used the same tube but used the close up as well as the regular tube. Copy and paste your tube as a new layer and move it above the large heart layer. Make sure its below the wire. On the heart layer go to selections, select all, selections, invert. Go back to your tube layer and hit the delete key. Go to selections, none. Change the opacity so that its slightly see through. Repeat this process for the other heart.
Now open the skull and crossbones sticker. Resize it then copy and paste as a new layer at the top of the left and side rectangle. Duplicate it and move the other one to the bottom of the rectangle.
Open the speakers, resize the copy and paste as a new layer to the left of the tag. Angle it slightly to the left. Duplicate it and angle to the right. Add a microphone to the center.
Then open a guitar you like, resize it then copy and paste as a new layer to the bottom of the right hand side.
Add your tube of choice to the center of the tag.
Then add your text, copyrights, license number and tagger markings.
Save and your done! Thanks for trying my tutorial!
Wednesday, September 9, 2009
New tuts coming!
I'll be working on more tuts this weekend! I bought new tubes and can't wait to play with them! YAY! So stay tuned....
Chat box...
I'm going to put up the chat box again. I took it down due to the fact it was linking for both blogs and driving me mad lol! So I'll put it back up! Thanks!
Shani
Shani
New layout and New blinkies!
I decided to change things up after several months and made a layout and header using my Simply Sassy kit! WOO HOO! I love it and I'm normally not a pink person, but this is awesome and I love it.
I asked my sweet friend and amazing tagger friend Bev of Horseplays Pastures to please make me blinkies for both blogs since I loved hers. She was so gracious when I asked! I'm THRILLED with them and amazed at her talent! Thank Bev for your hard work! You are so awesome and I enjoy everything you do! Make sure you check Bev out! Her blog is:
HERE
Hugs,
Shani
Subscribe to:
Posts (Atom)