Thursday, October 29, 2009


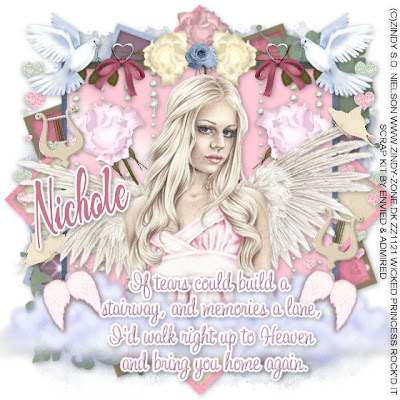
Stairway to Heaven (PTU)

This tutorial was written on October 29, 2009 by Shani aka Wicked Princess. The concept of the tag is mine and mine alone. Any resemblance to any other tag/tut is pure coincidence. This was written for those with working knowledge of PSP.
Supplies Needed:

++Paint Shop Pro ( I used 10 but any version should work)

++Scrap kit by Envied & Admired called Stairway to Heaven which can be purchased HERE

++Template 9 by Alyssa can be found HERE

++Tube of choice or the one I used. I used the artwork of Zindy S.D. Nielson and you can purchase her work HERE You must have a license in order to use her work.

++Font and Mask of choice

Let’s get Started!

**NOTES:
-Add Drop shadow of choice as you go
-You can merger layers as you want to make things easier for yourself.

Open the template in PSP, using your shortcut keys on your keyboard (SHIFT+D) duplicate the template as a new image. Close the original.

Open several papers of choice, resizing as needed. For example, when I look at the blue bar where it tells me what I’ve opened (say like paper 2) it tells me what percentage I’m viewing it at. For me it’s usually 16%, so I resize to 16% bringing it to 100%. ( I hope that made sense!) Once you’ve done this, minimize for later use.


Next go to the bottom template layer and go to selections, select all, then float, selections defloat. Don’t forget to go to selections, none then delete the template layer. Repeat this process for the rest of the template.


Add a new raster layer, flood fill with your choice of paper. Add your mask, and merge group. Move this layer to the bottom.


Open two sets of glitter hearts. Resize them. On the first one, copy and paste as a new layer, to the right of the tag. Move towards the bottom of the frame. Adjust as needed. Duplicate it and go to image, mirror. Add the other one just as before.

Next open the rose with stem of your choosing, resize it then copy and paste as a new layer. Move it to the upper center of the frame. Open another rose with stem of your choosing, rotate in 90 degrees to the right. Move it so it sits on the left side of the rose bud at the top. Duplicate it and go to image, mirror. Add a rose bud of your choice, to the bottom of the center of the rose at the center.

Now open another rose with stem, angle to the left. Copy and paste it as a new layer. Move it to the left of the tag. Duplicate it and go to image, mirror.

Open your tube of choice, and resize. Copy and paste as a new layer, center it in the middle of the tag.

Add the cloud of choice, to the bottom left hand of the tag. Duplicate it and go to image, mirror.

Then open the dove of choice, resize it. Copy and paste as a new layer and move it to the upper left hand corner. Duplicate it and go to image, mirror. Add the heart with bow you like, resize it then copy and paste as a new layer next to them.

Next open the angel wings of choice. Resize then copy and paste as a new layer, move to the left of the clouds. Duplicate it and go to image, mirror.

Add the harp of choice, where you like along with butterflies of choice.

I used the word art in the kit, but you can use whatever text you like.

Add your copyrights, license info and tagger markings.

Save and your done!

Thanks for trying my tutorial.

Tuesday, October 27, 2009

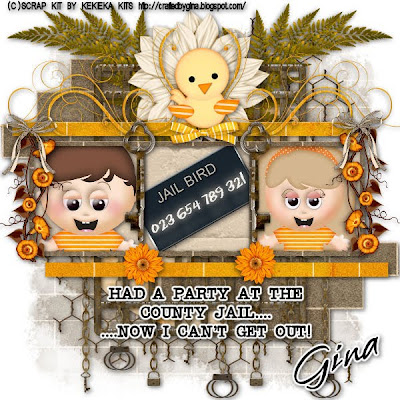
County Jail Party (PTU, CHARITY)


County Jail Party (PTU, Charity)

This tutorial was written on October 27, 2009 by Shani aka Wicked Princess. The concept of the tag is mine and mine alone. Any resemblance to any other tag/tut is pure coincidence. This was written for those with working knowledge of PSP.
Supplies Needed:

++Paint Shop Pro ( I used 10 but any version should work)

++Scrap kit by Gina called Jail Bird can be purchased HERE Please note Jail Bird is a Charity kit and all proceeds go the Jail Ministries. Please check it out!

++Template 44 by Tracy at Freebie Friends can be found HERE

++Tube of choice. I used the clip art dolls from the kits.

++Font and Mask of choice

Let’s get Started!

**NOTES:
-Add Drop shadow of choice as you go
-You can merger layers as you want to make things easier for yourself.

Open the template in PSP, using your shortcut keys on your keyboard (SHIFT+D) duplicate the template as a new image. Close the original. **Increase the canvas size by going to image, canvas size then increase it to 600x600.


Open several papers of choice, resizing as needed. For example, when I look at the blue bar where it tells me what I’ve opened (say like paper 2) it tells me what percentage I’m viewing it at. For me it’s usually 16%, so I resize to 16% bringing it to 100%. ( I hope that made sense!) Once you’ve done this, minimize for later use.


Next go to the bottom template layer and go to selections, select all, then float, selections defloat. Don’t forget to go to selections, none then delete the template layer. Repeat this process for the rest of the template.


Add a new raster layer, flood fill with your choice of paper. Add your mask, and merge group. Move this layer to the bottom.


Open the chain link fencing and resize if needed. Copy and paste as a new layer. Move it below the circle layer just above the mask layer.

Next open the bricks element. Resize it then copy and paste as a new layer, move to the upper left hand corner. Duplicate it and go to image, mirror.

Now Open the leaf branch, resize it then copy and paste as a new layer, moving to the upper left hand corner of the tag. Duplicate it and go to image, mirror.

Then open the jail door, resize it then copy and paste it as a new layer into the center of the canvas. Make sure this is just above the circle layer.

Open the flower of choice, resize it then copy and paste as a new layer. Move to the upper center part of the tag.

Next open both of the clip art dolls and resize them. Copy and paste as new layers, moving to the below the frame layers. Adjust as needed. Then using your magic wand tool, Click inside the frame, go to selections, modify, then expand by 7. Go to selections, invert. On the doll layers, hit delete on your keyboard. Go to selections, none.

Then open the Jail bird sign, resize it then copy and paste as a new layer into the center frame.

Now open the chain links with keys and handcuff’s resize it then copy and paste as a new layer. Move it to the bottom of the rectangle layers.

Open the flower bunch of choice. Resize it then copy and paste as a new layer to the left of the frame. Duplicate it and go to image, mirror. Add a bow of choice to the top of it.

Open the flourish of choice. Resize and rotate it. Copy and paste as a new layer, moving to the top of the rectangle layers. Duplicate it then go to image, mirror. Add a bird of choice to the center of the flourish where it meets (also the center of the flower) and a bow at the birds feet.

Add the key element after resizing to the middle of the bars between the frames. Then add the flower of choice to the bottom of the keys.

Add any text, copyrights, and tagger markings.

Save and your done!

Thank you for trying my tutorial.

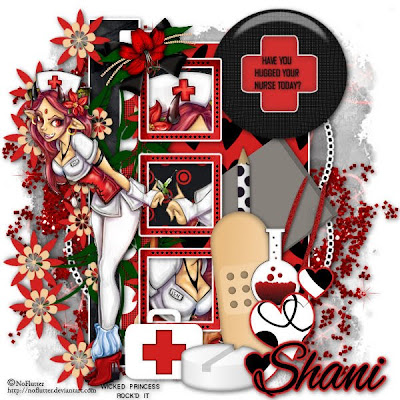
Have you hugged your nurse today?


Have you hugged your nurse today? FTU

This tutorial was written on October 27, 2009 by Shani aka Wicked Princess. The concept of the tag is mine and mine alone. Any resemblance to any other tag/tut is pure coincidence. This was written for those with working knowledge of PSP.
Supplies Needed:

++Paint Shop Pro ( I used 10 but any version should work)


++Nurse Naughty ADD ON Scrap kit by me can be found on my blog HERE

++Template31 by Tracy at Freebie Friends can be found HERE


++Tube of choice or the one I used. I used the artwork of NoFlutter you can see her artwork HERE

++Plug ins: Eye Candy 4000 Gradient Glow

++Font and Mask of choice

Let’s get Started!

**NOTES:
-Add Drop shadow of choice as you go
-You can merger layers as you want to make things easier for yourself.

Open the template in PSP, using your shortcut keys on your keyboard (SHIFT+D) duplicate the template as a new image. Close the original. **Increase the canvas size by going to image, canvas size then increase it to 600x600.


Open several papers of choice, resizing as needed. For example, when I look at the blue bar where it tells me what I’ve opened (say like paper 2) it tells me what percentage I’m viewing it at. For me it’s usually 16%, so I resize to 16% bringing it to 100%. ( I hope that made sense!) Once you’ve done this, minimize for later use.


Next go to the bottom template layer and go to selections, select all, then float, selections defloat. Add your gradient glow of choice. Don’t forget to go to selections, none then delete the template layer. Repeat this process for the rest of the template.


Add a new raster layer, flood fill with your choice of paper. Add your mask, and merge group. Move this layer to the bottom.

Open the glitter splatter of your choice. Copy and paste as a new layer, moving it below the template layers, just above the mask layer.

Next open the bandaid, post it, pencil, tweezers, first aid kit and pill. Resize them then copy and paste and arrange in the lower right hand corner by the hearts layer. Move the hearts layer above all of these. Arrange them as you like.

Now open the flower bouquet of your choice. Resize it then copy and paste as a new layer to the upper left hadn corner of the tag, below the frame and squares layer. Duplicate it and go to image, flip.

Open your tube of choice, copy and paste as a new layer to the left of your tag. Resize as needed and adjust. Duplicate it then move below the frame layer. Move where you would like the tube to be seen in the frame. Use your magic wand tool, click inside one of the frames. Go to selections, modify, expand by 6. Go to selections, invert and on the tube layer hit the delete key. Go to selections, none. Repeat this for the rest of the frames.

Add your text, copyrights and tagger markings.

Save and your done! Thank you for trying my tutorial!

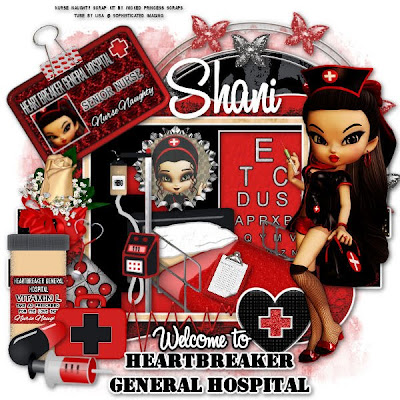
Heartbreaker General Hospital (PTU)


Heartbreaker General Hospital PTU

This tutorial was written on October 27, 2009 by Shani aka Wicked Princess. The concept of the tag is mine and mine alone. Any resemblance to any other tag/tut is pure coincidence. This was written for those with working knowledge of PSP.
Supplies Needed:

++Paint Shop Pro ( I used 10 but any version should work)


++Nurse Naughty Scrap kit by me can be purchased HERE

++Template40 by Tracy at Freebie Friends can be found HERE

++Tube of choice, or the one I used. I used the tube from the kit.

++Plug ins: Eye Candy 4000 Gradient Glow

++Font and Mask of choice

Let’s get Started!

**NOTES:
-Add Drop shadow of choice as you go
-You can merger layers as you want to make things easier for yourself.

Open the template in PSP, using your shortcut keys on your keyboard (SHIFT+D) duplicate the template as a new image. Close the original. **Increase the canvas size by going to image, canvas size then increase it to 600x600.


Open several papers of choice, resizing as needed. For example, when I look at the blue bar where it tells me what I’ve opened (say like paper 2) it tells me what percentage I’m viewing it at. For me it’s usually 16%, so I resize to 16% bringing it to 100%. ( I hope that made sense!) Once you’ve done this, minimize for later use.


Next go to the bottom template layer and go to selections, select all, then float, selections defloat. Add your gradient glow of choice. Don’t forget to go to selections, none then delete the template layer. Repeat this process for the rest of the template.


Add a new raster layer, flood fill with your choice of paper. Add your mask, and merge group. Move this layer to the bottom.

Open both the butterfly brad wires. Resize the first one as needed, copy and paste as a new layer, moving just above the circle layer. Arrange it over the circle as you like. Resize the other one, then copy and paste as a new layer, moving above the other one as you like. Note that I moved mine slightly higher.

Now we’re going to make our hospital scene window. Open the hospital bed, resize it, then copy and paste as a new layer. Move it so that its towards the bottom, right hand corner of the frame. Move it below the frame layer also. Using your magic wand tool, click inside the frame, got to selections, modify and expand by 6. Go to selections, invert, and on the bed layer hit the delete key. Add the eye chart after resizing, moving below the frame layer and to the upper right hand corner. Then open the bottle cap you like, resize it then copy and paste above the bed layer. Add a clipboard to the bed, and the IV drip to the left hand side of the bed.

Next open the Heart and with stat line of your choice. Copy and paste it then mirror it, moving it to the middle of the bottom portion of the frame. This should be the top layer.

Now open your tube of choice, copy and paste as a new layer to the right hand side of the tag.

Open the pill package, pill bottle, first aid kit and pill capsule. Resize then copy and paste as new layers to the bottom left hand side of the tag, grouped together as you like. Add the syringe to the bottom of the grouping.

Then open the rose corsage you like, resize it then copy and paste as a new layer to the left part of the tag. Move this layer below the grouping.

Open the HGH Nurse Id card, erasing the string part. Resize then copy and paste as a new layer angling to the left a bit. Move to the upper left hand corner as you like it. Add a clip of choice to the top of it.

Add any text, copyrights and tagger markings.

Save and your done!

Friday, October 23, 2009

Sassy Saturday PTU


Sassy Saturday PTU

This tutorial was written on October 23, 2009 by Shani aka Wicked Princess. The concept of the tag is mine and mine alone. Any resemblance to any other tag/tut is pure coincidence. This was written for those with working knowledge of PSP.

Supplies Needed:

++Paint Shop Pro ( I used 10 but any version should work)

++Scrap kit by Dorthi called Pink Grapes can be found HERE

++ Template 16 by Lacarolita’s can be found HERE

++Tube of choice or the one I used. I used the artwork of CEI Stickers, which can be purchased HERE


++Plug ins:
Eye Candy 4000

++Mask and font of choice.

**NOTES:
-Add Drop shadow of choice as you go
-You can merger layers as you want to make things easier for yourself.


Open the template in PSP, using your shortcut keys on your keyboard (SHIFT+D) duplicate the template as a new image. Close the original.

Open several papers of choice, resizing as needed. For example, when I look at the blue bar where it tells me what I’ve opened (say like paper 2) it tells me what percentage I’m viewing it at. For me it’s usually 16%, so I resize to 16% bringing it to 100%. ( I hope that made sense!) Once you’ve done this, minimize for later use.

Next go to the bottom template layer and go to selections, select all, then float, selections defloat. Don’t forget to go to selections, none then delete the template layer. Repeat this process for the rest of the template
Add a new raster layer and send it to the bottom. Flood fill with your choice of paper. Add your mask and merge group.

Open the large flower of your choice. Copy and paste as a new layer in the upper left hand corner of the tag, below the rectangles.

Next open the bead string of your choice, resizing then copy and paste as a new layer into the center of the top and bottm rectangles.

Then open the flower branches, resize then copy and paste as new layer on the bottom of the bottom layer then at the top of the top rectangle.

Add a bow and charm of your choice to the upper left hand corner of the top rectangle layer.

Open your tube of choice, resize it then copy and paste as a new layer to the right hand portion of the tag.

Add your text, copyrights and license info.

Save and your done!

Thank you for trying my tutorial

Thursday, October 15, 2009

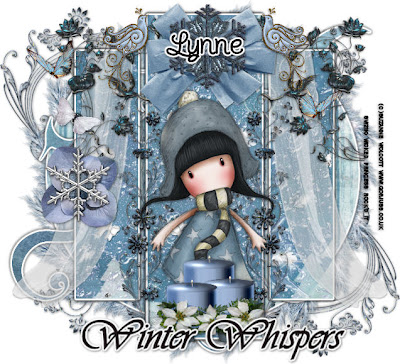
Winter Whispers (PTU)


Winter Whispers
This tutorial was written on October 15, 2009 by Shani aka Wicked Princess. The concept of the tag is mine and mine alone. Any resemblance to any other tag/tut is pure coincidence. This was written for those with working knowledge of PSP.
Supplies Needed:

++Paint Shop Pro ( I used 10 but any version should work)

++Scrap kit by Baby Cakes Scraps called Shiver can be purchased HERE

++Template 95 by Ali can be found HERE

++Tube of choice or the one I used. I used the artwork of Suzanne Wolcott which can be purchased HERE You must have a valid license in order to use her work.

++Plug in:
-Eye Candy 4000 Gradient Glow

++Mask and font of choice.

**NOTES:
-Add Drop shadow of choice as you go
-You can merger layers as you want to make things easier for yourself.


Open the template in PSP, using your shortcut keys on your keyboard (SHIFT+D) duplicate the template as a new image. Close the original.

Open several papers of choice, resizing as needed. For example, when I look at the blue bar where it tells me what I’ve opened (say like paper 2) it tells me what percentage I’m viewing it at. For me it’s usually 16%, so I resize to 16% bringing it to 100%. ( I hope that made sense!) Once you’ve done this, minimize for later use.

Next go to the bottom template layer and go to selections, select all, then float, selections defloat. Don’t forget to go to selections, none then delete the template layer. Repeat this process for the rest of the template.**NOTE: I added a white gradient glow to the template and removed the top doodle layer.

Open the wreath of your choosing. Resize as needed then copy and paste as a new layer. Move it to the bottom of the layers palette.

Next open the doodle of choice, resize and copy and paste as a new layer. Move it to the upper left hand side of the canvas. Then move this layer to the bottom below the wreath. Duplicate it and go to image, mirror, then image flip.

Open the snow/bow splatter. Copy and paste as a new layer. On the Rectangle layer (note I merged my rectangles to one layer) go to selections, select all, then selections float then defloat. Go to selections, modify, contract by 4. On the splatter layer, hit the delete key. Go to selections none.

Now open one of the nettings. We’re going to make this look like a window almost. Resize then copy and paste as a new layer. Move to the upper left corner of the left rectangle. Duplicate it and go to image, mirror.

Then open the doodle two, resize it. Then copy and paste asa new layer, moving to the center between the rectangles. Duplicate it and go to image, mirror and adjust as needed.

Open the corner doodle of choice, resize it then copy and paste as a new layer, moving to the upper right hand corner of rectangle. Duplicate it and go to image, mirror. Adjust it as needed.

Next open the bow of choice, resize it then copy and paste as a new layer to the upper center part of the tag. Add the snowflake of choice.

Open your tube, resize then copy and paste as a new layer. Move to the center bottom of the tag. Add the trio of candles to the bottom also.

Now open the dove of choice, resize then copy and paste as a new layer on either side of the bow at the top. Add several butterflies of choice through out.

Open a flower of choice, resize then copy and paste as a new layer to the left hand side of the tag. Add a snow flake of choice to the top of the flower.

Finally add your text, copyrights, licensing info and tagger markings.

Save and your done!

Thank you fro trying my tutorial.

Monday, October 12, 2009

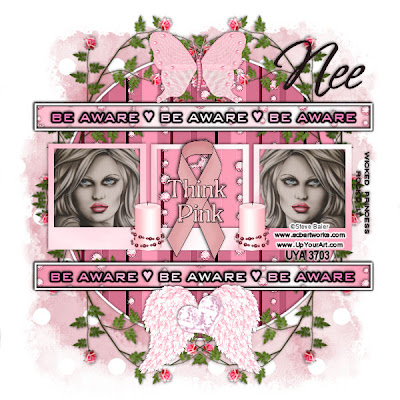
Be Aware PTU


Be Aware PTU

This tutorial was written on October 12, 2009 by Shani aka Wicked Princess. The concept of the tag is mine and mine alone. Any resemblance to any other tag/tut is pure coincidence. This was written for those with working knowledge of PSP.
Supplies Needed:

++Paint Shop Pro ( I used 10 but any version should work)

++Scrap kit by Nee of Envied And Admired Scraps called Think Pink can be purchased HERE

++Template 4 by Tracy at Freebie Friends can be found HERE

++Tube of choice or the one I used. I used the beautiful artwork of Steve Bair which can be purchased HERE You must have a valid UYA license in order to use his work.

++Plug ins
-Eye Candy 4000 Gradient Glow

++Mask and font of choice.

**NOTES:
-Add Drop shadow of choice as you go
-You can merger layers as you want to make things easier for yourself.


Open the template in PSP, using your shortcut keys on your keyboard (SHIFT+D) duplicate the template as a new image. Close the original.

Open several papers of choice, resizing as needed. For example, when I look at the blue bar where it tells me what I’ve opened (say like paper 2) it tells me what percentage I’m viewing it at. For me it’s usually 16%, so I resize to 16% bringing it to 100%. ( I hope that made sense!) Once you’ve done this, minimize for later use.

Next go to the bottom template layer and go to selections, select all, then float, selections defloat. Don’t forget to go to selections, none then delete the template layer. Repeat this process for the rest of the template.**NOTE I increased the canvas size by going to image, canvas size and changed it to 600x600. Also I added a gradient glow to the word art.

Add a new raster layer and send it to the bottom. Flood fill with your choice of paper. Add your mask and merge group.

Open the glitter rain of your choice. Resize if needed then copy and paste as a new layer. Move it below the circle frame layer. On the frame layer, use your magic wand tool and click inside the frame. Go to selections, modify expand by 2. Go to selections, invert. On the rain layer, hit the delete key. Go to selections, none.

Now repeat this process for the Polaroid frame layers and the rectangle frame layers.

Next open the rose stems that kind of curve at the top of them. Resize then copy and paste as a new layer. Move below the rectangle layers and to the right. Make it so the bottom of the stem is at the bottom of the rectangle. Duplicate it then go to image, mirror. Duplicate it again and go to image, flip. Then once more duplicate and go to image, mirror.

Open your tube of choice, resize it then copy and paste as a new layer. Move it below the Polaroid frame layer on the right. Use your magic wand tool and click inside the frame. Go to selections, modify, expand by 5. Go to selections, invert. On the tube layer, hit the delete key. Go to selections, none. Duplicate this layer and go to image, mirror. Adjust as needed so that it sits in the frame nicely.

Add the support ribbon of your choice to the center frame.

Now open the candle of choice. Resize it then copy and paste as a new layer. Move it in between the left and center frame. Duplicate it and go to image, mirror.

Add a butterfly of choice to the top of the frame, where the roses meet . Then add the wings of choice to the bottom, along with a gem of choice.

Add your copyrights, license info, tagger markings and text. Save and your done!

Thanks for trying my tutorial.
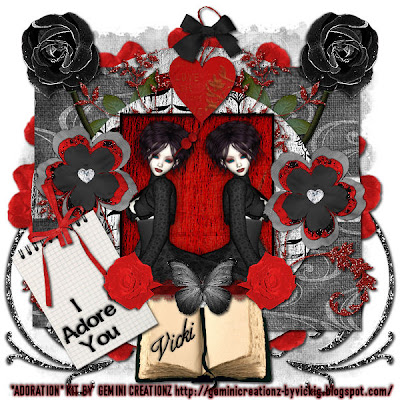
I Adore You PTU


I Adore You

This tutorial was written on October 12, 2009 by Shani aka Wicked Princess. The concept of the tag is mine and mine alone. Any resemblance to any other tag/tut is pure coincidence. This was written for those with working knowledge of PSP.
Supplies Needed:

++Paint Shop Pro ( I used 10 but any version should work)

++Scrap kit by Gemini Creationz called Adoration can be found HERE

++Template 55 by Ali can be found HERE

++Tube of choice or the one I used. I used the tube out of the kit.

++Plug ins:
-muera meister copies

++Mask and font of choice.

**NOTES:
-Add Drop shadow of choice as you go
-You can merger layers as you want to make things easier for yourself.


Open the template in PSP, using your shortcut keys on your keyboard (SHIFT+D) duplicate the template as a new image. Close the original.

Open several papers of choice, resizing as needed. For example, when I look at the blue bar where it tells me what I’ve opened (say like paper 2) it tells me what percentage I’m viewing it at. For me it’s usually 16%, so I resize to 16% bringing it to 100%. ( I hope that made sense!) Once you’ve done this, minimize for later use.

Next go to the bottom template layer and go to selections, select all, then float, selections defloat. Don’t forget to go to selections, none then delete the template layer. Repeat this process for the rest of the template.**NOTE I increased the canvas size by going to image, canvas size and changed it to 600x600.

Add a new raster layer and send it to the bottom. Flood fill with your choice of paper. Add your mask and merge group.


Open the glitter doodle, resize then copy and paste as a new layer. Move it to the bottom left of the tag and duplicate it. Go to image, mirror and adjust it as needed.

Next open a flower of choice, resize it. Copy and paste as a new layer and use your plug in muera meister copies. Use the encircle option and set the shift x and y to 70.

Then open the rose with long stems that you like. Erase a good portion of the bottom stem of the rose. Copy and paste it, and move it up to the uppers left hand side below the top circle layer. Duplicate it and go to image, mirror.

Open the glitter doodle flowers. Resize as needed then copy and paste as a new layer to the left hand side below the frame background later. Duplicate it and go to image, mirror.

Next open your tube of choice, resize it and crop as needed. Copy and paste it as a new layer, below the frame layer. Duplicate it and go to image mirror. You should have two now towards the outer sides of the frame. Use your magic wand tool and click inside the frame. Go to selections, modify and expand by 3. Go to selections, invert and on your tube layers, hit the delete key. Go to selections, none.

Now open the book, resize it then copy and paste as a new layer below the frame layer.

Open the note pad, resize then copy and paste as a new layer. Angle it to the left and move to the left side at the corner of the frame. Add the bow of choice to the top of the note pad.

Then open the ribbon border of choice, resize it then copy and paste as a new layer at the bottom of the frame layer. Add a rose on either side of it and a butterfly in the center.

Open the heart tag, resize and then copy and paste as a new layer. Move it to the upper part of the tag above the frame. Add a bow of choice to the center of the loop.

Open the three sets of flower petals. Copy and paste them on top of each other. Resize them so they look as though they are layer. Then open the glitter splat you like. Copy and paste as a new layer, moving to just above the center layer. On the middle flower layer go to selections, select all then selections, float then defloat. Modify and contract by 5. Then go to selections, invert and on the glitter layer hit the delete layer. Don’t forget to go to selections, none. Add a gem to the center of the flower then merge the visible. Copy and paste the flower after resizing it into your canvas. And move to either side of the frame.

Add your text, copyrights and tagger info.

Save and your done.

Thank you for trying my tutorial.

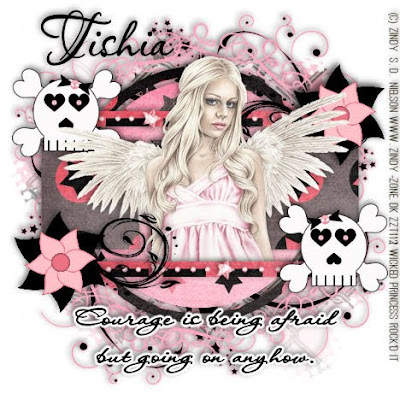
Courage Is.... (PTU)


Courage Is…

This tutorial was written on October 10, 2009 by Shani aka Wicked Princess. The concept of the tag is mine and mine alone. Any resemblance to any other tag/tut is pure coincidence. This was written for those with working knowledge of PSP.
Supplies Needed:

++Paint Shop Pro ( I used 10 but any version should work)

++Scrap kit by Tishia called Alysia can be purchased HERE

++Template “fancy” by Vicky can be found HERE *Note you have to scroll down quite a bit to find it.

++Tube of choice or the one I used. I used the work of Zindy Nielson and you can find her artwork HERE You must have valid license in order to use her work.

++Font and Mask of choice

**NOTES:
-Add Drop shadow of choice as you go
-You can merger layers as you want to make things easier for yourself.


Open the template in PSP, using your shortcut keys on your keyboard (SHIFT+D) duplicate the template as a new image. Close the original.

Open several papers of choice, resizing as needed. For example, when I look at the blue bar where it tells me what I’ve opened (say like paper 2) it tells me what percentage I’m viewing it at. For me it’s usually 16%, so I resize to 16% bringing it to 100%. ( I hope that made sense!) Once you’ve done this, minimize for later use.

Next go to the bottom template layer and go to selections, select all, then float, selections defloat. Don’t forget to go to selections, none then delete the template layer. Repeat this process for the rest of the template.

Add a new raster layer and send it to the bottom. Flood fill with your choice of paper. Add your mask and merge group.


Open the chain link fencing, resize as needed and copy then paste as a new layer. Add the same mask as you used before, merge the group.

Next open your tube of choice, resize if needed then copy and paste as a new layer. Move it to the center of the tag. Adjust as needed.

Open your star string bling. Resize it and rotate it by going to image, free rotate and check left and 90 degrees. Then copy and paste it as a new layer, moving it above the bottom rectangle layer. Duplicate it and go to image, flip. You should now have one on each small rectangles.

Now open the skull and cross bones of choice. Add one to opposite corners after resizing.

Then open the flower of choice, resize it and copy then paste as a new layer. Add it to opposite corners.

Add the text you like, copyright info, tagger markings and license info.

Save, and your done! Thanks for trying my tutorial.
Saturday, October 10, 2009

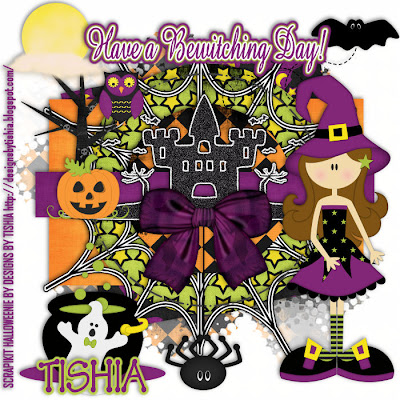
Bewitching Day PTU


Bewitching Day PTU

This tutorial was written on October 10, 2009 by Shani aka Wicked Princess. The concept of the tag is mine and mine alone. Any resemblance to any other tag/tut is pure coincidence. This was written for those with working knowledge of PSP.
Supplies Needed:

++Paint Shop Pro ( I used 10 but any version should work)

++Scrap kit by Tishia called Halloweenie can be purchased HERE

++Template by Melissa can be found HERE


++Tube of choice. I used the clip art witch that was included in the kit.

++Plug ins:
-Eye Candy 4000 Gradient Glow


++++Font and mask of choice

**NOTES:
-Add Drop shadow of choice as you go
-You can merger layers as you want to make things easier for yourself.
-This a FULL size kit. You will need to resize as you go!

Open the template in PSP, using your shortcut keys on your keyboard (SHIFT+D) duplicate the template as a new image. Close the original.

Open several papers of choice, resizing as needed. For example, when I look at the blue bar where it tells me what I’ve opened (say like paper 2) it tells me what percentage I’m viewing it at. For me it’s usually 16%, so I resize to 16% bringing it to 100%. ( I hope that made sense!) Once you’ve done this, minimize for later use.

Next go to the bottom template layer and go to selections, select all, then float, selections defloat. Don’t forget to go to selections, none then delete the template layer. Repeat this process for the rest of the template. *Note I deleted the word art layer.


Add a new raster layer and send it to the bottom. Flood fill with your choice of paper. Add your mask and merge group.

Open the haunted house. Resize it then copy and paste as a new layer. Move it to the bottom of the rectangle layer. Add a gradient glow of your choice.

Next open the spider web, resize it and add a gradient glow. Copy and paste as a new layer and move below the first circle layer.

Then open the tree, resize and copy then paste as a new layer. Move it to the left and below the house layer.

Open the spider with the string, resize it. Then copy and paste as a new layer into the center of the canvas towards the bottom of the house. Add a bow of choice at the top of the string.

Add the bat of choice after resizing to the upper right hand corner of the tag.

Open the witch and resize it. Copy and paste as a new layer. Move to the right of the tag.

Then open the pumpkin and owl to the tree. Make sure your resize and adjust as needed.

Now add the moon after resizing to the upper right hand side of the tag.

Add the cauldron and ghost of choice to the bottom left of the tag after resizing.

Finally add any text you like, and save!

Thanks for trying my tutorial.
You are not alone (FTU)


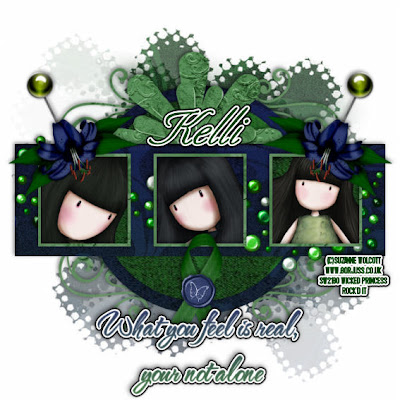
You are not alone

This tutorial was written on October 10, 2009 by Shani aka Wicked Princess. The concept of the tag is mine and mine alone. Any resemblance to any other tag/tut is pure coincidence. This was written for those with working knowledge of PSP.
Supplies Needed:

++Paint Shop Pro ( I used 10 but any version should work)

++Scrap kit by me called Coming Out of the Dark which is FTU can be found on my blog HERE

++Template 14 by Alyssa can be found HERE

++ 3 tubes of choice or the ones I used. I used the work of Suzanne Wolcott which you can be found HERE Note you must have a valid license in order to use her work.

++Font and Mask of choice

Let’s get Started!

**NOTES:
-Add Drop shadow of choice as you go
-You can merger layers as you want to make things easier for yourself.

Open the template in PSP, using your shortcut keys on your keyboard (SHIFT+D) duplicate the template as a new image. Close the original.


Open several papers of choice, resizing as needed. For example, when I look at the blue bar where it tells me what I’ve opened (say like paper 2) it tells me what percentage I’m viewing it at. For me it’s usually 16%, so I resize to 16% bringing it to 100%. ( I hope that made sense!) Once you’ve done this, minimize for later use.


Next go to the bottom template layer and go to selections, select all, then float, selections defloat. Add your gradient glow of choice. Don’t forget to go to selections, none then delete the template layer. Repeat this process for the rest of the template.


Add a new raster layer, flood fill with your choice of paper. Add your mask, and merge group. Move this layer to the bottom.

Then open the paper flower of choice, resize if needed. Copy and paste as a new layer and move below the rectangle layer. Adjust it so that its showing half way above the rectangle at the top of it.

Now open the green beading. Copy and paste as a new layer, move it to just above the rectangle layer. Adjust and resize as needed.

Open the pin of choice. Resize then copy and paste above the green beading layer. Move it so its sitting behind the framed square to the left. Duplicate it and go to image, mirror.

Next open your tubes of choice. Crop them as needed, then copy and paste your first one as a new layer. Move it below the framed layer on the left. Adjust as needed. Using your magic wand tool click inside the frame and go to selections, modify, expand by 3. Go to selections, invert. On the tube layer hit the delete key. Repeat this process for the other two frames and tubes.

Then open the tiger lily of your choice. Resize then copy and paste as a new layer. Angle it as you like and move it to the top of the frame layer on the left. Duplicate it and go to image, mirror.

Next open the awareness ribbon of your choice, resize then copy and paste as a new layer. Move it to the bottom, under the middle frame. Add a wax button of choice.

Add the word art of your choosing to the bottom of the tag.

Now add any other text, copyright info, license number and tagger markings.

Save and your done!

Thanks for trying my tutorial.