Thursday, July 30, 2009
Timeless Beauty-PTU
Timeless Beauty-PTU
This tutorial was written on July 29, 2009 by Shani aka Wicked Princess. The concept of the tag is mine and mine alone. Any resemblance to any other tag/tut is pure coincidence. This was written for those with working knowledge of PSP.
Supplies Needed:
++Paint Shop Pro ( I used 10 but any version should work)
++Scrap kit by me called Gracious Beauty can be purchased from HERE OR HERE
++Template21 by Bev at Horseplays Pastures can be found HERE
++Tube of choice or the one I used. I used the artwork of Giovanna Cosotto can be purchased HERE
++Plug ins:
Xero Radiance
Eye Candy 4000 Gradient Glow
Muera Meister Copies
Let’s get started!
**NOTES:
-Add Drop shadow of choice as you go
-You can merger layers as you want to make things easier for yourself.
Open the template in PSP, using your shortcut keys on your keyboard (SHIFT+D) duplicate the template as a new image. Close the original.
Open several papers of choice, resizing as needed. For example, when I look at the blue bar where it tells me what I’ve opened (say like paper 2) it tells me what percentage I’m viewing it at. For me it’s usually 16%, so I resize to 16% bringing it to 100%. ( I hope that made sense!) Once you’ve done this, minimize for later use.
Next go to the bottom template layer and go to selections, select all, then float, selections defloat. Add a gradient glow of your choice.Don’t forget to go to selections, none then delete the template layer. Repeat this for the remainder of the template.
Go to the first template layer and duplicate it. On the bottom template layer, go to effects, textures, mosaic antique glass at whatever setting your like. Repeat this for the rest of the template.
Open the doodle of your choice, resie then copy and paste as a new layer below the first of the middle template layer. Angle it slightly then duplicate it several times. Move them so they are overlapping slightly all the way up.
Next open up the baby’s breath and resize. Copy and paste as a new layer below the first circle layer. Open several flowers you like then copy and paste as new layers randomly over the baby’s breath.
Open the bling frame you like. Copy and paste as a new layer and move above the first circle layer.
Next open the flourish of your choice. Copy and paste as a new layer and use your plug in, Muera Meister copies on the encircle option with your shift x and y set at 50.
Then open the jeweled flower of your choice and copy and paste as a new layer into the center of the flourishes.
Add your tube of choice, adjust where you like it. Use the plug in, Xero, radiance with the setting you like.
Open several roses of your choice, copy and paste and resize. Move to the bottom right hand corner and add a butterfly of choice.
Add a set of books and angel to the opposite corner.
Finally add your text of choice, copyrights, license number and tagger markings
Save and your done!
Thank you for trying my tutorial.
Wednesday, July 29, 2009
Drama Free Zone-PTU
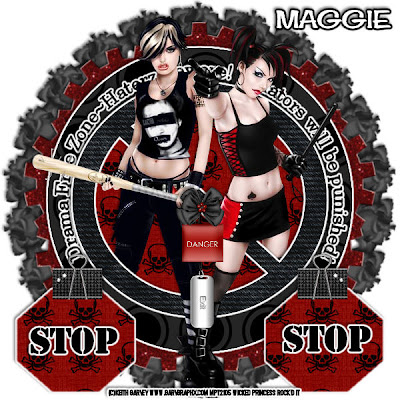
DRAMA FREE ZONE – PTU
This tutorial was written on July 29, 2009 by Shani aka Wicked Princess. The concept of the tag is mine and mine alone. Any resemblance to any other tag/tut is pure coincidence. This was written for those with working knowledge of PSP.
Supplies Needed:
++Paint Shop Pro ( I used 10 but any version should work)
++Scrap kit by Maggies Scrap called Demon Circle can be found HERE
++Template 13 by me can be found HERE
++Two tubes of choice or the ones I used. I used the artwork of Keith Garvey you can purchase it HERE
++Plug ins:
-Xero Radiance
-Eye Candy 4000 Gradient Glow
-Muera Meister Copies
**NOTES:
-Add Drop shadow of choice as you go
-You can merger layers as you want to make things easier for yourself.
Open the template in PSP, using your shortcut keys on your keyboard (SHIFT+D) duplicate the template as a new image. Close the original.
Open several papers of choice, resizing as needed. For example, when I look at the blue bar where it tells me what I’ve opened (say like paper 2) it tells me what percentage I’m viewing it at. For me it’s usually 16%, so I resize to 16% bringing it to 100%. ( I hope that made sense!) Once you’ve done this, minimize for later use.
Next go to the bottom template layer and go to selections, select all, then float, selections defloat. Add a fat gradient glow with your choice of colors. Don’t forget to go to selections, none then delete the template layer. Repeat this process for the rest of the template.
Open the rose with stem you like. Copy and paste as a new layer into the center of the canvas. Resize it a bit as needed. Use your plug in Muera Meister copies on the encircle option. I used the 50 for shift x and y. how many roses you want is up to you. Move this layer to the bottom.
Choose one of the glitter accents you like. Copy and paste as a new layer into the center of the canvas. Repeat the muera meister copies option with the same settings. Move this layer above the roses layer.
Open your tubes of choice, copy and paste as a new layer into the center of the canvas. Add your plug in Xero radiance on the setting you like. Duplicate them and move one set below the no sign layer. Go to the top tube layer again and using your eraser tool, erase the parts you don’t want seen.
Add a binder clip to each of the stop signs. Then add a padlock and bow between the two tubes.
Add your text, copyrights, license info and tagger markings. Save and your done! Thank you for trying my tutorial!
Tuesday, July 28, 2009
Glamorous-PTU
Glamorous-PTU
This tutorial was written on July 24, 2009 by Shani aka Wicked Princess. The concept of the tag is mine and mine alone. Any resemblance to any other tag/tut is pure coincidence. This was written for those with working knowledge of PSP.
Supplies Needed:
++Paint Shop Pro ( I used 10 but any version should work)
++Scrap kit by MPZ at so Tempting Scraps called Glam it up! This kit is a part of the July collab at paradise4scrappers and can be received for free if you spend $10.00 or more until the end of july. Then after that you can find it in her portion of the store. You can purchase it HERE
++Template 6 by Bev at Horseplays Pasture can be found HERE
++2 Tubes of choice or the ones I used. I used the work of Elias Chatzoudis and you can purchase his work HERE
++Plug ins:
Eye Candy 4000 gradient glow
Xero, Radiance
Let’s get Started!
**NOTES:
-Add Drop shadow of choice as you go
-You can merger layers as you want to make things easier for yourself.
Open the template in PSP, using your shortcut keys on your keyboard (SHIFT+D) duplicate the template as a new image. Close the original.
Open several papers of choice, resizing as needed. For example, when I look at the blue bar where it tells me what I’ve opened (say like paper 2) it tells me what percentage I’m viewing it at. For me it’s usually 16%, so I resize to 16% bringing it to 100%. ( I hope that made sense!) Once you’ve done this, minimize for later use.
Next go to the bottom template layer and go to selections, select all, then float, selections defloat. Don’t forget to go to selections, none then delete the template layer. Add a fat gradient glow of your choosing ONLY to the shoes. Repeat this process for the rest of the template.
Open the glitter splat you like. Copy and paste as a new layer and move below the frame layer. Use your magic wand tool and click inside the frame. Go to selections, modify expand and expand by 5. Go to selections, invert. Activate the glitter splat layer and hit delete on the keyboard. Go to selections, none.
Next open your first tube of choice and add your plug in xero, radiance at the random setting you like. Crop if needed ( I used a close up) and copy and paste as a new layer. Go back to the large shoe, and go to selections, select all, then selections float then defloat. Finally go to selections, invert and go back to your tube layer. Hit delete on your keyboard. Go to selections, none.
Add the doodle of choice to the bottom left hand part of the template. Go to image, mirror then image flip. Adjust as needed. Add a paperclip with bow and flower you like to each one of those doodles.
Next add the other tube. Use your xero radiance plug in again. Adjust and move it as you like.
Open the purse, mirror and cell phone. Copy and paste as new layers to the right hand side of the frame.
Finally add your text, copyrights and license info. Don’t forget your tagger markings!
Save and your done.
Thank you for trying my tutorial.
Monday, July 27, 2009
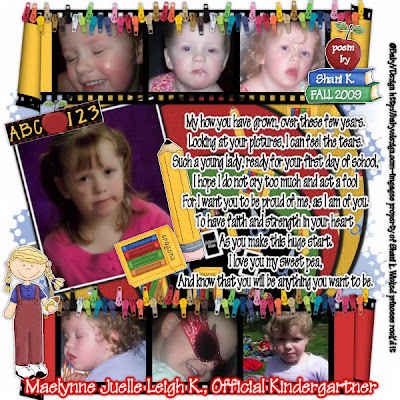
Official Kindergartner-PTU
Official Kindergartner PTU
This tutorial was written on July 24, 2009 by Shani aka Wicked Princess. The concept of the tag is mine and mine alone. Any resemblance to any other tag/tut is pure coincidence. This was written for those with working knowledge of PSP.
Supplies Needed:
++Paint Shop Pro ( I used 10 but any version should work)
++Scrap kit by Baby V Designs called Kindergarten Dayz can be purchased HERE
++Template 9 by me can be found HERE
++ 7 images of choice. I used 7 pictures of my daughter Maelynne.
++Plug ins:
-Eye Candy 4000 Gradient Glow
++Font and mask of choice
Let’s get Started!
**NOTES:
-Add Drop shadow of choice as you go
-You can merger layers as you want to make things easier for yourself.
Open the template in PSP, using your shortcut keys on your keyboard (SHIFT+D) duplicate the template as a new image. Close the original.
Open several papers of choice, resizing as needed. For example, when I look at the blue bar where it tells me what I’ve opened (say like paper 2) it tells me what percentage I’m viewing it at. For me it’s usually 16%, so I resize to 16% bringing it to 100%. ( I hope that made sense!) Once you’ve done this, minimize for later use.
Next go to the bottom template layer and go to selections, select all, then float, selections defloat. Don’t forget to go to selections, none then delete the template layer. Add a fat gradient glow of your choosing. Repeat this process for the rest of the template.
Add a new raster layer and flood fill with your choice of paper. Add your mask and merge the group.
Open two of the film frames you like. Minimize one of them and start working with the one. Open three of the pictures you want to use. Note: I did the digitial noise removal to soften the pictures. Copy and paste the first picture into the first frame. Resize as needed. Using your magic wand tool, click inside the frame. Go to selections, invert. Go back to the image layer and hit delete on your keyboard. Go to selections, none. Continue this for the other two frames.
minimize this, and repeat the process for the other film frame. When your satisfied, merge the layers. Minimize this one we’ll use them in a second.
Open your main picture and resize it. I did the digital noise removal on this one too. Add a gradient glow you like to this picture. Copy and paste as a new layer and place at an angle on the left side of the canvas.
Next copy and paste your first film frame and move to the bottom. Add the second one and move to the top.
Then add the clip string after resizing to the top of both frames to make it look like its being clipped on by it.
Open the pencil and crayon clip art. Copy and past as new layers and place on the edges of your main picture. Add the mini chalkboard to the top of it.
Choose one of the children clip art and resize. Copy and paste as a new layer to the left of the bottom frame. Add the books and apple to the opposite corner of the top frame.
Add any text that you like, and if you choose to use the images and no tubes, please credit the maker of the kit.
Save and your done! Thank you for trying my tutorial.
Hope Whispers-FTU
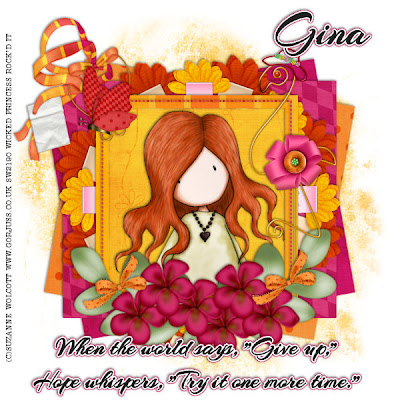
Hope Whispers-FTU
This tutorial was written on July 24, 2009 by Shani aka Wicked Princess. The concept of the tag is mine and mine alone. Any resemblance to any other tag/tut is pure coincidence. This was written for those with working knowledge of PSP.
Supplies Needed:
++Paint Shop Pro ( I used 10 but any version should work)
++Kit called Flamingo Juice by Gina @ Kikeka Kits can be found HERE
++Template 165 by Missy can be found HERE
++Tube of choice or the one I used. I used the artwork of Suzanne Wolcott and it can be purchased, HERE
++Plug ins:
-Muera Meister Copies
++Font and mask of choice
Let’s get Started!
**NOTES:
-Add Drop shadow of choice as you go
-You can merger layers as you want to make things easier for yourself.
Open the template in PSP, using your shortcut keys on your keyboard (SHIFT+D) duplicate the template as a new image. Close the original.
Open several papers of choice, resizing as needed. For example, when I look at the blue bar where it tells me what I’ve opened (say like paper 2) it tells me what percentage I’m viewing it at. For me it’s usually 16%, so I resize to 16% bringing it to 100%. ( I hope that made sense!) Once you’ve done this, minimize for later use.
Your going to want to adjust the canvas and make it larger. Go to image, canvas size and increase it by 600 x 600.
Next go to the bottom template layer and go to selections, select all, then float, selections defloat. Don’t forget to go to selections, none then delete the template layer. Repeat this process for the rest of the template.
Add a new raster layer and flood fill with your choice of paper. Add your mask and merge the group. Move this layer to the bottom of your layer palette.
Using your magic wand tool, click inside the frame. Go to selections, modify expand by 4. Add a new raster layer and flood fill with your choice of paper. Go to selections, none and then move this layer below the frame.
Open your choice of clips with flowers. Resize the first one and copy and paste it as a new layer into the center of the canvas. Use your plug in muera mester copies, with the encircle option. I used 50 for the shift x and y. Add the next flower after resizing and do the same thing. Angle the flowers slightly so that they intertwine now and offset each other. Close off all other layers except the two flower clip layers. Merge visible then open up all layers again. Move this layer below the frame and background layer.
Add your tube of choice and resize as needed. Move below the frame layer.
Next open your flower bundle of choice. Resize it and copy and paste as a new layer below the frame layer. Add your choice of bows to either side of the flowers.
Open your choice of wire and ribbon tag. Copy and paste as a new layer to the left hand side of the tag. Add your choice of butterfly next to it.
Next add the wire flamingo you like to the right side of the tag. Adjust and move as you like.
Finally add your tagger markings, copyrights, and license number.
Save and your done!
Thank you for trying my tutorial.

Sunday, July 26, 2009
Rock Star Gurls-PTU
Rock Star Gurls-PTU
This tutorial was written on July 11, 2009 by Shani aka Wicked Princess. The concept of the tag is mine and mine alone. Any resemblance to any other tag/tut is pure coincidence. This was written for those with working knowledge of PSP.
Supplies Needed:
++Paint Shop Pro ( I used 10 but any version should work)
++Scrap kit by Susan aka HippieDaze called DJ Superstar can be purchased HERE
++Template by Susan can be found 013 HERE
++Tube of choice or the one I used. I used the artwork of Kenny Kiernan which can be purchased from HERE
++Plug ins:
-Eye Candy 4000 Gradient Glow
-Xero Radiance
Let’s Get Started!
**NOTES:
-Add Drop shadow of choice as you go
-You can merger layers as you want to make things easier for yourself.
Open several papers of choice, resizing as needed. For example, when I look at the blue bar where it tells me what I’ve opened (say like paper 2) it tells me what percentage I’m viewing it at. For me it’s usually 16%, so I resize to 16% bringing it to 100%. ( I hope that made sense!) Once you’ve done this, minimize for later use
Next go to the bottom template layer and go to selections, select all, then float, selections defloat. Don’t forget to go to selections, none then delete the template layer. Add a gradient glow on the fat setting the colors of your choice. Repeat this process for the rest of the template.
Open your four tubes, and crop as needed. Copy and paste as a new layer, centering into each of the smaller squares. Go to the small square layer and use your short cut keys CTRL+A then CTRL+F then go to selections, defloat. Next go to selections, invert. Go to your tube layers, and hit the delete key. Go to selections, none. Close off all the layers but the tube layers. Merge together and unhide all the layers.
On the tube layer use your plug in Xero, Radiance on whatever setting you like. Also make sure this layer is just above the small square layer.
Next open the musical notes of your choice. Add a gradient glow of your choice and the duplicate it. Move one layer to the top of the canvas, the other one to the bottom. Make sure to move these layers below the word art layers.
Open the t-shirt and ipod you like. Resize then copy and paste new layers, Move the t-shirt and ipod to opposite corners at the top.
Add two stars of your choosing to either side of the template, making sure that the are alternated over each other.
Open the headphones, rock pass, cassette and ticket. Resize and copy and paste as a new layer on opposite corners of the tag.
Add your text, copyrights, license number and tagger markings. Save and your done!
Thank you for trying my tutorial.
Poll Results!
I saw an overwhelming amount of support for more animation tuts! WOOT WOOT.. ok so I'll have my list going with things I want to teach myself for animation. I really want to try and twist it up and see what I can do. I'll be working on them more this week... I'm tackling a list of things to get done! Thanks everyone for voting!When I do them I will make sure that I also label them animation so you'll be able to find them faster in the labels section.
Shani
Shani
Saturday, July 25, 2009
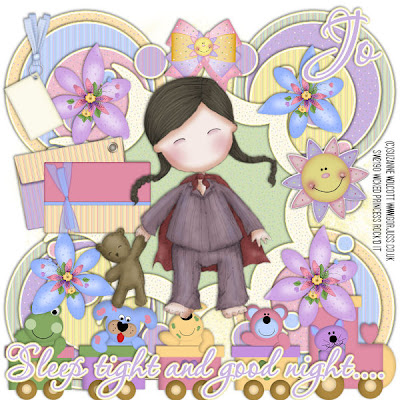
Sleep Tight - PTU
Sleep Tight-PTU
This tutorial was written on July 25, 2009by Shani aka Wicked Princess. The concept of the tag is mine and mine alone. Any resemblance to any other tag/tut is pure coincidence. This was written for those with working knowledge of PSP.
Supplies Needed:
++Paint Shop Pro ( I used 10 but any version should work)
++Kit by Scraps by Jo called Over the Rainbow can be purchased HERE
++Template 12 By me can be found HERE
++Tube of choice. I used the artwork Suzanne Wolcott which you can purchase HERE
++Plug ins:
-Eye Candy 4000 Gradient Glow
++Mask and font of choice
Let’s get started!
**NOTES:
-Add Drop shadow of choice as you go
-You can merger layers as you want to make things easier for yourself.
-THIS IS A FULL SIZE KIT!
Open the template in PSP, using your shortcut keys on your keyboard (SHIFT+D) duplicate the template as a new image. Close the original.
Open several papers of choice, resizing as needed. For example, when I look at the blue bar where it tells me what I’ve opened (say like paper 2) it tells me what percentage I’m viewing it at. For me it’s usually 16%, so I resize to 16% bringing it to 100%. ( I hope that made sense!) Once you’ve done this, minimize for later use.
Next go to the bottom template layer and go to selections, select all, then float, selections defloat. Don’t forget to go to selections, none then delete the template layer. Add a fat gradient glow with the colors of your choice. Repeat this process for the rest of the template.
Add a new raster layer and flood fill with your choice of paper. Add your mask and merge group. Move this layer to the bottom.
Next open the train with stuffed animals. Resize it and then copy and paste as a new layer at the bottom of the canvas. Resize it as needed and adjust
Open two of the flowers you like. Resize then copy and paste the first one as a new layer towards the lower bottom left hand corner of the template. Duplicate it and move it to the opposite corner on the top. Repeat this for the other flower.
Add the sunshine to the right side of the canvas, placed on the right side of the frame.
On the opposite side add the card and envelop of your choice. You’ll need to resize and adjust.
Add a bow to the top center part of the frame and a tag to the left upper side.
Add your tube, and resize as needed. Place the tube into the center of the canvas.
Add your text, copyrights, license info and tagger markings.
Save and your done! Thank you for trying my tutorial.
Friday, July 24, 2009
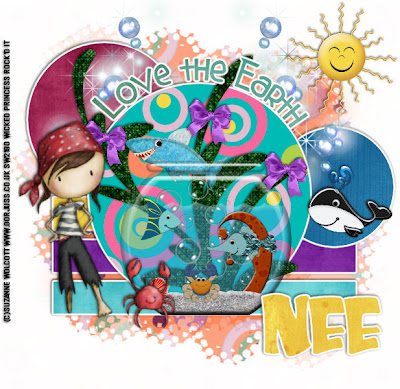
Love the earth-PTU
Love the earth-PTU
This tutorial was written on July 24, 2009 by Shani aka Wicked Princess. The concept of the tag is mine and mine alone. Any resemblance to any other tag/tut is pure coincidence. This was written for those with working knowledge of PSP.
Supplies Needed:
++Paint Shop Pro ( I used 10 but any version should work)
++Scrap kit called Under the Sea by Nee @ Envied and Admired Scraps can be purchased HERE OR HERE OR HERE
++Template 70 by Blissfully Beth can be found HERE *Note you’ll have to scroll down a bit and you’ll see it on the left hand side.
++Tube of choice or the one I used. I used the artwork of Suzanne Wolcott. You can purchase her work
HERE
++Plug ins:
-Eye Candy 4000 Gradient Glow
++Font and mask of choice
Let’s get Started!
**NOTES:
-Add Drop shadow of choice as you go
-You can merger layers as you want to make things easier for yourself.
Open the template in PSP, using your shortcut keys on your keyboard (SHIFT+D) duplicate the template as a new image. Close the original.
Open several papers of choice, resizing as needed. For example, when I look at the blue bar where it tells me what I’ve opened (say like paper 2) it tells me what percentage I’m viewing it at. For me it’s usually 16%, so I resize to 16% bringing it to 100%. ( I hope that made sense!) Once you’ve done this, minimize for later use.
Next go to the bottom template layer and go to selections, select all, then float, selections defloat. Don’t forget to go to selections, none then delete the template layer. Repeat this process for the rest of the template.
Add a new raster layer and flood fill with your choice of paper. Add your mask and merge the group. Move this layer to the bottom of your layer palette.
Now we’re going to make the fishbowl scene. Open the fish bowl, the gravel and the water. Copy and paste the water and the gravel onto the fishbowl. Make sure these are below the fishbowl layer.
Add the coral and some fish that you like. Adjust and move as you like. Resize it then minimize to add later.
Next open the bubbles of choice. Resize if needed then copy and paste as a new layer, move it below the large circle layer. Duplicate it then go to image, mirror.
Open the seaweed element, resize then copy and paste as a new layer and move into the center of the circle layer.
Add the fish bowl by going to copy merged and paste it as a new layer. Center it into the circle layer. Add the shark and have to popping out of the fish bowl a bit. Resize and adjust as needed. Add the killer whale to the other side of it on the circle layer.
Next add the sun up in the upper right hand corner. Then add bows to the seaweed.
Open your tube of choice, resize then copy and paste as a new layer to the left of the tag.
Finally add your text, copyrights, license info and tagger markings
Save and your done!
Thank you for trying my tutorial.

Tuesday, July 21, 2009
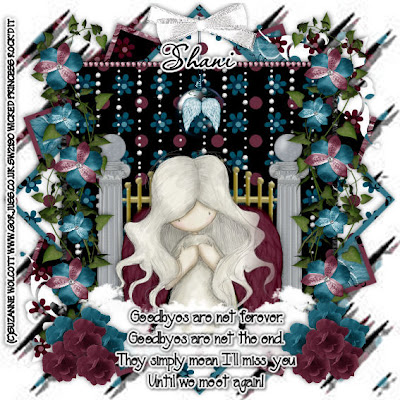
Goodbye-PTU
Goodbye –PTU
This tutorial was written on July 21, 2009 by Shani aka Wicked Princess. The concept of the tag is mine and mine alone. Any resemblance to any other tag/tut is pure coincidence. This was written for those with working knowledge of PSP.
Supplies Needed:
++Paint Shop Pro ( I used 10 but any version should work)
++Scrap kit by me called Remembering La La can be purchased from HERE OR HERE
++Template by Alyssa can be found HERE
++Tube of choice or the one I used. I used the artwork of Suzanne Wolcott. You can purchase her work from HERE
++Mask and font of choice.
Let’s get started!
**NOTES:
-Add Drop shadow of choice as you go
-You can merger layers as you want to make things easier for yourself.
Open the template in PSP, using your shortcut keys on your keyboard (SHIFT+D) duplicate the template as a new image. Close the original.
Open several papers of choice, resizing as needed. For example, when I look at the blue bar where it tells me what I’ve opened (say like paper 2) it tells me what percentage I’m viewing it at. For me it’s usually 16%, so I resize to 16% bringing it to 100%. ( I hope that made sense!) Once you’ve done this, minimize for later use.
Next go to the bottom template layer and go to selections, select all, then float, selections defloat. Don’t forget to go to selections, none then delete the template layer. Repeat this for the remainder of the template.
Add a new raster layer, and send to the bottom Flood fill with your choice of paper and add your mask and remember to merge group.
Next open the glitter rain of choice. Resize then copy and paste as a new layer below the frame layer. Adjust as needed.
Open the gates of heaven element, resize as needed. Copy and paste below your top frame layer. Try to center it as best as you can.
Add a beading strip of choice to the top of the frame.
Open your tube of choice, and resize it as needed. Copy and paste it as a new layer, centering it in front of the gates of heaven. Add a set of angel wings from the elements behind the tube.
Next open the greenery of choice. Copy and paste it to the left hand side of the frame. Duplicate it and move it up a bit so now you have a set of greenery all the way up the side. Duplicate the greenery again twice, and go to image, mirror and do the same thing on the other side.
Open your cloud element, copy and paste as a new layer. Move it to the bottom of the frame, towards the left. Duplicate it and go to image mirror. You want to make sure this is ABOVE the frame layer and tube layer.
Next open two roses of your choosing. Resize then copy and paste as a new layer. Duplicate it twice. Move each of them to the bottom left hand corner, arranging in a pile. Duplicate them some more and do the same on the opposite side. With the second colored rose, do the same thing. Look at my tag for an example.
Open two of the flowers you like from the elements. Open the one, resize then copy and paste in three spots along the greenery on the one side. Duplicate them and do it on the other side as well. Add the second flower, a bit smaller and repeat the process again.
Next open the ornament of your choice. Resize then copy and paste as a new layer. Move to the top of the frame and adjust where you like it. Add a bow of choice to the top of it.
Add your text, copyrights, license number and tagger markings.
Save and your done!
Thank you for trying my tutorial!
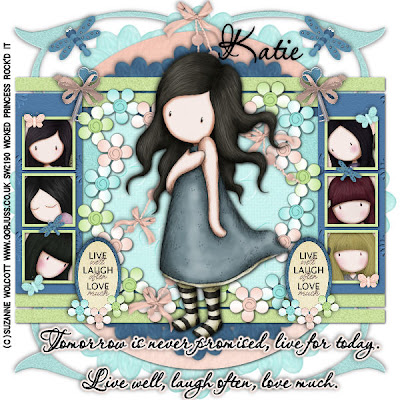
Tomorrow is never promised-PTU
This tutorial was written on July 21, 2009 by Shani aka Wicked Princess. The concept of the tag is mine and mine alone. Any resemblance to any other tag/tut is pure coincidence. This was written for those with working knowledge of PSP.
Supplies Needed:
++Paint Shop Pro ( I used 10 but any version should work)
++Scrap kit by Katie at Crazed Creations called Live, Laugh Love can be purchased HERE
++Template 20 Wacky Scraps can be found HERE
++7 tubes of choice or the ones I used. I used the artwork of Suzanne Wolcott. You can purchase her work
++Tube of choice or the one I used. I used the artwork of Suzanne Wolcott. You can purchase her work HERE
++Plug ins:
-Muera Meister Copies
++Font of choice
**NOTES:
-Add Drop shadow of choice as you go
-You can merger layers as you want to make things easier for yourself.
Open the template in PSP, using your shortcut keys on your keyboard (SHIFT+D) duplicate the template as a new image. Close the original.
Open several papers of choice, resizing as needed. For example, when I look at the blue bar where it tells me what I’ve opened (say like paper 2) it tells me what percentage I’m viewing it at. For me it’s usually 16%, so I resize to 16% bringing it to 100%. ( I hope that made sense!) Once you’ve done this, minimize for later use.
Next go to the bottom template layer and go to selections, select all, then float, selections defloat. Don’t forget to go to selections, none then delete the template layer. Repeat this process for the rest of the template **NOTE I deleted the word art layer.
Open your doodle of choice. Copy and paste as a new layer and place to the left of the tag. Duplicate it go to image, mirror. Close off all other layers, then merge these two together. Duplicate this one and go to image, flip. Merge these together and open all other layers.
Choose a flower you like from the kit, resize it, then copy and paste as a new layer. Use your muera meister copies plug in and the encircle option. I believe I used x and y shift at 65. Use the number of flowers you like. Move this layer below the circle template layer.
Open another flower of choice, and do the same thing however make the shifty 45 or 50 and your choice on the number. Move this one above the circle layer, but below the rectangle.
Next open your first tube of choice, resize and crop as needed. Copy and paste under the frame, in the first square. Use your magic wand tool and click inside the frame. Go to selections, modify expand by 3. Selections, invert and then go to the tube layer. Hit delete on your keyboard. Repeat this for the other 5 frames and tubes.
Open Frame 1 and resize. Copy and paste as a new layer, centering it in the center of your tag. Adjust as you like it. Using your magic wand tool and click inside the frame. Go to selections, expand by 5. Add a new raster layer and flood fill with your choice of paper. Go to selections none. Move this layer below your frame layer.
Next open the bow and doodle you like, resize as needed then copy and paste as a new layer. Move it to the top of the circle layer and center it. It should now flow down overlapping the frame and paper.
Add your final tube, centering it as you like it.
Next add the plaque of your choice to either side of the tube near, the frames.
Open the dragon fly, and butterflies of your choice. Copy and paste them as a new layer through out the tag as you like.
Add your text, copyright info, license info and tagger markings
Save and your done
Thank you for trying my tutorial.
Rock My World -FTU
Rock My World-FTU
This tutorial was written on July 21, 2009 by Shani aka Wicked Princess. The concept of the tag is mine and mine alone. Any resemblance to any other tag/tut is pure coincidence. This was written for those with working knowledge of PSP.
Supplies Needed:
++Paint Shop Pro ( I used 10 but any version should work)
++Scrap kit by Stargazer Musings called Punky Princess (FTU) can be found HERE
++Template 62 by Kristin can be found HERE
++Tube of choice, or the one I used. I used the artwork of CEI Stickers which can be purchased HERE
++Plug ins:
-Muera Meister Copies
-Eye Candy 4000 Gradient glow
**NOTES:
-Add Drop shadow of choice as you go
-You can merger layers as you want to make things easier for yourself.
Open the template in PSP, using your shortcut keys on your keyboard (SHIFT+D) duplicate the template as a new image. Close the original.
Open several papers of choice, resizing as needed. For example, when I look at the blue bar where it tells me what I’ve opened (say like paper 2) it tells me what percentage I’m viewing it at. For me it’s usually 16%, so I resize to 16% bringing it to 100%. ( I hope that made sense!) Once you’ve done this, minimize for later use.
Next go to the bottom template layer and go to selections, select all, then float, selections defloat. Don’t forget to go to selections, none then delete the template layer. Add a gradient glow of your choice. Repeat this process for the rest of the template.
Open your choice of gem string. Copy and paste as a new layer after resizing. Angle it slightly, then use your muera meister copies encircle option with the settings of x and y set to 50 and the number 12. Once ok with it, move this layer to the bottom layer, just above the bottom template layer.
Next open your choice of flower, and use your plug in muera meister copies, encircle. Same settings as before. Move this layer below the skull and crossbones. Adjust as needed.
Open your bow of choice, resize then copy and paste as a new layer on each side of the skull “ear phones”
Add your tube of choice, I moved mine to the right of the tag.
Add your text, copyright info, license number and tagger markings.
Save and your done!
Thank you for trying my tutorial!
Far Away-PTU
Far Away-PTU
This tutorial was written on July 18, 2009 by Shani aka Wicked Princess. The concept of the tag is mine and mine alone. Any resemblance to any other tag/tut is pure coincidence. This was written for those with working knowledge of PSP.
Supplies Needed:
++Paint Shop Pro ( I used 10 but any version should work)
++Scrap kit called Vintage Memories by Stargazer Musings can be purchased exclusively from MTA HERE
++Template 6 from Wacky Scraps can be found HERE
++Tube of choice or the one I used. I used the artwork of Jamie Kidd, which can be purchased HERE
++Plug ins:
-Muera Meister Copies
++Font and mask of choice.
**NOTES:
-Add Drop shadow of choice as you go
-You can merger layers as you want to make things easier for yourself.
Open the template in PSP, using your shortcut keys on your keyboard (SHIFT+D) duplicate the template as a new image. Close the original.
Open several papers of choice, resizing as needed. For example, when I look at the blue bar where it tells me what I’ve opened (say like paper 2) it tells me what percentage I’m viewing it at. For me it’s usually 16%, so I resize to 16% bringing it to 100%. ( I hope that made sense!) Once you’ve done this, minimize for later use.
Next go to the bottom template layer and go to selections, select all, then float, selections defloat. Don’t forget to go to selections, none then delete the template layer. Repeat this process for the rest of the template. **NOTE I deleted the stitching layer.
Add a new raster layer and flood fill with your choice of paper add your mask of choice. Merge group and move this layer to the bottom. *Note I duplicated it, image mirror, then image flip.
Open your choice of foliage. Resize then copy and paste as a new layer. Move this layer to just above the first scalloped layer. Angle it slightly to the left and adjust. Duplicate it then go to image, mirror.
Next open your choice of flower. Resize it then copy and paste as a new layer. Use your muera meister copies plug in with the encircle option. Set the x and y shift to 50 and the number of flowers to 10. This should fit perfectly so it covers the flower holes on the second scalloped template layer.
Open another flower of choice, resize it smaller than before and copy and paste as a new layer. Do the muera meister copies plug in, encircle. Use 40 for the shift x and y and set the number to 20. This is the perfect size to use as a frame. Move this to just above the final circle template layer.
Add your tube of choice. You can do as I have done and made the tube “pop out” of the frame. Duplicate the tube once you have placed it, moving one below the new frame. Using your eraser tool, go to the top tube layer and erase the parts you want hidden behind the frame layer. Go back to the bottom tube layer and erase the parts that are under the frame you don’t want to see.
Open the pin, the charm of choice. Resize, then copy and paste as new layers, to the right of the tag. Add a bow of choice to the bottom part of the tag.
Add several butterflies of choice around the tag in various places where you like them.
Add your text, copyright, license info, and tagger markings.
Save and your done!
Thank you for trying my tutorial.
Monday, July 20, 2009
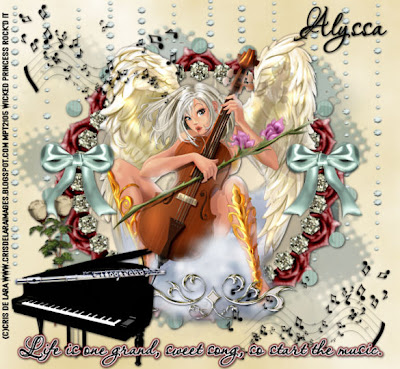
Life's Music-PTU
Life’s Music-PTU
This tutorial was written on July 20, 2009 by Shani aka Wicked Princess. The concept of the tag is mine and mine alone. Any resemblance to any other tag/tut is pure coincidence. This was written for those with working knowledge of PSP.
Supplies Needed:
++Paint Shop Pro ( I used 10 but any version should work)
++Scrap kit by Alyssa called Beautiful Music can be purchased HERE or HERE or HERE
++Template by Lacarolita 32 can be found HERE
++Tube of choice, or the one I used. I used the artwork of Cris De Lara you can purchase it HERE You have to have a license in order to use it.
++Plug ins:
-muera meister copies
++Mask and font of choice
Let’s get started!
**NOTES:
-Add Drop shadow of choice as you go
-You can merger layers as you want to make things easier for yourself.
Open the template in PSP, using your shortcut keys on your keyboard (SHIFT+D) duplicate the template as a new image. Close the original.
Open several papers of choice, resizing as needed. For example, when I look at the blue bar where it tells me what I’ve opened (say like paper 2) it tells me what percentage I’m viewing it at. For me it’s usually 16%, so I resize to 16% bringing it to 100%. ( I hope that made sense!) Once you’ve done this, minimize for later use.
Next go to the bottom template layer and go to selections, select all, then float, selections defloat. Don’t forget to go to selections, none then delete the template layer. Repeat this process for the rest of the template.
Add a new raster layer, and flood fill with your choice of paper. Add your mask and merge group. Send this to the bottom of the layers palette.
Add another raster layer and flood fill with your choice of paper. This will be our tag background instead of the normal plain white one. Send this layer to the bottom.
Open the glitter rain you like, and copy and paste as a new layer, move it to just above the mask layer. You may need to resize and adjust it.
Next open the rose of choice, resize it then copy and paste as a new layer. Use your muera meister copies on the encircle option. I set the shift x and y to 60. Move this layer below the circle layer and adjust as needed.
Open your gem of choice, and resize it. Copy and paste as a new layer then use the muera meister copies plug in on the encircle option. Set the x and y to 35 with as many of the gems as you choose. Move this layer above the small dot layer.
Next add your tube, resize as needed. Place in the center of the circle layer, but make sure its at the top at this point.
Add a bow of choice to the left side of the circle, resize as needed. Duplicate it then go to image mirror.
Open the musical notes banner of your choice. Resize it then copy and paste it as a new layer at the upper left hand side of the tag. Duplicate it and go to image, mirror then image, flip.
Next open a rose and stem of choice. Resize it then copy and paste as a new layer. Duplicate it, then angle one slightly to the left or the right. Add the piano and the flute. Resize it all and bundle to the left over the roses layers.
Open the doodle of your choosing, resize then copy and paste as a new layer, moving below the piano layer and placed at the bottom center of the tube.
Add your text, copyrights, license number and tagger markings.
Save and your done!
Thank you for trying my tutorial!
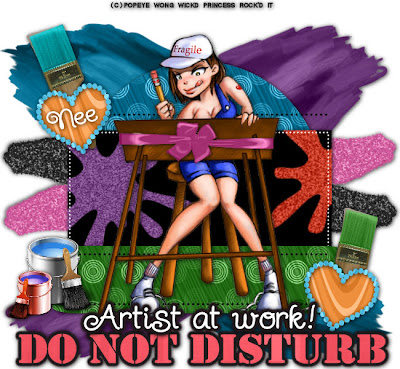
Do Not Disturb: Artist At Work-PTU
Do Not Disturb: Artist At Work PTU
This tutorial was written on July 20, 2009 by Shani aka Wicked Princess. The concept of the tag is mine and mine alone. Any resemblance to any other tag/tut is pure coincidence. This was written for those with working knowledge of PSP.
Supplies Needed:
++Paint Shop Pro ( I used 10 but any version should work)
++Scrap kit by Nee @ Envied and Admired Scraps called Starving Artist Collab Kit 2008 can be purchased HERE OR HERE OR HERE
++Template 33 by Lacarolita can be found HERE
++Tube of choice, or the one I used. I used the artwork of Popeye Wong. He is a FREE TO USE artist, however please make sure you put his copyright on the tag! The tube I used is called “a fragile talent” and can be found HERE
++Font of choice
**NOTES:
-Add Drop shadow of choice as you go
-You can merger layers as you want to make things easier for yourself.
Open the template in PSP, using your shortcut keys on your keyboard (SHIFT+D) duplicate the template as a new image. Close the original.
Open several papers of choice, resizing as needed. For example, when I look at the blue bar where it tells me what I’ve opened (say like paper 2) it tells me what percentage I’m viewing it at. For me it’s usually 16%, so I resize to 16% bringing it to 100%. ( I hope that made sense!) Once you’ve done this, minimize for later use.
Next go to the bottom template layer and go to selections, select all, then float, selections defloat. Don’t forget to go to selections, none then delete the template layer. Repeat this process for the rest of the template.
Open the two large brush strokes (non glitter ones) resize them then copy and paste one as a new layer. Angle it slightly and move to the upper right hand corner. Add the second one, but opposite of this one, in the upper left hand corner. Close off a layers but these. Merge visible on these. Duplicate it then go to image, mirror, then image flip. Merge these together. You should now have four color splotches in one layer.
While all the layers are closed off, open two of the glitter paint strokes you like. Copy and paste one after resizing, where it will look like its coming out of the center of the other ones we just merged. Look at my finished tag for an example. Add the second glitter paint stroke angling slightly. Close off the last big paint layer and merge visible. Duplicate it then go to image, mirror then image flip. Merge these together. Then open the other paint splotch layer and merge these together.
Open up all layers again.
Open two paint brushes of your choosing, I chose opposite colors. Resize then copy and paste each as a new layer Move each behind one of the hearts layers, angle as you like. Add two paint cans with brushes of choice to the left hand part of the tag.
Open your tube of choice, and copy and paste into the center of the tag. If you use the one I did, then add a bow to the drawing board.
Add your text of choice, tagger markings and copyrights!
Save and your done!
Thank you for trying out my tutorial!
Sunday, July 19, 2009
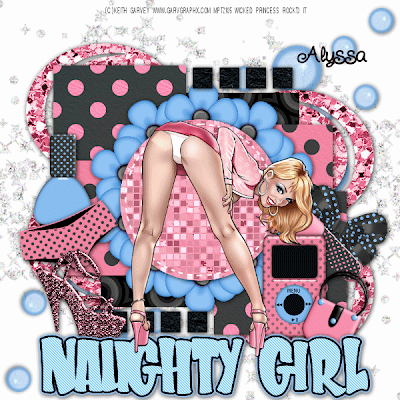
Naughty Girl (animated) PTU
Naughty Girl (Animated) PTU
**NOTE THIS IS AN ANIMATED TAG. HOWEVER YOU Don’t have to animate!**
This tutorial was written on July 18, 2009 by Shani aka Wicked Princess. The concept of the tag is mine and mine alone. Any resemblance to any other tag/tut is pure coincidence. This was written for those with working knowledge of PSP.
Supplies Needed:
++Paint Shop Pro ( I used 10 but any version should work)
++Animation Shop 3
++Scrap kit by Alyssa called Girlie spots can be purchased from HERE
++Template 7 by Wacky Scraps can be found HERE
++Tube of choice. I used the artwork of Keith Garvey. You can purchase her work HERE You must have a valid license in order to use her work.
++Plug ins:
-Eye Candy 4000-Jiggle
-Xero-Fritallary
-Muera Meister Copies
Effects: Noise
**NOTES:
-Add Drop shadow of choice as you go
-You can merger layers as you want to make things easier for yourself.
Open the template in PSP, using your shortcut keys on your keyboard (SHIFT+D) duplicate the template as a new image. Close the original.
Open several papers of choice, resizing as needed. For example, when I look at the blue bar where it tells me what I’ve opened (say like paper 2) it tells me what percentage I’m viewing it at. For me it’s usually 16%, so I resize to 16% bringing it to 100%. ( I hope that made sense!) Once you’ve done this, minimize for later use.
Next go to the bottom template layer and go to selections, select all, then float, selections defloat. Don’t forget to go to selections, none then delete the template layer. Repeat this process for the rest of the template
Open the bling element. Copy and paste it as a new layer in the upper left hand corner. Duplicate it and go to image, mirror. Close off all layers and merge thee two. While they are still close off, open the bubbles of choice. Copy and paste after resizing into the upper right hand corner of the canvas. Duplicate it and go to image mirror. Close off the bling layer and merge this one.
Open the flower of choice. Resize then copy and paste into the center of the canvas. Go to your plug ins, muera meister copies using the encircle option. Set the shift x and y to I believe 45. Adjust as you need to, and move this layer below the circle template layer.
Next open the shoe, undies and polish of your choice. Resize them and copy and paste as a new layer to all to the left side. Arrange them how you like.
Now open the purse, MP3, chapstick and bow of your choice. Resize them and copy and paste as a new layer to the right side. Arrange them how you like.
Next add your tube of choice, placing in the center of the tag. NOTE I did my text and moved the tube to the top layer. This is optional, you set it how you like.
Add your copyright, any text and tagger markings.
Save this as a psp image if your choosing to do animation. If not save either as a png or jpeg.
++ANIMATION++
Open Jasc Animation 3.
Go back to PSP and follow these steps to set up your animation….
Activate the bling layer, and duplicate it twice. You should now have 3 of them. Go to the bottom one and go to Adjust, add/remove noise and add these settings:
Make sure Uniform is checked and the percentage to 25 then click ok.
Go to the next bling layer, repeat this but make the percentage 35.
Go to the third bling layer, repeat this but make the percentage 45.
Next your going to go to your circle template layer, make sure this is the active layer. Duplicate it twice, so you now should have three. Go to the bottom circle and add the Xero Fritallry plug in. I just did a random one that I liked.
Go to the next circle layer and do the same, hitting random again. Do this one more time for the third circle layer.
Now comes the jiggling booty! Lol
Activate your tube layer, and duplicate it twice. You should now have three. Go to the bottom tube layer. Using your freehand selection tool (it looks like a rope) trace around the area of her booty that you want to make “jiggle” remember to not do it too far out or you’ll mess it up. To make it easier for myself to be able to trace and not mess up, I have my freehand selection set to the following:
Selection type: point to point
Mode: Shift
Feather:0
Anti Alias checked
Smoothing:0
This allows me to click in one spot angle out click to connect and so on. Once you have it traced all around like you like, right click to make it the dancing dots.
Ok now you should have the selection all ready and the dancing dots are active. While still on this layer, go to your plug in Eye Candy 4000-Jiggle with these settings:
Movement type: Bubbles
Bubble size (pixels): 36.00
Warp Amount (pixels): 7.20
Twist: 20
Random Seed set to 5
Click ok.
Go to the next tube layer up repeat this but Random Seed set at 10.
On the final tube layer repeat this again but Random Seed set at 15
Go to selections none.
Now is the time to animate!
Starting at the bottom, go to the bling layers. Close off the top two bling layers. The bottom one should be the only one open.
Go to the first circle layer leave it open and close off the other two.
Go to the first tube layer, leave it open and close off the others.
Now go to edit, copy merged.
Go over to Animation shop, right click and click on paste as new animation.
Go back to PSP, close off the first layers for the bling, circle and tube and open the second one. Go to edit, copy merged and back to animation shop.
Go to edit, paste, paste after current frame.
Back to PSP….
Close off the second layers of the bling, circle and tube layers and open the third ones. Go to edit, copy merged and back to animation shop once more!
Go to edit, paste, paste after current frame.
Now we’re going to animate…
Go to the tool bar and click on the little button that looks like a movie film clip. You should now see your tag animated!
Save it as a gif and your done!
Thanks for trying my tutorial!
Naughty Girl Tut temp down!
Morning everyone!
I had to take the Naughty Girl tut temporarily down while I fix it. A friend let me know that you can't animate the pin up girls from Garv, but you can the toon girls. So I'm swapping the tube out for one of the toon girls and will have it back up later today! So please make sure if you do use a garv girl you use the toon girls!
She also provided me with a very useful link that lets you know what artists allow what kind of animation
http://www.mypsptubes.com/phpbb3/viewtopic.php?f=17&t=456
Thank you again hon for letting me know!
I shall return my friends with the replacement tag!
Hugs
Shani
Saturday, July 18, 2009
Holy animation...
I'm writing one more animation tut right now after working on this to get it right for several hours lol. I don't mind doing animated tuts, but need to know how many are interested in them. Take a sec to vote in my poll!
Also I just realized on the Can you handle this tut I forgot the link for the template. I have no fixed it! Sorry about that guys. I got so wrapped up in making sure I wrote that tut right lol!
I'm whipping out more tuts in the next few days.. so keep an eye out!
Shani
Also I just realized on the Can you handle this tut I forgot the link for the template. I have no fixed it! Sorry about that guys. I got so wrapped up in making sure I wrote that tut right lol!
I'm whipping out more tuts in the next few days.. so keep an eye out!
Shani
A rose by any other name -PTU
A rose by any other name PTU
This tutorial was written on July 18, 2009 by Shani aka Wicked Princess. The concept of the tag is mine and mine alone. Any resemblance to any other tag/tut is pure coincidence. This was written for those with working knowledge of PSP.
Supplies Needed:
++Paint Shop Pro ( I used 10 but any version should work)
++Scrap kit by Stargazer Musings called My love, My life can be purchased HERE
++Tube of choice or the one I used. I used the artwork of Jamie Kidd. You can purchase her work HERE
++Plug ins:
~Eye Candy 4000-Gradient Glow (optional for font)
~Muera Meister Copies
++Font and Mask of choice
**NOTES:
-Add Drop shadow of choice as you go
-You can merger layers as you want to make things easier for yourself.
Open several papers of choice, resizing as needed. For example, when I look at the blue bar where it tells me what I’ve opened (say like paper 2) it tells me what percentage I’m viewing it at. For me it’s usually 16%, so I resize to 16% bringing it to 100%. ( I hope that made sense!) Once you’ve done this, minimize for later use.
Open a new canvas of 600x600, remember you can always resize later if you like. Flood fill with your choice of paper. Add your mask and merge group.
Next open your choice of scalloped frame. Resize it then copy and paste as a new layer. Using your magic wand tool, click inside the frame and expand by 3. Add a new raster layer and flood fill with your choice of paper. Go to selections, none.
Open your choice of flower that has the bows on it. Resize then copy and paste as a new layer into the center of your canvas. Use your plug in muera meister copies and set the shift x and y to 60. you can use as many as you want for the number of flowers. Click ok and adjust as you need to. This will sit on top of the scalloped frame.
Next open the wrap bow of your choice, I chose one with the belle flowers coming out of it. Copy and paste tit towards the bottom of the frame. Add a large flower of your choice to either end of the bow. Erase the parts of the bow you don’t want seen from behind the flower.
Add your tube of choice, moving it under the bow layer, and adjust as needed.
Choose a butterfly you like and add several through out the tag as you like.
Finally add your text, copyrights, license number and tagger markings.
Save and your done!
Thank you for trying my tutorial!
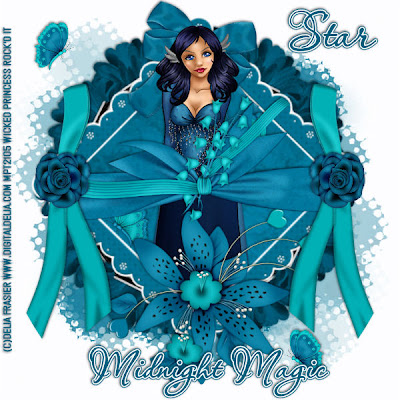
Midnight Magic-PTU
This tutorial was written on July 18, 2009 by Shani aka Wicked Princess. The concept of the tag is mine and mine alone. Any resemblance to any other tag/tut is pure coincidence. This was written for those with working knowledge of PSP.
Supplies Needed:
++Paint Shop Pro ( I used 10 but any version should work)
++Scrap kit by Stargazer Musings called My love, My life can be purchased HERE
++Tube of choice or the one I used. I used the artwork of Delia Frasier. You can purchase her work HERE
++Plug ins:
~Eye Candy 4000-Gradient Glow
~Muera Meister Copies
++Font and Mask of choice
**NOTES:
-Add Drop shadow of choice as you go
-You can merger layers as you want to make things easier for yourself.
Open several papers of choice, resizing as needed. For example, when I look at the blue bar where it tells me what I’ve opened (say like paper 2) it tells me what percentage I’m viewing it at. For me it’s usually 16%, so I resize to 16% bringing it to 100%. ( I hope that made sense!) Once you’ve done this, minimize for later use.
Open a new canvas of 600x600, remember you can always resize later if you like. Flood fill with your choice of paper. Add your mask and merge group.
Next open your choice of frame. Copy and paste it as a new layer. Add a gradient glow, I used white on the fat setting. Turn the frame so its corners are up and down, looks like a diamond now. Use your magic wand tool and click inside the frame. Go to selections, modify expand by 6. Add a new raster layer and flood fill with your choice of paper. Go to selections, none.
Open the flower clip of your choice. Copy and paste as a new layer. Turn it so the binder clip loop is facing the bottom. Center it in your canvas, and use your plug in muera meister copies. I set the x and y shift to 60. Make the number of clips your choice, whatever you like best. Move this layer to below the frame layer.
Now open a big bow you like, copy and paste it after resizing at the top corner of the frame. Adjust where you like it.
Next add your tube of choice. You can do as I chose to do and make her “pop” out of the frame. Duplicate the tube and move one below the frame layer. Go to the top tube layer and erase the parts of her you want hidden behind the frame. For instance I erased down towards the bottom where her feet would be. Go to the second tube layer and erase the parts that shouldn’t be there, below the frame.
Open a large flower of your choice, and copy and paste as a new layer at the bottom corner of the frame. Resize and adjust if needed.
Open the wrap frame of your choice, I chose one with flowers coming out of the knot. Copy and paste as a new layer. Move it over the center of the tube, so that the edges are touching the corners of the frame.
Add a tie bow to the right corner, resizing if needed. Duplicate it and go to image, mirror. Add a rose of choice to each side also.
Next add several butterflies through out the tag as you like them.
Add your text, copyrights, license info, and tagger markings.
Save and your done!
Thank you for trying my tutorial.
Friday, July 17, 2009
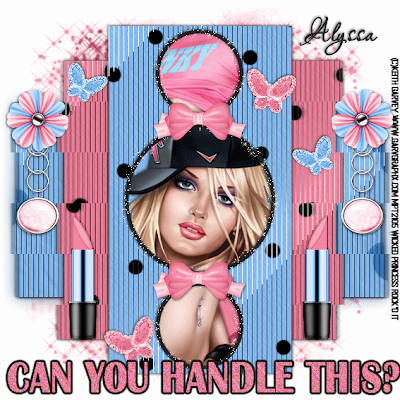
Can you handle this? (animated) FTU
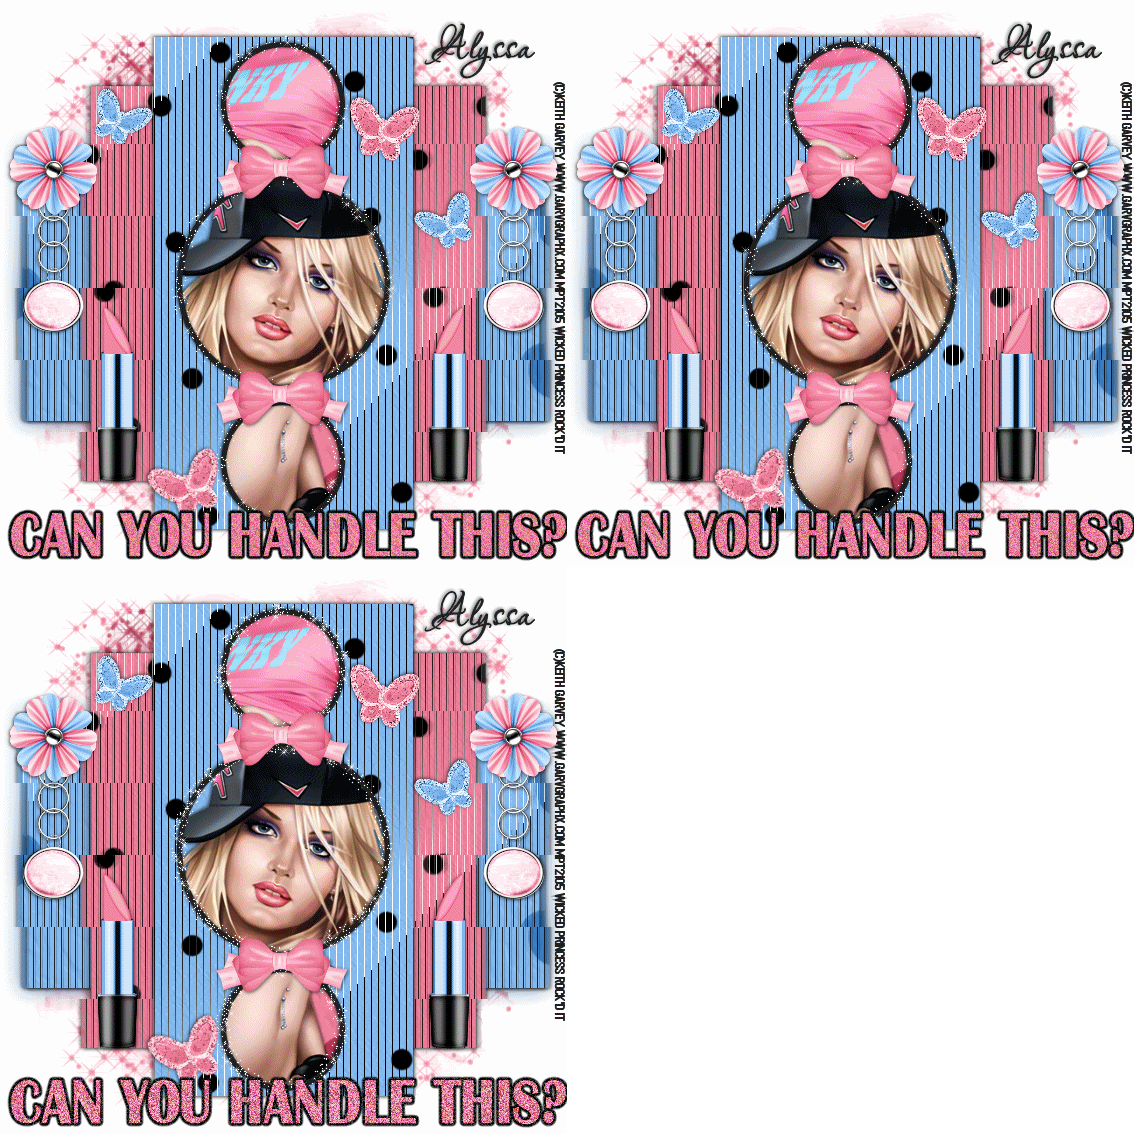
**NOTE CLICK ON THE THUMBNAIL PIC TO SEE THE ANIMATION**
Can You Handle This? (Animated) FTU
This is my first animated tutorial! I hope its easy to use for everyone.
This tutorial was written on July 17, 2009 by Shani aka Wicked Princess. The concept of the tag is mine and mine alone. Any resemblance to any other tag/tut is pure coincidence. This was written for those with working knowledge of PSP.
Supplies Needed:
++Paint Shop Pro ( I used 10 but any version should work)
++Animation Shop 3
++Scrap kit by Alyssa called Girlie spots Add OnHERE++Template by Alyssa can be found HERE
++Template also by Alyssa can be found HERE++Template by Alyssa can be found HERE
++Tube of choice. I used the artwork of Keith Garvey. You can purchase her work HERE You must have a valid license in order to use her work.
++Mask and font of choice
++Plug ins:
-Tramages-Two the line
DSB Flux Linear Transmission
++Xenofex, constellation
++Effects:
-Blur-Guassian Blur
Let’s get started!
**NOTES:
-Add Drop shadow of choice as you go
-You can merger layers as you want to make things easier for yourself.
Open the template in PSP, using your shortcut keys on your keyboard (SHIFT+D) duplicate the template as a new image. Close the original.
Open several papers of choice, resizing as needed. For example, when I look at the blue bar where it tells me what I’ve opened (say like paper 2) it tells me what percentage I’m viewing it at. For me it’s usually 16%, so I resize to 16% bringing it to 100%. ( I hope that made sense!) Once you’ve done this, minimize for later use.
Next go to the bottom template layer and go to selections, select all, then float, selections defloat. Don’t forget to go to selections, none then delete the template layer. Repeat this process for the rest of the template. **NOTE I angled the paper slightly in the pattern palette.
Add a new raster layer, and flood fill with your choice of paper. Add your mask and merge group. Send this to the bottom of the layers palette.
Go to the bottom rectangle layer and use your plug in Tramages-Two the Line with the following settings:
-control0- 80
-control1 – 54
-control2-48
-control3-9
Repeat this for the other two rectangles.
Go back to the bottom rectangle layer and duplicate it. Then go to adjust, blur, guassian blur and use your choice of setting.
Go back to the original rectangle and use your plug in , DSB Flux, linear transmission with the following settings:
Slice Size: 26
Offset: 1
Blend: 50
And set to vertical. Click ok.
Go to the second rectangle layer and do this again with the same settings. DO NOT do this for the last one.
Open your tube of choice, copy and paste as a new layer. Move this layer below the frame you want to put it in. For the top one, I centered it where I liked it then using the magic wand tool, clicked inside the frame, go to selections, expand by 3 and go to selections invert. Go to the tube layer and hit delete on your keyboard. Go to selections, none.
Repeat this for the other two frames.
Open the lipstick element, copy and paste as a new layer to the left on second rectangle layer. Duplicate it and go to image, mirror.
Next add a bow of choice after resizing to the space between the frames. Adjust as needed.
Open the charm and flower of choice. Copy and paste the charm to the left hand side of the first rectangle in the corner. Duplicate it and go to image, mirror then also add the flower. Duplicate this also and go to image mirror.
Next open the butterflies and place in various positions where you like on the tag. Adjust as you need.
Add your copyrights, license info, tagger marking and any text you want.
SAVE this now as a psp image so that you have it for the basis if you chose not to animation later. Or if your not doing the animated part, go ahead and save as normal and be done.
++ANIMATION++
Go to your frames, close off everything and merge JUST the frames together. You should now have one layer with all three frames.
Duplicate this layer three times.
Go to the bottom frame layer, and add your constillation plug in with the following settings:
Star Size: 2.16
Size Variation: 6
Edge Star Density: 1
Overall Star Density: 1
Overdrive 100
Twinkle Amount 55
Twinkle Rotation: 45
Make sure keep original image is selected.
Hit the random seed button-this will set it at random.
Click ok and you will see where this now looks like you have a bunch of little stars all over the frame.
Go to the frame layer right above this one, your going to add the constellation plug in again. Same settings (which should come up as default) click Random Seed again and click ok. Repeat this for the last one also.
Now comes the tricky part!
Open your animation shop.
Go back to PSP and close off the top two frame layers, go to edit, copy merged. Go to animation and right click, when the menu pops up, click on paste as a new animation.
Go back to PSP, hide the first layer and open the second go to edit, copy merged. Go to animation and go to edit, paste, paste after current frame.
Back to PSP one more time and close off that layer and open the final one. Go to edit, copy merged and back to animation shop. Go to edit, paste, paste after current frame.
Now go to the animation button up in the tool bar, it looks like a film strip.
If your satisfied, save it as a gif and your done!
Thanks for trying my tutorial.
Thursday, July 16, 2009
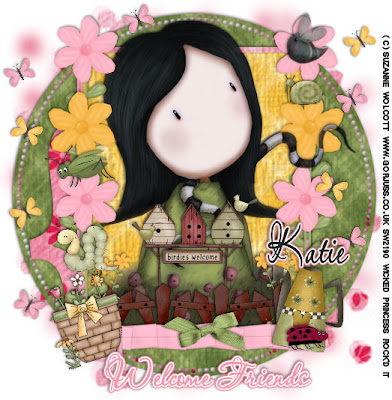
Welcome Friends-PTU
Welcome Friends-PTU
This tutorial was written on July 16, 2009 by Shani aka Wicked Princess. The concept of the tag is mine and mine alone. Any resemblance to any other tag/tut is pure coincidence. This was written for those with working knowledge of PSP.
Supplies Needed:
++Paint Shop Pro ( I used 10 but any version should work)
++Scrap kit by Katie at Crazed Creations called Garden Pals can be purchased HERE
++Template 57 by Ali at Designs by Ali can be found HERE
++Tube of choice or the one I used. I used the artwork of Suzanne Wolcott. You can purchase her work HERE
++Font and Mask of choice
**NOTES:
-Add Drop shadow of choice as you go
-You can merger layers as you want to make things easier for yourself.
Open the template in PSP, using your shortcut keys on your keyboard (SHIFT+D) duplicate the template as a new image. Close the original.
Open several papers of choice, resizing as needed. For example, when I look at the blue bar where it tells me what I’ve opened (say like paper 2) it tells me what percentage I’m viewing it at. For me it’s usually 16%, so I resize to 16% bringing it to 100%. ( I hope that made sense!) Once you’ve done this, minimize for later use.
Next go to the bottom template layer and go to selections, select all, then float, selections defloat. Don’t forget to go to selections, none then delete the template layer. Repeat this process for the rest of the template.
Add a new raster layer and flood fill with your choice of paper. Add your mask layer and merge the group. **Note I chose to duplicate the layer, mirror then flip. I also added a guassin blur, this is optional.
Open the fence clip art. Resize then copy and paste as a new layer. Move it below the frame layer.
Next open the folded ribbon of choice, and resize. Copy and paste as a new layer at the bottom of the frame. Add a bow you like to the center of it after resizing.
Open two flowers with stems you like, resize them. Copy and paste the first one and place to the left side of the frame towards the bottom of it. Duplicate it and go to image, Mirror. Add the next flower, but a layer below that one, and duplicate it. Go to image mirror. Repeat it once more for the next set.
Add your basket and water can clip art, angled slightly to the corners of the frames.
Open several of the bug pals and resize them. Place them where you like on the tag. I put them mostly on the flowers since bugs like flowers!
Next open your tube of choice. Resize as needed, copy and paste as a new layer. Move this below the frame layer. Duplicate it and move this one to the top of the layers palette. With this one activated, use your eraser brush and erase the parts you want gone and to look like they are sitting in front of the tube, or the tube is “Popping” out of the frame.
Open two butterflies of choice, resize then copy and paste each as a new layer. Duplicate several times and move them around as you like around the tag.
Add your text, license info, copyrights and tagger markings
Save and your done! Thank you for trying my tutorial!
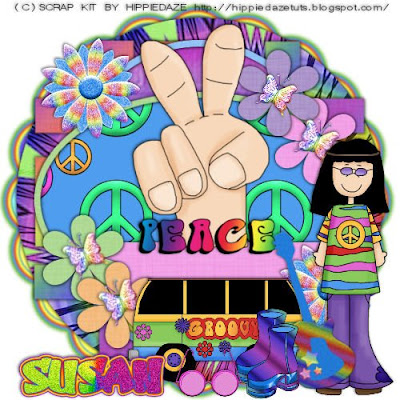
Give peace a chance-PTU
This tutorial was written on July 11, 2009 by Shani aka Wicked Princess. The concept of the tag is mine and mine alone. Any resemblance to any other tag/tut is pure coincidence. This was written for those with working knowledge of PSP.
Supplies Needed:
++Paint Shop Pro ( I used 10 but any version should work)
++Scrap kit by Susan aka HippieDaze called Groovy Festival can be purchased HERE
++Template by Susan can be found 020HERE
++Font of choice
Let’s Get Started!
**NOTES:
-Add Drop shadow of choice as you go
-You can merger layers as you want to make things easier for yourself.
Open several papers of choice, resizing as needed. For example, when I look at the blue bar where it tells me what I’ve opened (say like paper 2) it tells me what percentage I’m viewing it at. For me it’s usually 16%, so I resize to 16% bringing it to 100%. ( I hope that made sense!) Once you’ve done this, minimize for later use
Next go to the bottom template layer and go to selections, select all, then float, selections defloat. Don’t forget to go to selections, none then delete the template layer. Repeat this process for the rest of the template.
Open the frame of choice, and copy and paste as a new layer. Move below the first circle layer. Resize and adjust as needed.
Next open a butterfly of choice, resizing it. Copy and paste it as a new layer and place in the center of one of the flowers. Duplicate it and add to the other flowers.
Add the peace sign hand clip art to the center of the template. Adjust as needed.
Open the flower of choice from the kit. Copy and paste as a new layer and resize as needed also. Move one to the upper left hand side of the circle frame. Duplicate it and move one to the opposite side towards to the bottom.
Add a hippie clipart of choice from the kit, resizing the copy and paste as a new layer to the bottom right side of the tag.
Next add the love bus to the bottom center. Add the remaining elements of choice. I used the guitar, boots and glasses.
Add any text you like. If you choose not to use any outside tubes, please credit the kit maker for the kit on your tag.
Save and your done!
Thank you for trying my tutorial!
And a sailing we will go....-PTU
And a sailing we will go PTU
This tutorial was written on July 15, 2009 by Shani aka Wicked Princess. The concept of the tag is mine and mine alone. Any resemblance to any other tag/tut is pure coincidence. This was written for those with working knowledge of PSP.
Supplies Needed:
++Paint Shop Pro ( I used 10 but any version should work)
++Scrap kit by Tishia called Sail Away can be purchased HERE
++Tube of choice or the one I used. I used the artwork of Suzanne Wolcott and it can be purchased
HERE
++Mask and font of choice
**NOTES:
-Add Drop shadow of choice as you go
-You can merger layers as you want to make things easier for yourself.
Open several papers of choice, resizing as needed. For example, when I look at the blue bar where it tells me what I’ve opened (say like paper 2) it tells me what percentage I’m viewing it at. For me it’s usually 16%, so I resize to 16% bringing it to 100%. ( I hope that made sense!) Once you’ve done this, minimize for later use.
Open a new canvas, I started out with 600x600. Remember you can always resize and crop later. Flood fill with your choice of paper. Add your mask and merge the group.
Open the Lifesaver frame. Copy and paste it as a new layer. Using your magic wand tool click inside the frame. Go to selections, modify expand by 8. Add a new raster layer and flood fill with your choice of paper. Move this layer below the frame layer.
We’re going to make an ocean “scene” inside the frame. Open the waves, and resize, copy and paste below the frame layer. Adjust as needed.
Add the tug boat, light house, fish and whale where you like it.
Open the kite and resize. Copy and paste as a new layer, go to image, mirror. Then move and adjust it to the upper right hand side of the tag.
Next open the directions pole, resizing it and copy and paste as a new layer. Add a the start of choice to the bottom of the pole.
Add your tube of choice, resizing and placing to the left.
Finally add your text, license info, copyrights and tagger markings.
Save and your done! Thank you for trying my tutorial.
Wednesday, July 15, 2009
Diamonds are a girls best friend -PTU
This tutorial was written on July 15, 2009 by Shani aka Wicked Princess. The concept of the tag is mine and mine alone. Any resemblance to any other tag/tut is pure coincidence. This was written for those with working knowledge of PSP.
Supplies Needed:
++Paint Shop Pro ( I used 10 but any version should work)
++Scrap kit called Diamond Diva by Nee @ Envied and Admired Scraps can be purchased HERE OR HERE OR HERE
++Template 50 by Kristin at Wicked Scraps can be found HERE
++Tube of choice or the one I used. I used the artwork of Alice Terraneo which can be purchased HERE
++Plug ins:
-Eye candy 4000-Gradient Glow
++Font and mask of choice
Let’s get Started!
**NOTES:
-Add Drop shadow of choice as you go
-You can merger layers as you want to make things easier for yourself.
Open the template in PSP, using your shortcut keys on your keyboard (SHIFT+D) duplicate the template as a new image. Close the original.
Open several papers of choice, resizing as needed. For example, when I look at the blue bar where it tells me what I’ve opened (say like paper 2) it tells me what percentage I’m viewing it at. For me it’s usually 16%, so I resize to 16% bringing it to 100%. ( I hope that made sense!) Once you’ve done this, minimize for later use.
Next go to the bottom template layer and go to selections, select all, then float, selections defloat. Don’t forget to go to selections, none then delete the template layer. Repeat this process for the rest of the template.
**Note do this for the brush layer also!
Add a new raster layer, flood fill with your choice of paper. Add your mask and merge group. Move this to the very bottom of your layers palette.
Open the frame of your choice, I used one with the flowers on it. Copy and paste as a new layer and move above the circle template layer. You’ll need to resize and adjust so that it fits it just right.
Next open your tube of choice, resize then copy and paste as a new layer. Center in the middle of your canvas. Adjust as needed.
Open the diamond element, and resize. Copy and paste as a new layer and place to the left of the template. Angle it so the pointy end ends up in the corner of the rectangle and circle. Duplicate it and go to image, mirror. Add a bow of choice to the bottom of the diamond.
Choose one of the polish bottles and cell phone. Place below the diamond layer after resizing. Do the same with the shoe element but on the opposite side. Duplicate the shoe to make them a pair. Arrange how you like.
Add a lipstick and glasses of choice to the top of the diamond on the left side. On the opposite side put the wineglass and quill pen.
Finally add your text, copyright info, license and tagger markings.
Save and your done!
Thank you for trying my tutorial
Subscribe to:
Posts (Atom)